 Achievements and Trophies
The list of trophies and descriptions on how to obtain each of them. Return to the “Achievement/Trophy List” for an easier-to-read listing. Please note that the complete list of trophies, including descriptions, may contain game spoilers. Turn back now if you prefer not to see them!
Unlocking Each Achievement/Trophy

Collect all trophies.
You can obtain this Achievement/Trophy once you obtain all the other trophies listed in this Achievement/Trophy section. Read the descriptions below for more information on how to get each of them.
Defeat 10000 enemies.
This Achievement/Trophy is the most difficult one to obtain in the game from a time commitment perspective. Arguably, the jump rope challenges are more difficult, but defeating 10,000 enemies is well beyond the number of enemies any player would defeat during a typical playthrough of the game. How should you go about tackling this challenge?
The most important thing that you need to do is utilize some of the game’s booster functions. These functions are specific to the PlayStation 4 re-release of the game, allowing you to take shortcuts and speed through the game, making it much easier. The four functions include:
- Battle Assistance
- 9999 Damage
- High-Speed Mode
- Safe Travel
“Battle Assistance” will instantly charge your party member’s ATB gauges, enter Trance Mode easily, and keep your HP and MP filled. “Safe Travel” can be used to prevent random battles from occurring while your characters are moving. But the two most important features you will need to enable to obtain this Achievement/Trophy are “9999” and “High-Speed Mode.”
“9999” will ensure that all your attacks do 9,999 damage to enemies. Your attacks may already do enough damage to one-shot enemies in earlier zones, but this booster will make sure of that fact. “High-Speed Mode” is critical, as it significantly accelerates gameplay. The extra speed will allow you to blow through battles extremely quickly.
The best place to defeat enemies is in areas where there are higher chances of encountering large groups of enemies—ideally, 3 or 4 enemies in a single battle. According to most players, the best place to find large groups of low-level enemies is in Gizamaluke’s Grotto.
Travel to Gizamaluke’s Grotto and use the “9999” and “High-Speed Mode” boosters to start tearing through enemies. You should note, though, that this Achievement/Trophy takes a very large amount of time to earn, even while using these boosters.
On average, you will get around 10 kills per minute with the game sped up. You likely defeated fewer than 1,000 enemies during a standard playthrough, which means that to defeat 9,000 enemies, you will need to grind away for approximately 15 to 20 hours minimum. But there are tactics you can use to make this process easier.
One trick you can use is to tape down the left joystick. Keeping the joystick down will keep your characters running constantly, which means that all you will have to do now to keep the enemy counter going is press or
at the end of the battle to move past the “level up screen.” This tactic, while helpful, means that you will still need to actively press buttons on the controller constantly.
There are two options to consider for reducing the tediousness of button mashing. You can purchase a Turbo PS4 controller, which is a more expensive option but will work for this and future Achievement/Trophy challenges that involve a lot of button mashing.
Alternatively, you can make small adjustments to the script used for the Jump Rope challenge. Just modify the text in the script that appears as follows:
loop 9{
Send {enter down}
sleep 50
Send {enter up}
sleep 593
Send {enter down}
sleep 50
Send {enter up}
sleep 588
}
But change “loop 9” to read “loop 10000” or some other extremely high value. A high value will keep the script running indefinitely and will press or
for you automatically. Either option will make obtaining this Achievement/Trophy a breeze, but don’t underestimate the amount of time that it will take.

Purchased all items available from Stiltzkin.
You will need to find Stiltzkin the Moogle in every location to obtain this Achievement/Trophy. You can find more information using the Stiltzkin guide in the Side Quests section.

Uncover the secret of the Eidolon Wall.
You can obtain this Achievement/Trophy after you have reached Disc 4 and completed the events that take place in Terra, Bran Bal, and Pandemonium.
Add Dagger to your party and then travel back to Madain Sari. Make your way through the village back to Eiko’s kitchen, and you will see Lani flee as you enter the area. Exit Madain Sari, remove Dagger from your party, and also remove Amarant from your party. It was fine to have Amarant in your party earlier, but you need to remove him for the next step.
Return to Madain Sari and then head back to Eiko’s Kitchen and speak to Lani twice. The last thing she says is, “You know, I saw some words that might mean something in the small room over there.”
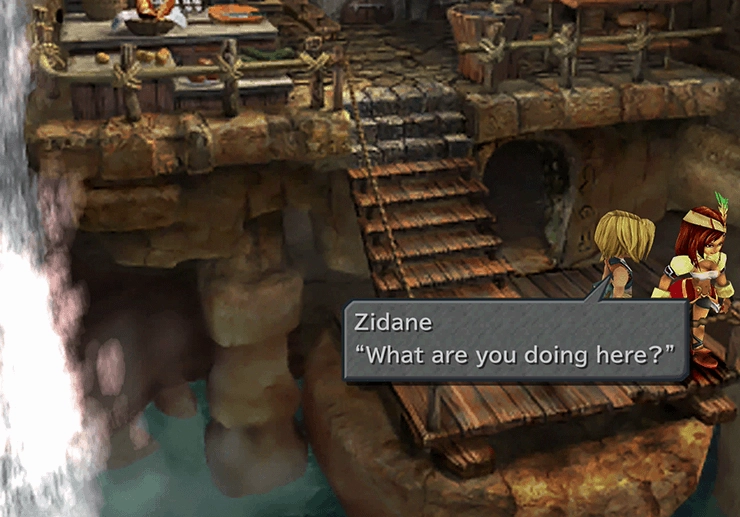
Travel back to the Eidolon Wall and circle the wall by walking right (or clockwise). As you pass the main entrance, you will hear a small chime sound. Turn around and walk to the left (or counterclockwise) and continue circling until you hear the chime again, then switch directions, going back and forth until you hear a total of 9 chimes. A message will appear on the screen, and your party members will have full HP and MP.
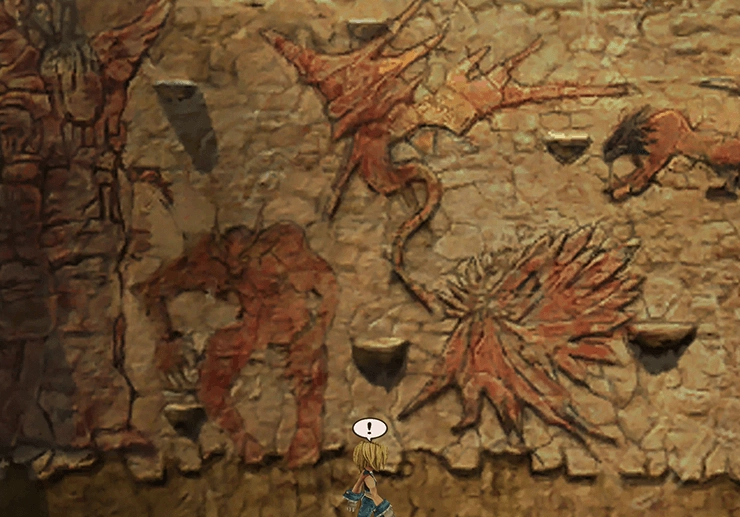
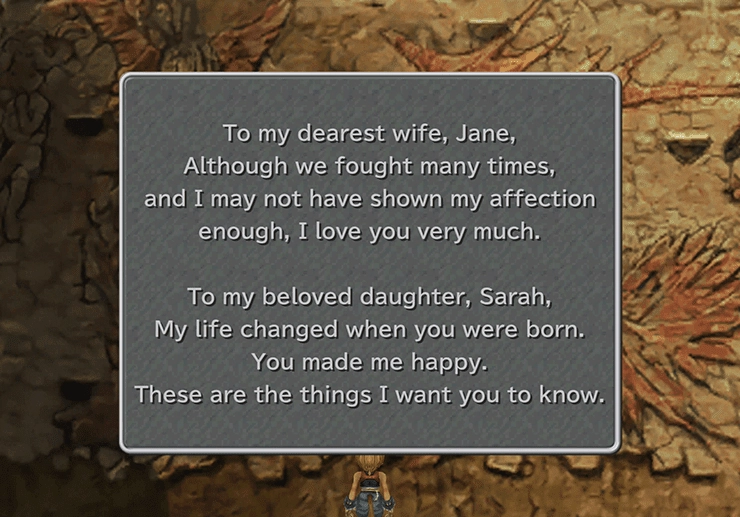
Now examine the pictures on the wall—look for the one that resembles Ifrit and examine it. The message will include a message from Dagger’s father for his wife, Jane, and for his daughter, which he calls by her actual name: Sarah. The Achievement/Trophy will pop up on the screen as soon as you begin reading the correct inscription.

Cause Moguo to have a tantrum.
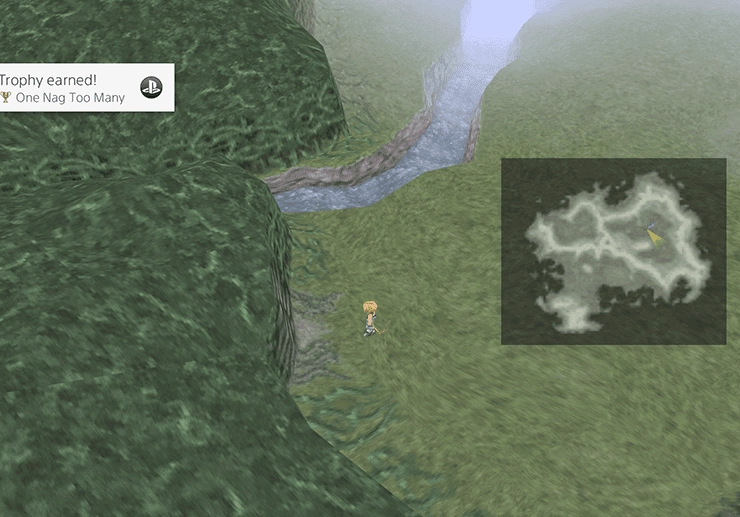
You can obtain this Achievement/Trophy as soon as you reach the world map after completing the events in the Evil Forest. Moguo is the Moogle that appears when you use the Moogle’s Flute. Press the or
button to make Moguo appear.
You can make Moguo have a tantrum by calling him over and dismissing him too many times in a row. Specifically, you need to call him over and send him away a total of 17 times. Moguo will then say, “STOP IT, STOP IT, STOP IT! KU-PHEH!” and the Achievement/Trophy will automatically appear.
Raise your Chocobo’s beak level to 99.
Check out the Chocobo Hot & Cold guide in the Side Quests section for more information on how to level your Chocobo’s beak.
The easiest way to speed-level your Chocobo’s beak to level 99 is to use the boosters included in the PlayStation 4 version of the game. Specifically, enable the “High-Speed Mode” booster. The extra speed will cause Choco the Chocobo to move faster, but the in-game timer will go at the same speed, allowing you to dig quicker and get maximum points each round.
Generally speaking, Chocobo’s Lagoon is the easiest place to go to level up your Chocobo’s beak level as it has items that are worth the most points, and they are concentrated in a fairly small map to search.

Visit every beach in Gaia.
There is quite a bit more to this Achievement/Trophy than simply “visiting every beach,” as the description might suggest. Instead, you can obtain this Achievement/Trophy by completing the Chocobo Beaches side quest. Check out the Chocobo Beaches guide in the Side Quests section for more information.

Locate all hidden treasures on the world map.
You will obtain this Achievement/Trophy once you have located all 24 Chocograph treasures. There are two side quest pages related to this trophy. The first involves a visit to the Chocobo Hot & Cold guide in the Side Quests section, which will allow you to dig up the Chocograph treasures.
The second side quest page to check out includes a list of all the Chocograph treasures and where to find them on the world map.

Repair the machine at Mognet Central.
You will automatically obtain this Achievement/Trophy once you have completed the Mognet Central side quest. Refer to the Mognet Central guide in the Side Quests section for more information.

Obtain a bottle of Superslick.
The bottle of Superslick is a key item that you must obtain to complete the Mognet Central Side Quest. Therefore, you will automatically earn this Achievement/Trophy while you are completing the quest.

Successfully catch 99 frogs.
Frog catching is an optional side quest that you can complete during your playthrough of the game or at the end of the game if you forgot to visit Qu’s Marshes during your playthrough. Check out the Catching Frogs guide in the Side Quests section for more information.

Successfully catch a golden frog.
This Achievement/Trophy, just like the Frog Wrangler Achievement/Trophy, is obtained by completing the Catching Frogs side quest mini-game. All you have to do to earn the Achievement/Trophy is capture a Golden Frog, which can spawn randomly at any of the Qu’s Marsh locations throughout the world map. The challenge, though, is that the proper strategy for completing the Catching Frogs side quest is not to capture the Gold Frogs, as this will cause the other frogs to spawn more slowly.
You should capture a Gold Frog and then reset your game after you have obtained the trophy. Check out the Catching Frogs guide in the Side Quests section for more information.

Win 10 items at the Treno Auction House.
All you have to do to obtain this Achievement/Trophy is travel to the auction house in Treno and successfully win 10 items. You can achieve this by outbidding any of the other auction attendees. However, the best strategy is to visit the Treno Auction House page to find out what the best prices are for each item and only to purchase them if they remain cheap.
You can always leave the auction house and return to reset the items that are for sale. Check out the Treno Auction House guide in the Side Quests section for more information.

Obtain the sacred blade Excalibur.
Complete the Excalibur side quest, and you will automatically obtain this trophy. Note that this is not the same sword as Excalibur II, which is much more difficult to obtain. Check out the Excalibur guide in the Side Quests section for more information.

Correctly answer all the questions in Ragtime Mouse’s pop quiz.
Track down the Ragtime Mouse and answer all of its questions. There are some easy ways to make the Ragtime Mouse appear more frequently while you are traveling on the world map. Check out the Ragtime Mouse guide in the Side Quests section for more information.

Gain the favor of all friendly enemies.
You will automatically receive this Achievement/Trophy once you have completed the Friendly Monsters side quest. Check out the Friendly Monsters guide in the Side Quests section for more information.

Defeat Ozma.
This Achievement/Trophy involves defeating the most difficult superboss in the game. That said, there are some Tips and Tricks that you can follow on the Ozma side quest page, which can make this battle much easier. Refer to the Ozma guide in the Side Quests section for additional information.

Obtain a miniature copy of the Prima Vista.
The miniature copy of the Prima Vista airship is the reward that you obtain from Morris when you successfully find all the rare coffees for him. You can find out more information by checking out the Rare Coffees guide in the Side Quest section.

Receive 10 rewards from Queen Stella.
You will obtain this Achievement/Trophy automatically as you work your way through the Stellazzio side quest. Refer to the Stellazzio guide in the Side Quests section for more information.

Obtain the Hammer.
The Hammer item is the reward that you receive from Queen Stella after you have found all the Stellazzios around Gaia and completed the Stellazzio side quest. Refer to the Stellazzio guide in the Side Quests section for more information.

Receive certification as a Rank S Treasure Hunter.
This side quest involves tracking down treasures in the various areas of the game. Treasure chests, Chocographs, and key items all count as points toward your “Treasure Hunter Rank.”
The best way to obtain this Achievement/Trophy is to follow a strategy guide or walkthrough (like this one) to make sure that you maximize the number of treasures you’re able to find, and you will most likely already be a Rank S by the time you first travel to Daguerreo.
Check out the Treasure Hunter guide in the Side Quests section for more information.

Defeat Behemoth in the Treno weapon shop using Dagger.
In a way, you obtain this Achievement/Trophy by completing the Knight’s House Monster Challenge side quest, and you can find the link with details below. The caveat, though, is that you must use Dagger to complete the final battle.
The easiest way to defeat Behemoth with Dagger is to have Dagger summon ![]() Odin. Summoning Odin will instantly kill Behemoth and conclude the battle. Alternatively, level Dagger up using the Speed Leveling Trick and equip her with
Odin. Summoning Odin will instantly kill Behemoth and conclude the battle. Alternatively, level Dagger up using the Speed Leveling Trick and equip her with ![]() Auto-Life,
Auto-Life, ![]() Auto-Regen, and
Auto-Regen, and ![]() Boost abilities. Any of her summons or magic abilities should bring down Behemoth quickly.
Boost abilities. Any of her summons or magic abilities should bring down Behemoth quickly.

Jump rope 1000 times without tripping and obtain King of Jump Rope.
This Achievement/Trophy is the most difficult one in the game to obtain. When many of the game’s fans read that one of the trophies involves jumping rope 1000 times, most assumed it would be impossible, and many of them wrote off the very idea of getting the Platinum Achievement/Trophy in this game.
There are two strategies that you can use to obtain the trophy. You can either practice, practice, and practice some more, or you can use scripts and programs to complete the jumps for you automatically. Regardless of the route you choose (including the scripting route), this will likely require multiple attempts to do successfully. This Achievement/Trophy is only for the die-hard completionists out there!
“Practice Makes Perfect” Strategy
This strategy is just to practice until you get the timings down. The general concept is that you need to press the or
button when you hear the sound, or in other words, when Vivi lands on the ground. The difficulty of this challenge lies in the timing changes throughout the 1,000 jumps, as well as the high number of jumps involved leaves a lot of room for potential misfires and failed attempts.
The jump rope timing changes at the following stages:
- 20 jumps: The jump rope moves faster
- 50 jumps: The jump rope moves faster
- 100 jumps: The jump rope moves faster
- 200 jumps: The jump rope pattern changes (double beats)
- 300 jumps: The jump rope moves very fast again
The most difficult aspect of this challenge, if you plan to practice and complete it without aides, is understanding the transition points and getting the timing of your button taps to match the jumps.
Here are some tips to help you with this difficult challenge:
- Turn off the music but not the sound, as this will help to isolate the sound effect of Vivi’s jumps.
- Try closing your eyes completely, as the visual indicators tend not to work as well as sound indicators for most players.
- Use videos on YouTube of other players completing this challenge to practice your timing for the transitions.
Scripting Strategy
Credit for this strategy goes to Septomor, who developed a script that you can use to automate your way through this challenge. You can find more information about Septomor’s strategy on the PlayStation Trophies forum here: https://www.playstationtrophies.org/forum/final-fantasy-ix/316580-working-hail-king-script-version-ps4.html.
There are a few steps that you will need to follow to use the Scripting Strategy. Firstly, you will need to have access to a Windows machine. Alternatively, Mac users will need to either borrow a laptop from a friend or utilize Boot Camp to initialize Windows as a partition on their machine.
1) Install the “PS4 Remote Play” app on your machine. You can find more information about this application here: https://remoteplay.dl.playstation.net/remoteplay/
2) Install AutoHotKey on your machine. You can find more information about this application here: https://autohotkey.com/
3) Install SciTE4AutoHotkey on your machine. You can find more information about this add-on for AutoHotKey here: https://www.autohotkey.com/scite4ahk/
The Setup:
The idea behind this strategy is that you will remotely log in to your PlayStation through Remote Play and then use a script in SciTE4AutoHotkey (which utilizes AutoHotKey functionality) to automatically press buttons on your PlayStation controller using timed intervals according to the script.
Open up SciTE4AutoHotkey and create a new script. Copy Septomor’s script, which can be found on the forums or using the following link:
Save the new script in a location that is easily accessible, such as the My Documents folder or the desktop.
Activate PS4 Remote Play on your machine, log in to your PlayStation Account, and log in to your PS4. Once you have completed this successfully, you should see your own PlayStation on your screen. Make sure that Vivi (or Zidane, later on in the game) is standing in front of the Jump Rope girls. You can now use the Enter button on your keyboard to move through the dialog.
Press enter until you see “0 times” appear on the screen. Press the “T” button, and the wording “started” will appear on the screen to indicate that the script is running in the background. Finally, press the Escape button to start the script.
It is important to note that the script may not always function as intended. It is likely to take you several attempts to complete the mini-game successfully, and you will need to adjust the “YOUR LATENCY: sleep 850” number up or down, typically between 830 and 870, until you find the correct number.
There is no guaranteed strategy for getting the script to take you to 1000 jumps—you will have to test different numbers until you find one that ends up being successful, and this could involve trying the same number a few times. Remember that even the slightest bit of latency between your computer and your PlayStation 4 could cause the script to fail. Just keep trying until you get it!

Jump rope 100 times without tripping.
You will automatically obtain the Skip to My Lou Achievement/Trophy while following the steps for the Hail to the King trophy.

Have the nobles demand an encore.
You can obtain this Achievement/Trophy by achieving a score of 80 or more during the sword fight scene—in other words, at least 80 out of 100 nobles will have to be ‘impressed’ with Zidane and Blank’s sword fight during the “I Want to Be Your Canary” performance.
You can take as many attempts at this mini-game as you would like until you do it successfully. However, you should note that if you plan on obtaining all trophies, including the Over the Moon trophy, you will need to get a score of 100 out of 100. A perfect score is required to obtain the first of four ![]() Moonstones needed to obtain that trophy.
Moonstones needed to obtain that trophy.

Win with Vivi during the Festival of the Hunt.
You can obtain this Achievement/Trophy when you reach Lindblum and complete the Festival of the Hunt. The way to have Vivi win the Festival is to have both Zidane and Freya be KO’d in battle. You can only KO Freya when she joins Zidane for the final battle against Zaghnol.
Zaghnol will appear in the shop area of the Business District when the timer reaches 4:30. Enter the Plaza after the timer has rolled past 4:30 and initiate the fight. Have Zidane and Freya both KO themselves while fighting Zaghnol. Vivi will win the Festival, and you will receive the trophy.
Note, though, that you may not want to continue with the game after letting Vivi win. The reward when Vivi wins is a ![]() Theater Ship Card, but if Freya wins, you will receive a
Theater Ship Card, but if Freya wins, you will receive a ![]() Coral Ring, which is a much more useful item.
Coral Ring, which is a much more useful item.

Complete FINAL FANTASY IX.
Defeat Kuja at the end of Disc 4 and complete the game to obtain this trophy.

Attain level 99 with at least one character.
The easiest way to level up your characters is using the speed leveling method in the Popos Heights outside Gizamaluke’s Grotto. Check out the Speed Leveling Characters page in the Tips and Tricks section for more information.

Obtain Madain’s Ring via mining.
You can obtain the One Ring Achievement/Trophy more easily if you use the “High-Speed Mode” Booster. The booster can significantly increase the amount of mining you can do over a short period.
You will have to dig 5 to 7 times in one area before the ![]() Madain’s Ring will appear, so don’t leave each spot too early. Leave the area and speak to the miner again once you have searched all the areas on both levels of the rock wall.
Madain’s Ring will appear, so don’t leave each spot too early. Leave the area and speak to the miner again once you have searched all the areas on both levels of the rock wall.

Free Kuppo from a wall in Fossil Roo.
Examine the wall near where the miner is in Fossil Roo to release Kuppo. This Achievement/Trophy is one of the easiest ones to obtain.

Obtain Athlete Queen.
This Achievement/Trophy is obtained by having Vivi race Hippaul in Alexandria until Hippaul reaches level 80. There is only one point in the game where you can complete this side quest, and if you go past it, you can no longer obtain this trophy. Check out the Hippaul Racing guide in the Side Quests for more information.

Beat the Nero Brothers’ shuffling game nine times in a row.
You can complete the Nero Brother’s shuffle mini-game during the visit to Alexandria on Disc 3. The mini-game is fairly early in the beginning stages, but it gets more and more difficult as you progress through each round.
Follow the proper brother as it bounces around, and then select the correct one 9 times in a row to obtain the trophy. The only other ‘tip’ for this game is that you may want to use recording software to track where the brother moves to on video and then slow it down so you can follow it more easily. This method is somewhat painful to initiate, but it’s the only way to make the mini-game easier.

Win a Tetra Master match.
All you have to do is defeat one opponent in Tetra Master. Check out the Tetra Master guide in the Side Quests section for more information.

Win 10 Tetra Master matches. (Certain NPCs can be re-challenged to increase your win count after progressing through the game.)
Defeat ten opponents in Tetra Master. Check out the Tetra Master guide in the Side Quests section for more information.

Win 10 Tetra Master matches. (Certain NPCs can be re-challenged to increase your win count after progressing through the game.)
This Achievement/Trophy is not difficult to obtain, but it is quite time-consuming if you wait until the end of the game to get it. Just work your way around to each of the towns and challenge each of the available opponents that you can find until you receive the trophy.
Remember that you can find card players in Memoria, which will also count towards this trophy.

Have a single character affected by all status ailments (both beneficial and detrimental).
This Achievement/Trophy is much easier to obtain than it would seem. You do not have to have all the status ailments at the same time; you just need to have one of your characters be hit by all the statuses listed below:
Auto-Life
This status is a Blu Mag ability (![]() Auto-Life) that Quina can learn. Alternatively, you can have Amarant use his Flair ability (
Auto-Life) that Quina can learn. Alternatively, you can have Amarant use his Flair ability (![]() Aura) to grant Auto-Life status as well.
Aura) to grant Auto-Life status as well.
Berserk
This status is a Wht Mag spell (![]() Berserk) that Dagger can cast on your party members.
Berserk) that Dagger can cast on your party members.
Confuse
This status is a Wht Mag spell (![]() Confuse) that Dagger can cast on your party members. You can also use Quina’s Blu Mag ability,
Confuse) that Dagger can cast on your party members. You can also use Quina’s Blu Mag ability, ![]() Bad Breath, to inflict this status effect with several others.
Bad Breath, to inflict this status effect with several others.
Darkness
This status is a Blk Mag spell (![]() Blind) that Vivi can cast on your party members. You can also use Quina’s Blu Mag ability,
Blind) that Vivi can cast on your party members. You can also use Quina’s Blu Mag ability, ![]() Bad Breath, to inflict this status effect with several others.
Bad Breath, to inflict this status effect with several others.
Doom
This status is a Flair ability (![]() Countdown) that Amarant can use on your party members. It has a 50% chance of landing successfully when used.
Countdown) that Amarant can use on your party members. It has a 50% chance of landing successfully when used.
Float
This status is a Wht Mag spell (![]() Float) that Dagger or Eiko can cast on your party members.
Float) that Dagger or Eiko can cast on your party members.
Freeze
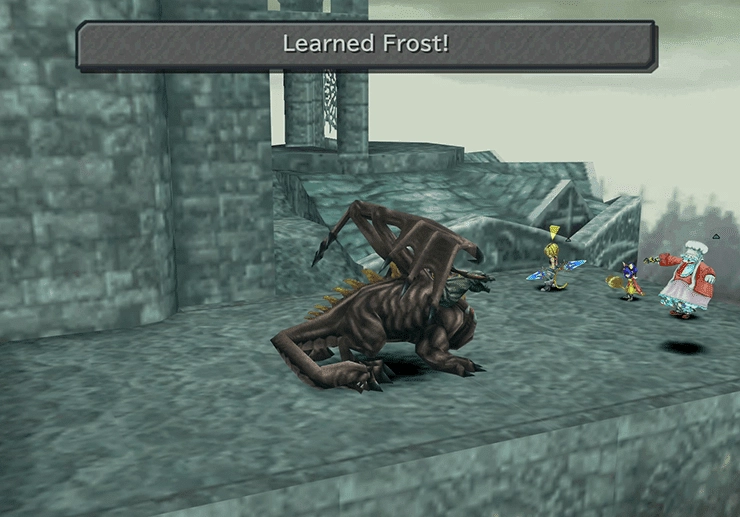
A Chimera enemy (pictured below) in Memoria will use its Cold Breath attack, which will inflict the Freeze status. Alternatively, you can use Quina’s “Blu Mag” ability called ![]() Frost on your party members or use the
Frost on your party members or use the ![]() Add Status ability while equipping the
Add Status ability while equipping the ![]() Ice Brand or
Ice Brand or ![]() Ice Lance and attack one of your characters.
Ice Lance and attack one of your characters.
Gradual Petrify
The Basilisk enemies in Burmecia will cast this spell on your party members.
Haste
This status is a Wht Mag spell (![]() Haste) that Eiko can cast on your party members.
Haste) that Eiko can cast on your party members.
Heat
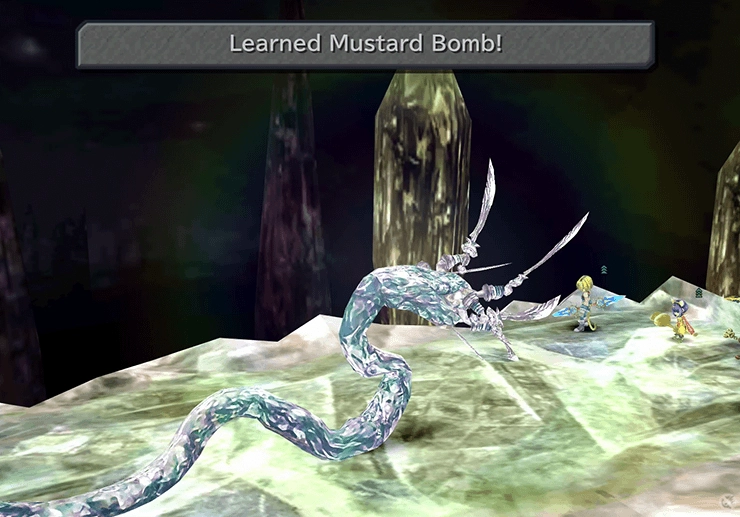
One of the easiest ways to inflict this status on one of your characters is to have Quina learn the “Blu Mag” ability ![]() Mustard Bomb, which he can learn from a Maliris enemy in the Crystal World. After that, use it on your party members.
Mustard Bomb, which he can learn from a Maliris enemy in the Crystal World. After that, use it on your party members.
Mini
This status is a Wht Mag spell (![]() Mini) that Dagger can cast on your party members.
Mini) that Dagger can cast on your party members.
Petrify
This status is a Blk Mag spell (![]() Break) that Vivi can cast on your party members.
Break) that Vivi can cast on your party members.
Poison
Have Vivi use his Blk Mag ability (![]() Bio) on one of your party members to inflict this status effect.
Bio) on one of your party members to inflict this status effect.
Protect
This status is a Wht Mag spell (![]() Protect) that either Dagger or Eiko can cast on your party members. Alternatively, you can use Quina’s Blu Mag ability
Protect) that either Dagger or Eiko can cast on your party members. Alternatively, you can use Quina’s Blu Mag ability ![]() Mighty Guard to cast this beneficial status effect among several others.
Mighty Guard to cast this beneficial status effect among several others.
Reflect
This status is a Wht Mag spell (![]() Reflect) that either Dagger or Eiko can cast on your party members.
Reflect) that either Dagger or Eiko can cast on your party members.
Regen
This status is a Wht Mag spell (![]() Regen) that Dagger or Eiko can cast on your party members. Alternatively, you can use Amarant’s Flair ability,
Regen) that Dagger or Eiko can cast on your party members. Alternatively, you can use Amarant’s Flair ability, ![]() Aura, or Freya’s Dragon ability,
Aura, or Freya’s Dragon ability, ![]() Reis’s Wind, to cast Regen as well.
Reis’s Wind, to cast Regen as well.
Shell
This status is a Wht Mag spell (![]() Shell) that either Dagger or Eiko can cast on your party members. Alternatively, you can use Quina’s Blu Mag ability
Shell) that either Dagger or Eiko can cast on your party members. Alternatively, you can use Quina’s Blu Mag ability ![]() Mighty Guard to cast this beneficial status effect among several others.
Mighty Guard to cast this beneficial status effect among several others.
Silence
This status is a Wht Mag spell (![]() Silence) that Dagger can cast on your party members.
Silence) that Dagger can cast on your party members.
Slow
Slow is a Blk Mag spell (![]() Bio) that Vivi can cast on your party members. You can also cast
Bio) that Vivi can cast on your party members. You can also cast ![]() Bad Breath on your party members, which could cause several negative statuses, including Slow.
Bad Breath on your party members, which could cause several negative statuses, including Slow.
Sleep
This is a Blk Mag spell (![]() Sleep) that Vivi can cast on your own party members. You can also use Quina’s Blu Mag spell
Sleep) that Vivi can cast on your own party members. You can also use Quina’s Blu Mag spell ![]() Night to cast Sleep on all of your party members.
Night to cast Sleep on all of your party members.
Stop
This is a Blk Mag spell (![]() Stop) that Vivi can cast on your own party members.
Stop) that Vivi can cast on your own party members.
Trouble
This status is a Skill ability (![]() Annoy) that Zidane can cast on your own party members.
Annoy) that Zidane can cast on your own party members.
Vanish
This status is a Blu Mag ability (![]() Vanish) that Quina can learn from a Vice enemy or a Hornet in Gizamaluke’s Grotto.
Vanish) that Quina can learn from a Vice enemy or a Hornet in Gizamaluke’s Grotto.
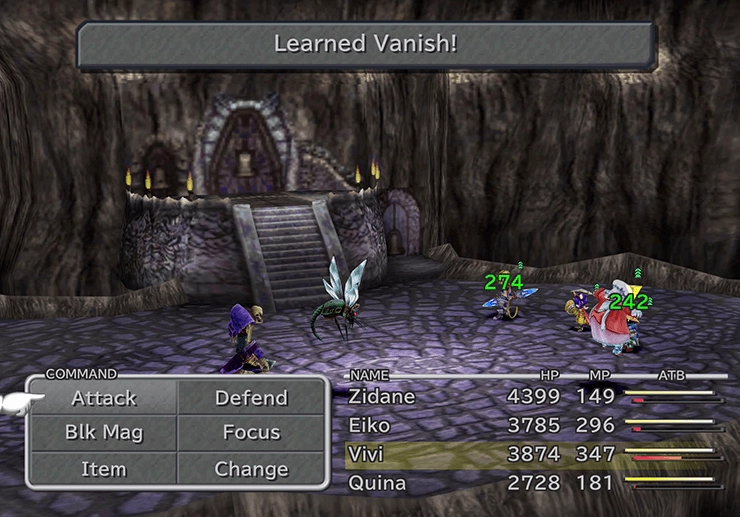
Venom
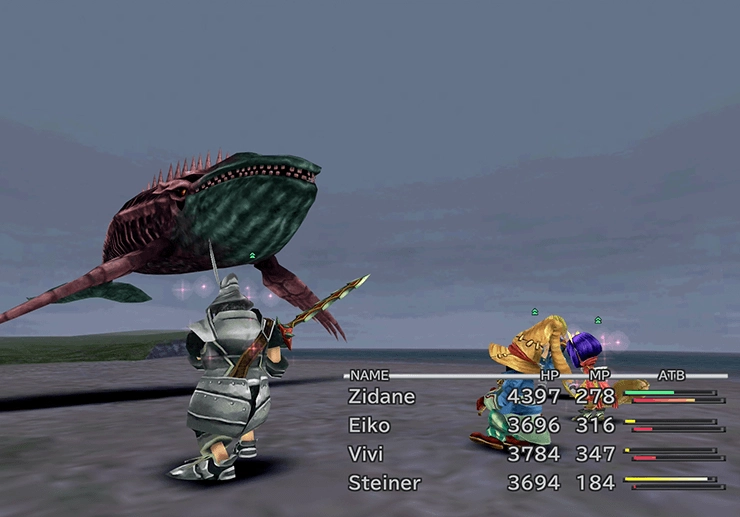
Zombie Whales will cause the Venom status effect with their “Venom Breath” ability. They can be found on any of the beaches around Gaia and are pictured in the screenshot below.
Virus
This move is also cast by an enemy called a Chimera in Memoria (pictured above under Freeze).
Zombie
Zombie Whales will cause the Zombie status effect with their Zombie Breath ability. They can be found on any of the beaches around Gaia and are pictured above (under “Venom”).
Enter trance 50 times.
All you have to do is have any of your characters enter Trance mode 50 times or more. It does not have to be the same character. Check out the Trance guide for more information, and use the Speed Leveling Characters tips to go through as many battles as quickly as possible.

View 79 Active Time Events.
This Achievement/Trophy can be extremely difficult to obtain if you are not actively tracking your progress through each town and making sure that you follow any sequences required to enable all the Active Time Events (ATEs).
There is no easy way to track which ATEs you have seen and which you have missed (at least not in the PlayStation 4 version of the game). Unfortunately, the only strategy for obtaining this Achievement/Trophy is to follow a guide and make sure that you don’t miss any. Some of the more difficult areas include:
- The first visit to Treno
- The first visit to Conde Petie
- The first visit to Black Mage Village
- The second visit to Treno
- The third visit to Lindblum (the Give Me My Money ATE being the easiest to miss accidentally)

Obtain 4 moonstones.
This Achievement/Trophy involves obtaining 4 ![]() Moonstones jewels during your playthrough of the game. There are four points in the game where you can obtain Moonstones, which means that you can miss or skip over any. Otherwise, you will not be able to obtain this trophy. So where do you find them?
Moonstones jewels during your playthrough of the game. There are four points in the game where you can obtain Moonstones, which means that you can miss or skip over any. Otherwise, you will not be able to obtain this trophy. So where do you find them?
Moonstone 1
You can obtain the first Moonstone as a reward for obtaining the maximum score during the swordfight performance scene of “I Want To Be Your Canary” at the beginning of the game. Alexandria section of the game. You must impress 100 out of 100 nobles.
Moonstone 2
The second Moonstone is obtained by tracking down and locating the four colored stones in the Conde Petie Mountain Path. Check out the Condie Petie Mountain Path Walkthrough page for more information.
Moonstone 3
The third Moonstone is one of the rewards that you will receive while completing the Friendly Monsters side quest. Specifically, you will receive a Moonstone when you give an Emerald to the Jabberwock. Note that the Friendly Monsters side quest requires that you provide a Moonstone to the Feather Circle. Giving a Moonstone to the Feather Circle will not impact your ability to obtain this trophy.
Moonstone 4
The last Moonstone is obtained as a reward for completing the Stiltzkin side quest, or in other words, by tracking down and speaking to Stiltzkin and then purchasing items from him each time he makes an appearance. Check out the Driving the Hard Bargain Achievement/Trophy section for more information.

Obtain Kain’s Lance.
Locate Kain’s Lance, which is in a hidden treasure chest in the early sections of Memoria. Check out the Memoria Walkthrough page for more information.
Obtain the Tower.
Locate the Tower which is in a hidden treasure chest in the early sections of Memoria. Check out the Memoria Walkthrough page for more information.

Obtain the Rune Claws.
Locate the Rune Claws which is in a hidden treasure chest found halfway through Memoria. Check out the Memoria Walkthrough page for more information.

Obtain the Angel Flute.
Locate the Angel Flute which is in a hidden treasure chest found halfway through Memoria. Check out the Memoria Walkthrough page for more information.

Obtain the Mace of Zeus.
Locate the Mace of Zeus which is in a hidden treasure chest found near the end of Memoria. Check out the Memoria Walkthrough page for more information.

Obtain the Gastro Fork.
Quina’s ultimate weapon is obtained once you defeat Quale in battle. Quale will challenge Quina and his party to a battle as soon as Quina catches 99 frogs. Check out the Catching Frogs guide in the Side Quests section for more information.

Obtain Excalibur II.
Obtaining Excalibur II, the most powerful weapon in the game, is actually much easier now in the PlayStation 4 version of the game with the boosters that have been made available. There are still a few tactics that you will want to employ, and the side quest does take approximately 5 hours to complete, but it is not nearly as difficult as it used to be. Check out the Excalibur II guide in the Side Quests section for more information.

Obtain the Whale Whisker.
The Whale Whisker rod is obtained as a reward for locating Chocograph #18: Ocean. Check out the Chocograph guide in the Side Quests section for more information.

Obtain the Tiger Racket.
The Tiger Racket is obtained as a reward for locating Chocobo Dive Spot #4. Check out the Chocobo Dive Spots guide in the Side Quests section for more information.

Obtain the Ultimate Weapon.
The Ultimate Weapon is obtained as a reward for locating the last Chocobo Dive Spot #5. Check out the Chocobo Dive Spots guide in the Side Quests section for more information.

Obtain the complete set of Genji armor.
You will most likely obtain all the Genji Armor pieces automatically as you complete the other side quest. You will need the following pieces:
Genji Gloves
You can find the Genji Gloves by locating Chocobo Dive Spot #3. Check out the Chocobo Dive Spot guide in the Side Quests section for more information.
Genji Helmet
You can find the Genji Helmet by locating Chocobo Mountain Crack #2. Check out the Chocobo Mountain Crack guide in the Side Quests section for more information.
Genji Armor
You can find the Genji Armor by locating Chocograph #21: Outer Island. Check out the Chocograph guide in the Side Quests section for more information.

Receive a Very Good Omen from a color fortune.
There is a ‘game’ that you can play inside the bedroom of the Inn in the Village of Dali. The fortune-telling machine game is located on the left side of the screen. All you have to do is pay 10 Gil to receive your fortune until you randomly receive the “Very Good Omen” fortune. Just keep trying until you get it.
Guide all the residents of Cleyra to safety.
In order to obtain this Achievement/Trophy you have to make the proper selections during the scenes at the top of Cleyra. The Burmecian kids and Dan’s Wife will ask you for help and you must select:
- Let’s head right!
- Let’s go left!
- Cross the bridge to the right!
- Not Yet
In the exact order listed. Once you do, you will automatically receive the Achievement/Trophy at the end of the scene in Cleyra.

