
Tetra Master
Tetra Master is a side quest card game that you can play throughout Gaia during a playthrough of Final Fantasy IX. It is a follow-up to the card game in Final Fantasy VIII called Triple Triad.
The primary difference between Triple Triad and Tetra Master, though, is that this card game offers very few (if any) rewards aside from the satisfaction of finding the cards and mastering the game. As a result, there is no reason to play the card game unless your goal is to complete a full playthrough and experience/master everything that Final Fantasy IX has to offer.
There is a point in the game on Disc 3 when the team travels back to Treno, when you will have to play Tetra Master, though, which is why there is a page here in the Side Quests section in this guide.
Obtaining Tetra Master Cards
You can obtain Tetra Master cards as rewards at various points in the game, and you’ll sometimes receive them as a reward for defeating a monster or boss.
Playing Tetra Master against other Card Players
Use the ![]()
![]()
![]() button when standing in front of a non-playable character (NPC) to initiate a Tetra Master game. Not all the NPCs will accept the challenge and play cards, but many of them do.
button when standing in front of a non-playable character (NPC) to initiate a Tetra Master game. Not all the NPCs will accept the challenge and play cards, but many of them do.
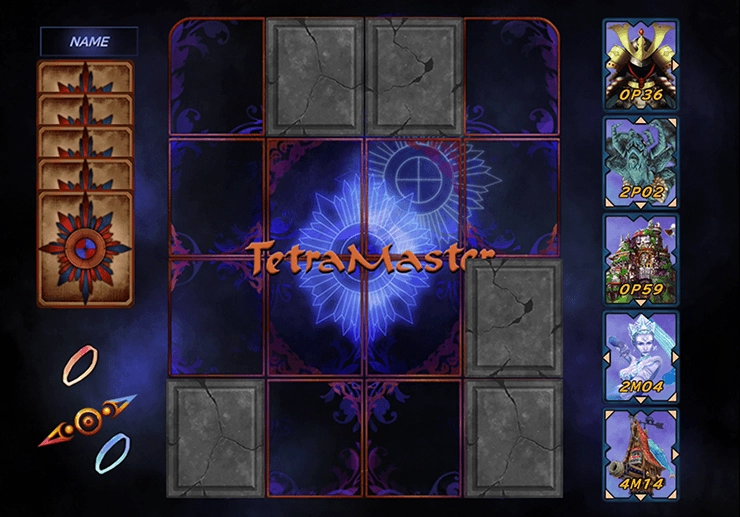
The game grid consists of 16 squares, with up to 6 of those squares randomly locked off and unusable. Each player takes turns placing a card on the game grid until all the cards have been played. The object of the game is to challenge or battle adjacent cards and “capture” them over to your color.
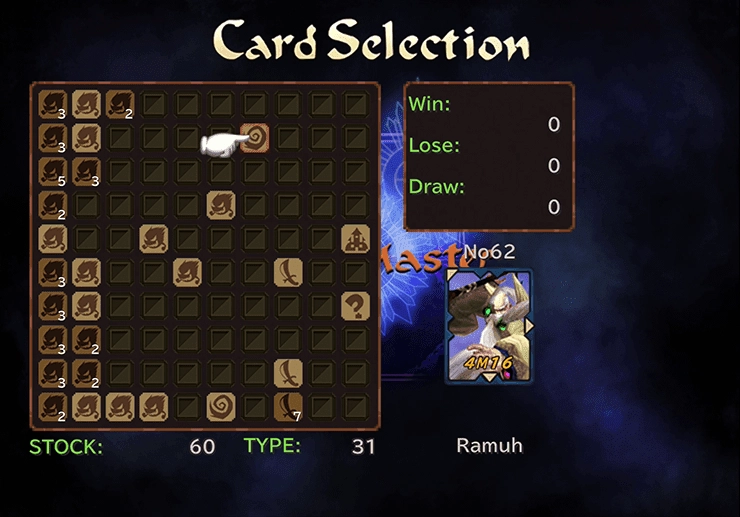
Card Values
Each of the cards has four alphanumeric characters listed near the bottom, representing the card’s stats (with descriptions of how each functions below).
- The first character represents the power of the card
- The second character represents the class of the card
- The third character represents the physical defense of the card
- The fourth character represents the magical defense of the card
The character/value is represented via hexadecimal, which means that the value will range (from lowest to highest) as shown: 0, 1, 2, 3, 4, 5, 6, 7, 8, 9, A, B, C, D, E, F.
The first character is the Power Stat. It represents the offensive power of the card and the power that the card has when you use it to attack and capture other cards on the board.
The second character is the Card’s Class:
- P (Physical)
- M (Magical)
- X (Flexible)
- A (Assault)
Having a P class means that the card’s attack will impact the physical defense, M means it will attack the magical defense, X will attack the lowest of the two stats (and this is an extremely rare class), and A will attack the lowest overall value on the card.
The arrows on the card, pointing either up, left, down, right, or to any of the corners, indicate the direction of attack that the card will employ. No arrow pointing on the card means that the card will not attack any adjacent cards in those directions.
Combos
Combination attacks are where the game gets rather complicated. Once a card has been defeated or captured, any enemy cards pointed at by the arrows of that card are also captured.
Winning
You win the game if you have more cards at the end of the game than your opponent.
Strategies
Make sure that you protect your cards by placing them in secure locations using the blocks placed around the board. Save your stronger cards for the end of the game, making sure that the arrow directions will allow you to utilize it properly when the time comes and then unleash it for a final combo.
Maximum Amount of Cards
The maximum amount of cards that you can hold at any given time is 100. This rule doesn’t make much sense, but as a result, you will have to throw away more common cards later in the game to free up space for more rare cards.
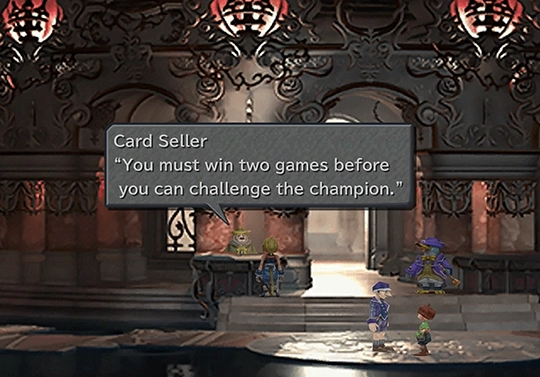
Treno Card Tournament
A Tetra Master tournament takes place in Treno’s Card Stadium as part of the story when you return to Treno on Disc 3. Entering the tournament is unavoidable, but its prize is not: this is a one-time event, and the reward can be permanently missed.
The tournament consists of three matches. You can retry the first two matches if you lose, but the match against the Champion only happens once, and the story continues whether you win or lose it. Save your game before challenging the Champion. Winning the final match earns you a ![]() Rebirth Ring, which teaches
Rebirth Ring, which teaches ![]() Auto-Life.
Auto-Life.
Several Active Time Events also become available only during the tournament, and they count toward the  Movie Critic Achievement/Trophy, so keep an eye on them as you play.
The Card Tournament takes place during the return trip to Treno on Disc 3. The walkthrough covers registration, each match, the Rebirth Ring prize and the missable ATEs.
| Number | Card | Type |
|---|---|---|
| 1) | 0P00 | |
| 2) | 0P00 | |
| 3) | 0P00 | |
| 4) | 0M01 | |
| 5) | 0P00 | |
| 6) | 1P00 | |
| 7) | 1P10 | |
| 8) | 1M01 | |
| 9) | 1P10 | |
| 10) | 1P10 | |
| 11) | 1M01 | |
| 12) | 1M11 | |
| 13) | 1M02 | |
| 14) | 2M02 | |
| 15) | 2P20 | |
| 16) | 2P21 | |
| 17) | 2M02 | |
| 18) | 2P21 | |
| 19) | 2P02 | |
| 20) | 2P21 | |
| 21) | 2M11 | |
| 22) | 3P20 | |
| 23) | 3P31 | |
| 24) | 3PC0 | |
| 25) | 3M21 | |
| 26) | 3M21 | |
| 27) | 3M12 | |
| 28) | 3P40 | |
| 29) | 3P21 | |
| 30) | 4P32 | |
| 31) | 4P51 | |
| 32) | 4P33 | |
| 33) | 4M26 | |
| 34) | 4P40 | |
| 35) | 4M22 | |
| 36) | 4P44 | |
| 37) | 4M22 | |
| 38) | 5M04 | |
| 39) | 5P41 | |
| 40) | 5M24 | |
| 41) | 5M33 | |
| 42) | 5M51 | |
| 43) | 5M32 | |
| 44) | 5M33 | |
| 45) | 5M23 | |
| 46) | 2P33 | |
| 47) | 5M19 | |
| 48) | 6M41 | |
| 49) | 5M36 | |
| 50) | 6MF0 | |
| 51) | 7M62 | |
| 52) | BP46 | |
| 53) | CP60 | |
| 54) | EP7C | |
| 55) | DM0C | |
| 56) | FMC1 | |
| 57) | 8M23 | |
| 58) | BMA0 | |
| 59) | DM11 | |
| 60) | 5M05 | |
| 61) | 6M91 | |
| 62) | 4M16 | |
| 63) | 4M66 | |
| 64) | CM84 | |
| 65) | BM61 | |
| 66) | CM95 | |
| 67) | EM65 | |
| 68) | 8M21 | |
| 69) | AM16 | |
| 70) | EMB5 | |
| 71) | FPB0 | |
| 72) | FP16 | |
| 73) | CPB3 | |
| 74) | 6M66 | |
| 75) | CM3C | |
| 76) | 0MCF | |
| 77) | 0P01 | |
| 78) | 7P30 | |
| 79) | 0P6A | |
| 80) | 2P00 | |
| 81) | 8P91 | |
| 82) | 6P31 | |
| 83) | BP9C | |
| 84) | 2P60 | |
| 85) | 6P40 | |
| 86) | 8P19 | |
| 87) | 2P61 | |
| 88) | EP92 | |
| 89) | 0P00 | |
| 90) | 1P11 | |
| 91) | 0M00 | |
| 92) | 0P00 | |
| 93) | 2P20 | |
| 94) | 0P6B | |
| 95) | 0P6B | |
| 96) | 7M55 | |
| 97) | 2P03 | |
| 98) | 7M77 | |
| 99) | 8M77 | |
| 100) | 8P77 |