
Galbadia Garden
The other four team members will greet Squall and Rinoa upon their arrival at the Galbadia Garden. Choose two party members to take with you, equip them with the appropriate Guardian Forces and junctioned magic, and then use the ![]() Save Point to save your game.
Save Point to save your game.


The hallways of Galbadia Garden can be challenging to navigate because they all look pretty similar. Your best bet is to start from the beginning and follow all the steps precisely as listed to ensure that you don’t get lost. So let’s get started!
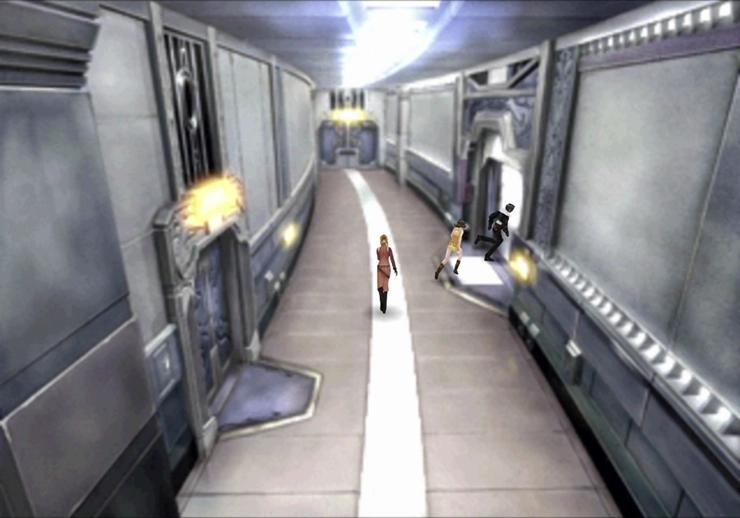
Head down the corridor on the right side of the room, to the right of the ![]() Save Point. There is an opening on the right side of this hallway with some stairs leading up to the second floor. Take the stairs upwards and you will see Fujin and Raijin standing at the top of the staircase. Speak to them to continue the story.
Save Point. There is an opening on the right side of this hallway with some stairs leading up to the second floor. Take the stairs upwards and you will see Fujin and Raijin standing at the top of the staircase. Speak to them to continue the story.
They will ask you to meet up with Seifer, as they are tired of dealing with everything that has been going on. Take the hallway to the left after speaking to them.
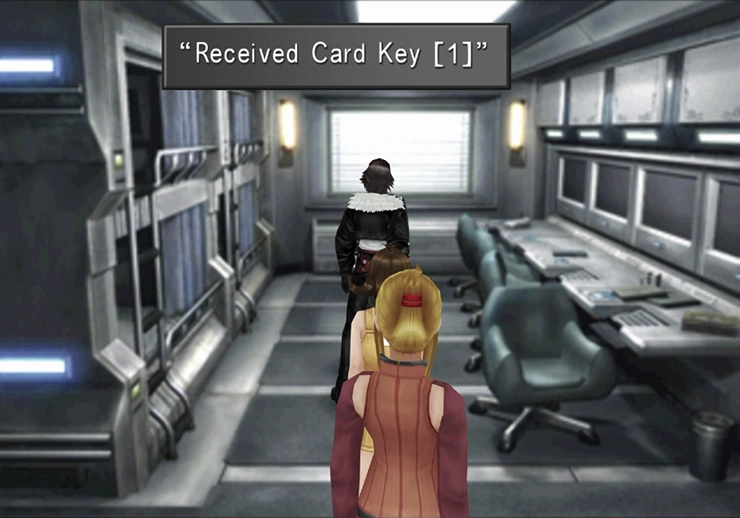
Take the doorway on the right side of the room to find a student. Speak to the ‘Male Student,’ and he will give you “Card Key [1].”
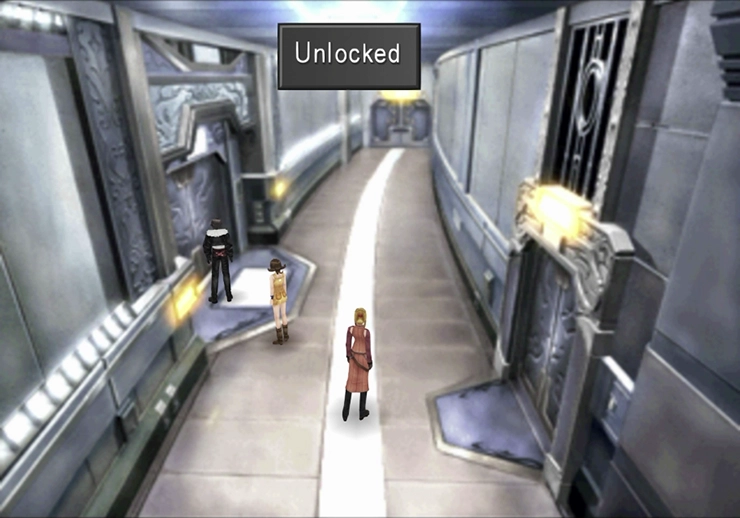
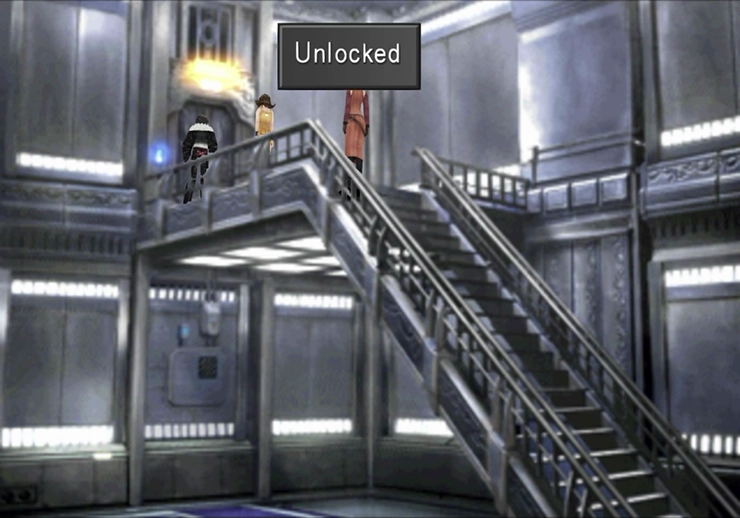
Exit the room and go back to the ![]() Save Point at the entrance to Galbadia Garden. This time, take the corridor on the left side of the hallway and then take the door on the left side of this next corridor as well.
Save Point at the entrance to Galbadia Garden. This time, take the corridor on the left side of the hallway and then take the door on the left side of this next corridor as well.

This doorway previously required “Card Key [1],” but you will see a message that says “Unlocked” when you approach the door with the key card already in your inventory.
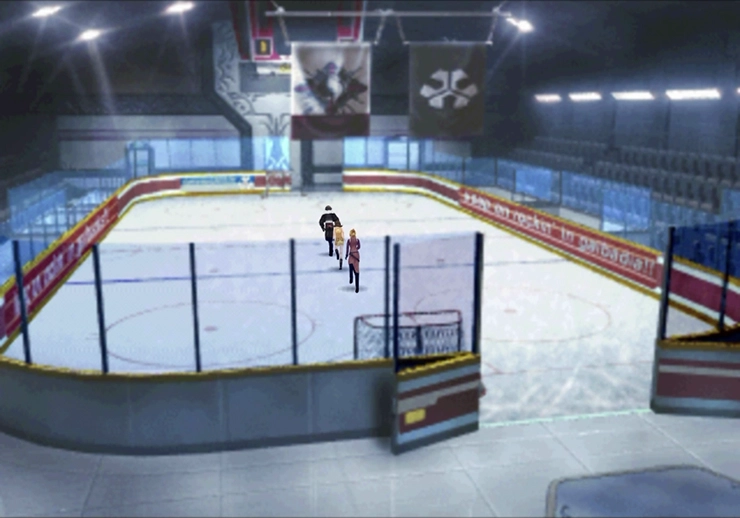
This next area contains a large hockey rink. Examine the hockey goal crease on the far side of the rink to find a ![]() Protect Draw Point. This rink is also the only place in the entire game where you can encounter Slapper enemies, the Garden’s demi-human ice hockey club, so pick a fight or two here if you want to see everything Final Fantasy VIII has to offer.
Protect Draw Point. This rink is also the only place in the entire game where you can encounter Slapper enemies, the Garden’s demi-human ice hockey club, so pick a fight or two here if you want to see everything Final Fantasy VIII has to offer.

You likely already have the maximum number of ![]() Protect magic on each of your characters, but you can use this Draw Point to restock if necessary. Go through the doorway at the back of the rink behind the Draw Point.
Protect magic on each of your characters, but you can use this Draw Point to restock if necessary. Go through the doorway at the back of the rink behind the Draw Point.
You will enter this next hallway from the left side. Go through the doorway on the right side of the hallway (opposite the side you just came in) and you will find another ‘Male Student’ at the front of a large auditorium. This one will give you “Card Key [2].” Exit the auditorium and go back into the hallway.

It’s time to go back to where you first met up with Fujin and Raijin. Go back through the doorway on the left, across the hockey rink, and back south to the ![]() Save Point at the entrance area to Galbadia Garden. Then go down the right hallway, into the crevice on the right side of the hall, up the stairs, and back to where Fujin and Raijin were standing.
Save Point at the entrance area to Galbadia Garden. Then go down the right hallway, into the crevice on the right side of the hall, up the stairs, and back to where Fujin and Raijin were standing.
This time, continue up the stairs one more level, going past Fujin and Raijin, and unlock the door at the top of the set of stairs using Card Key [2].
Follow the pathway leading outside the Garden and down the stairs.
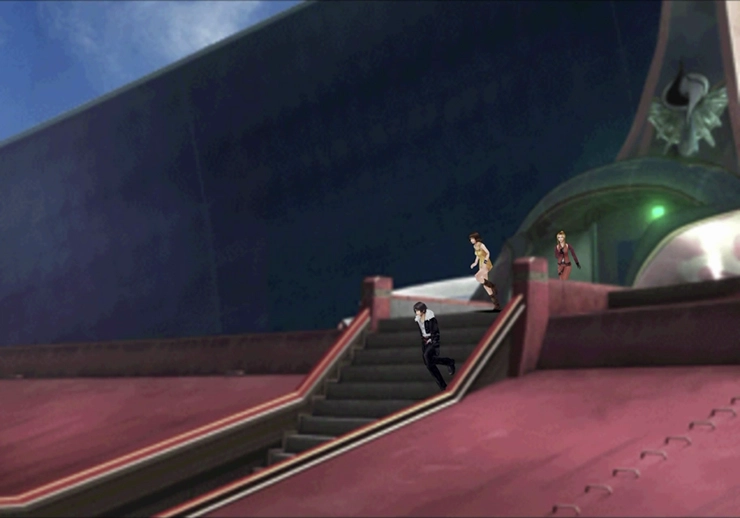
Once they reach the bottom of the ledge, your team will jump down into the outdoor recreational area with the basketball courts.
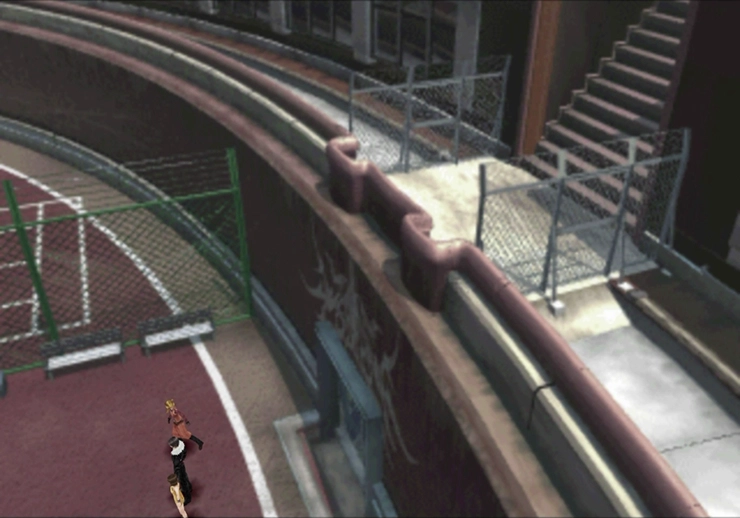
You can unlock the door on the right side of the courts to provide easier access to this area going forward. There is also a hidden Draw Point that contains ![]() Shell magic on the far side of the courts. Continue to the left, across the courts, and into the building.
Shell magic on the far side of the courts. Continue to the left, across the courts, and into the building.

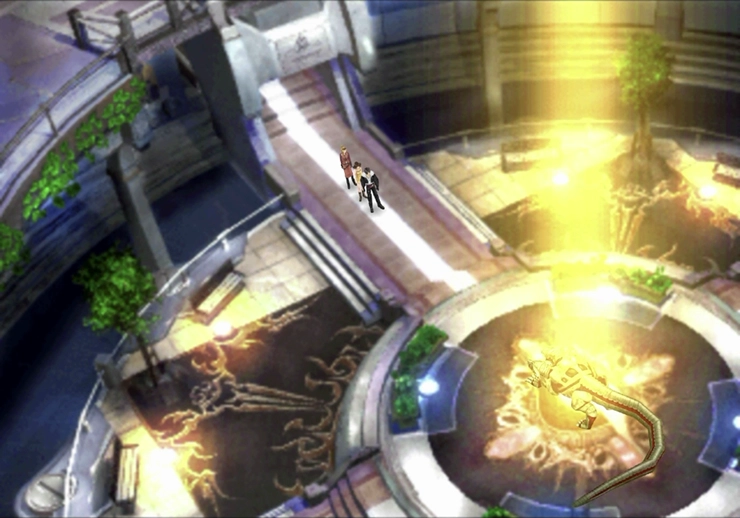
Follow the hallway, going past the stairs, straight towards the camera until you find yourself back in the main hall of Galbadia Garden.

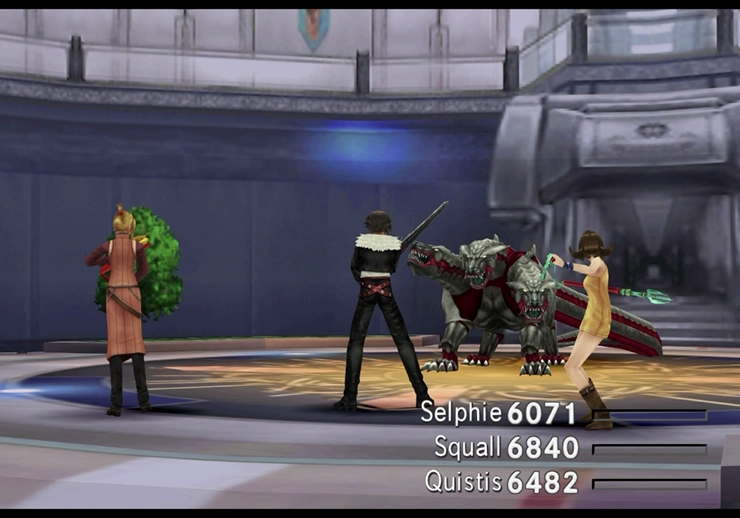
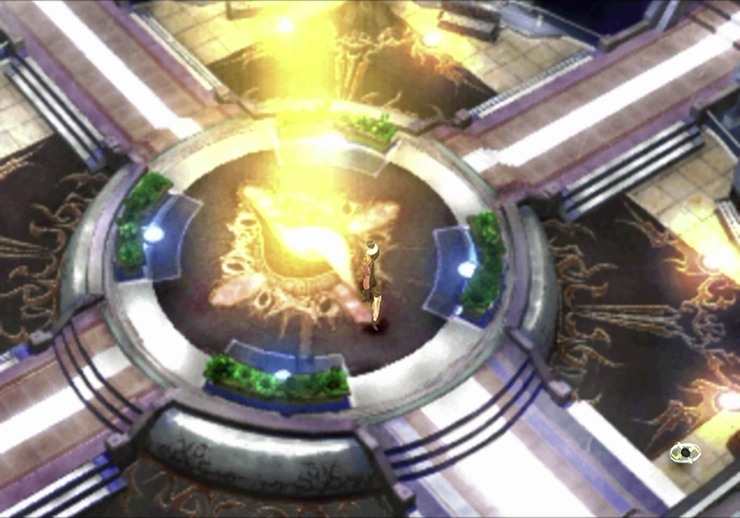
You’ll immediately notice a large creature standing in the light in the middle of the room. This creature is Cerberus, your next Guardian Force, but be careful not to touch it just yet. Instead, circle to the front of the room and save your game at the Save Point.
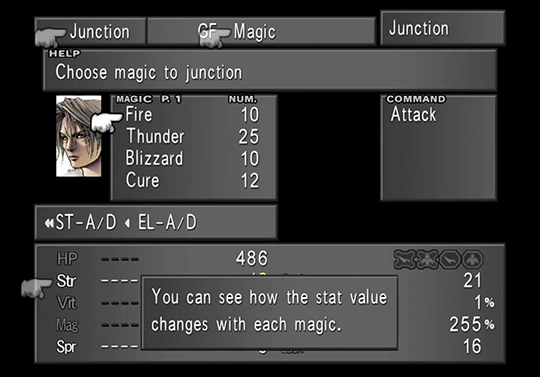
In preparing for the upcoming battle with Cerberus, make sure that none of your characters have ![]() Thunder or
Thunder or ![]() Wind-based magic equipped to their attacks through
Wind-based magic equipped to their attacks through ![]() Elem-Atk-J. Check out the Magic Junction Guide page in the Tips and Tricks section for more information (linked below):
Elem-Atk-J. Check out the Magic Junction Guide page in the Tips and Tricks section for more information (linked below):
Tips and Tricks
An overview of the magic junctioning process in Final Fantasy VIII, the primary method for powering up your characters.
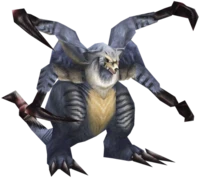
Guardian Force Battle
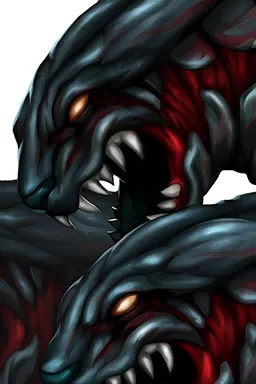
In Game Description: A 3-headed demon-dog of hell. In Triple, each of the 3 heads uses different magic. The tail is also powerful.
“… PRETTY CONFIDENT. LET’S SEE HOW YOU DO!”
As noted above, there are two types of magic that you should avoid using against Cerberus during this fight: Wind magic, which it is immune to, and Lightning magic, which it will absorb. You should also avoid using Quezacotl or Pandemona for the same reasons.
The fight against Cerberus is pretty straightforward. It will cast ![]() Triple on itself (and you can tell when it has cast this on itself because it will move backward into an attack stance) and then begin casting magic three times each time it attacks in battle. You can use
Triple on itself (and you can tell when it has cast this on itself because it will move backward into an attack stance) and then begin casting magic three times each time it attacks in battle. You can use ![]() Dispel if the damage output gets to be too heavy, but this shouldn’t be a problem.
Dispel if the damage output gets to be too heavy, but this shouldn’t be a problem.
You can take this opportunity to Draw both ![]() Double and
Double and ![]() Triple magic from Cerberus if any of your three characters aren’t fully stocked up on this magic already.
Triple magic from Cerberus if any of your three characters aren’t fully stocked up on this magic already.
1x
8x
Achievement/Trophy
You will receive the  Cerberus Achievement/Trophy as soon as you defeat it and it joins your team as a Guardian Force.
At the end of the battle, you will automatically be rewarded with the ![]() Cerberus Card, and Cerberus will join you as your newest Guardian Force.
Cerberus Card, and Cerberus will join you as your newest Guardian Force.
Guardian Forces
Cerberus is a unique Guardian Force whose summon casts Double and Triple on the entire party, allowing characters to cast multiple spells per turn. It also brings the highly coveted Abilityx3 junction ability, letting a character equip three party or character abilities at once.
Cerberus joins your party having already learned ![]() Str-J,
Str-J, ![]() Hit-J, and
Hit-J, and ![]() Abilityx3. Use Cerberus to add a third ability to one of your characters, and, with it bringing the
Abilityx3. Use Cerberus to add a third ability to one of your characters, and, with it bringing the ![]() Hit-J ability, you now have two Guardian Forces with the Hit-J junction and Squall, who can’t miss either way. Here is a recommended Guardian Force setup now that you have Cerberus to take advantage of that fact:
Hit-J ability, you now have two Guardian Forces with the Hit-J junction and Squall, who can’t miss either way. Here is a recommended Guardian Force setup now that you have Cerberus to take advantage of that fact:
Character 1:
Equip the following Guardian Forces:
Ifrit
Carbuncle
Leviathan
Character 2:
Equip the following Guardian Forces:
Shiva
Siren
Diablos
Pandemona
Character 3:
Equip the following Guardian Forces:
Quezacotl
Brothers
Cerberus
Helpful Hint
One of the rarer and essential items in the game, called a ![]() Curse Spike, can be obtained by using
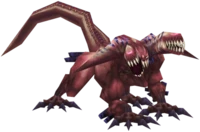
Curse Spike, can be obtained by using ![]() Mug on an enemy called a Tri-Face. You can fight as many Tri-Face enemies as you want in this area by initiating a battle right in the middle of the central hall where Cerberus is standing. There are other methods for obtaining them later on in the game, but this is a good opportunity to stock up on a few.
Mug on an enemy called a Tri-Face. You can fight as many Tri-Face enemies as you want in this area by initiating a battle right in the middle of the central hall where Cerberus is standing. There are other methods for obtaining them later on in the game, but this is a good opportunity to stock up on a few.

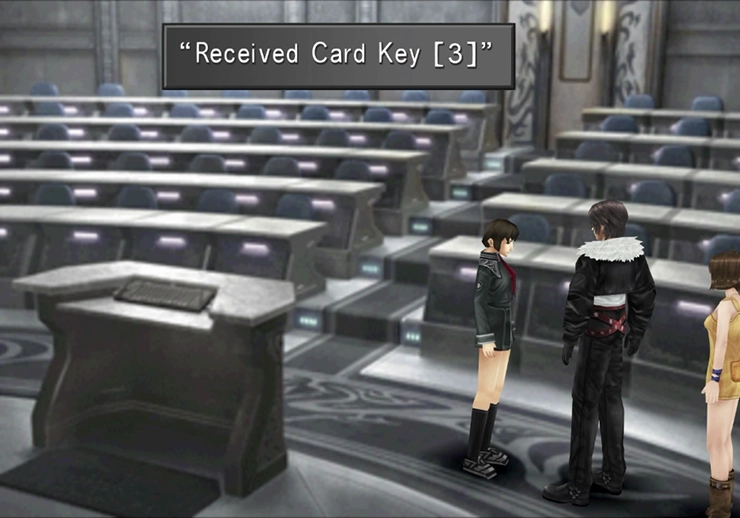
Travel southwest away from where you fought Cerberus, in the bottom-left corner of the screen, and go through the doorway on the left side of the screen. The student in this room will give you Card Key [3] and will wish you luck for your upcoming showdown against the sorceress.
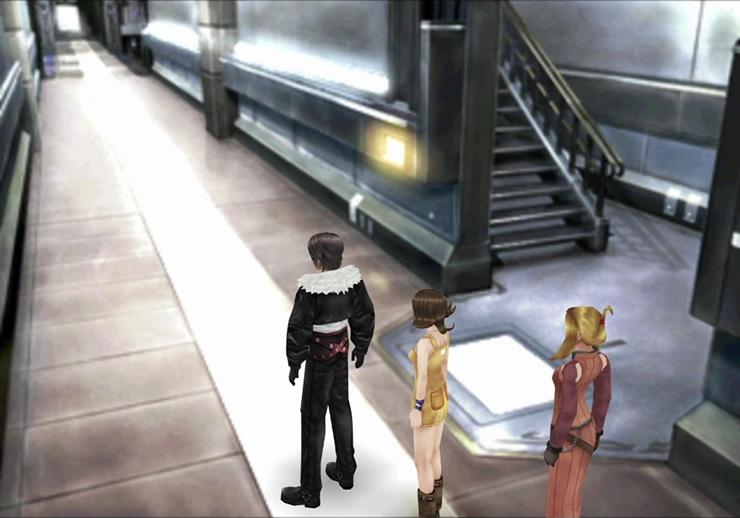
Make your way back to the central room and take the door in the upper-left corner of the map (northwest). Go up the stairs on the right side of the hallway and then travel left to arrive at an elevator that will take the team up to the third level.
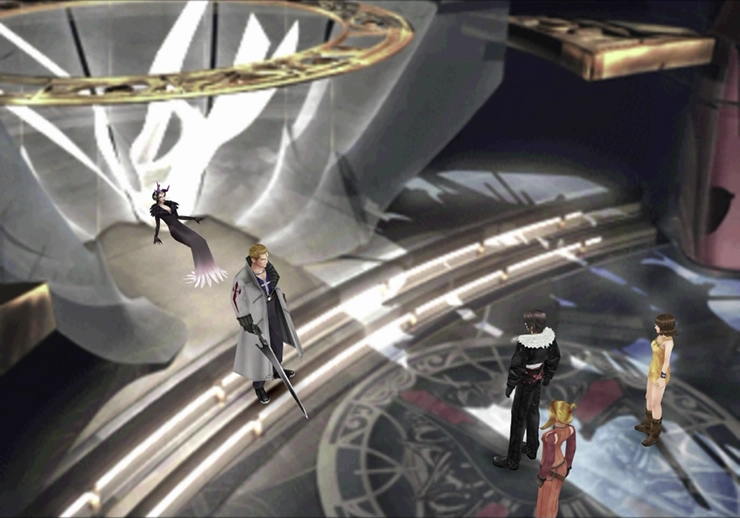
Use the Save Point located on the right side of the room to save your game before you continue. Ensure that at least one of your characters has the ![]() Mug ability equipped, and then walk towards Seifer and Sorceress Edea near the stairs at the back wall.
Mug ability equipped, and then walk towards Seifer and Sorceress Edea near the stairs at the back wall.

Boss Battle
In Game Description: Attacks with Edea to destroy SeeD. His sword skills have been refined, and he has gained more skills.

This first battle against Seifer is extremely easy. In addition to him doing very little damage to your team members, Seifer is also susceptible to Sleep, Blind, and Silence magic.
Consider hitting him with your ![]() Mug attack, though, as you can steal up to 8
Mug attack, though, as you can steal up to 8 ![]() Mega Phoenixes from him, which are a nice prize. You can also Draw
Mega Phoenixes from him, which are a nice prize. You can also Draw ![]() Haste magic from him as well.
Haste magic from him as well.
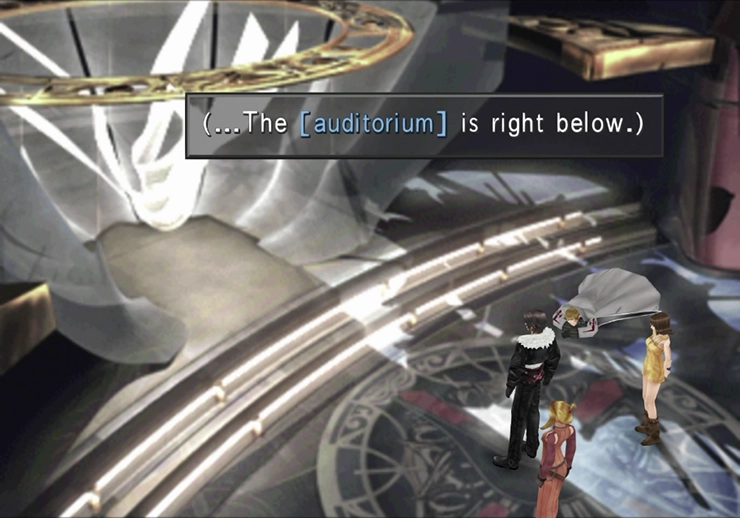
With Seifer cast aside, Sorceress Edea will teleport through the floor into the lower level of Galbadia Garden. A message will appear indicating that the “Auditorium” is right below this floor.
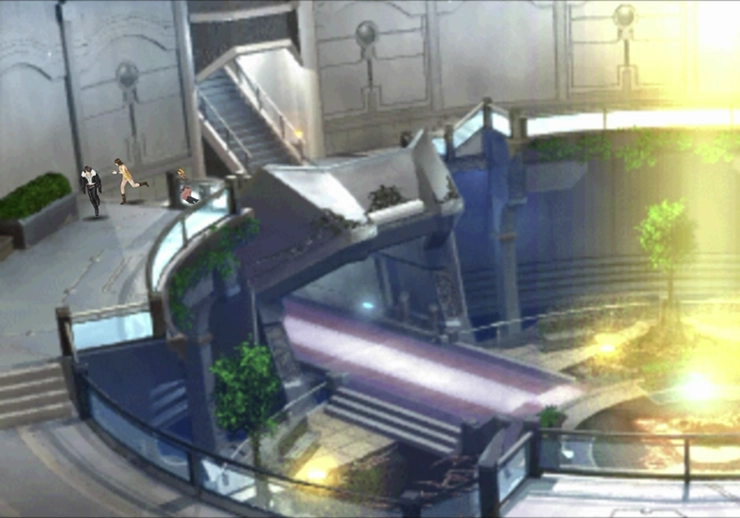
Turn around and take the elevator back down to the second level of the Garden. Follow the pathway along the outer edge of the main hall and into the auditorium on the opposite side.
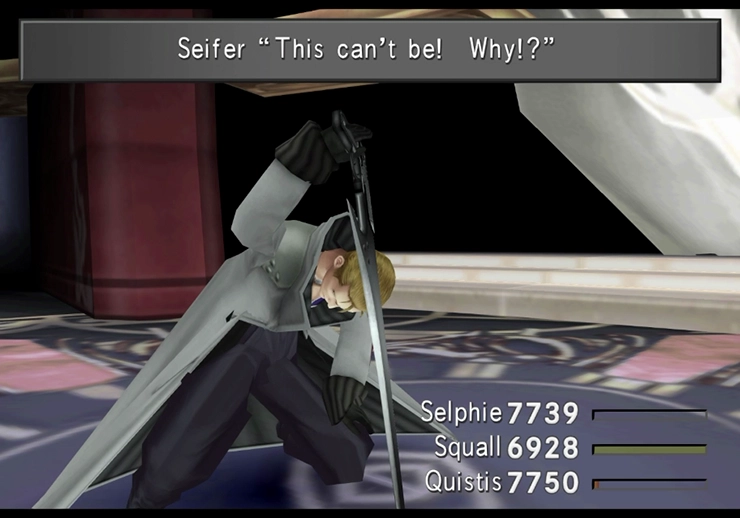
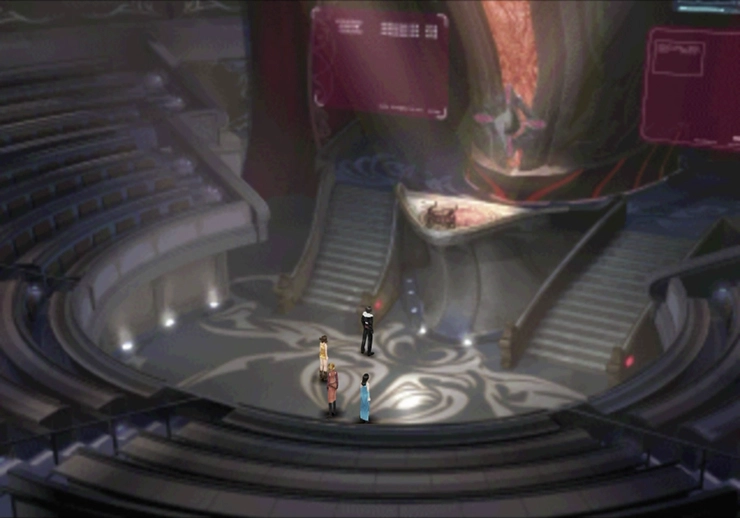
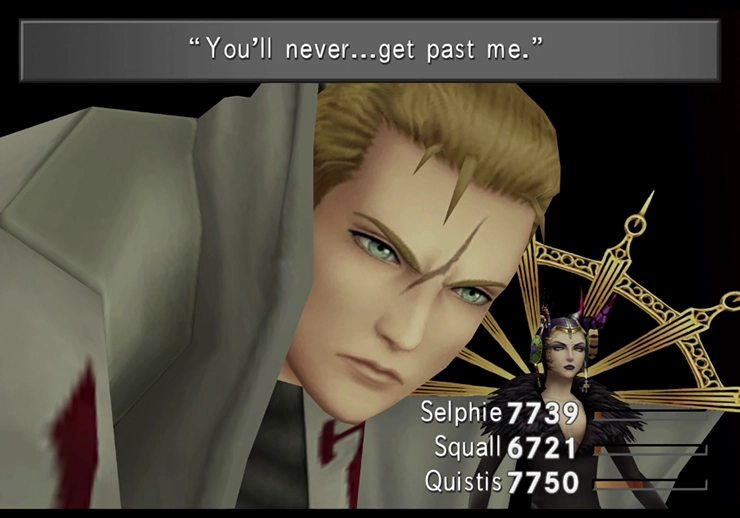
Edea will not be there when they first arrive, but she eventually shatters her way through the room and lands at the podium. Seifer appears at her side, one more time, and wants to do battle with you, one more time.
Boss Battle
In Game Description: Defeated once, and still trying to fight to save his pride. HP is lower due to the defeat, but skills are higher.
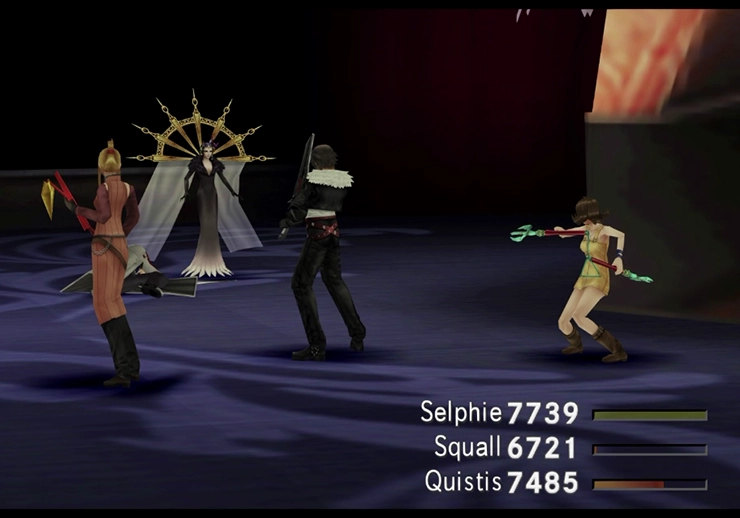
Seifer is already crouching over when the battle begins, so it’s fairly apparent that he is weak and injured from the previous fight. As expected, a few quick attacks will remove him from the fray, and even though it looks like Sorceress Edea is already in the fight, you have to take out Seifer first before you can attack her.
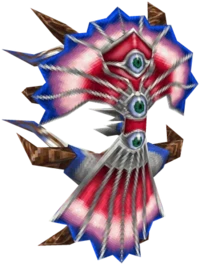
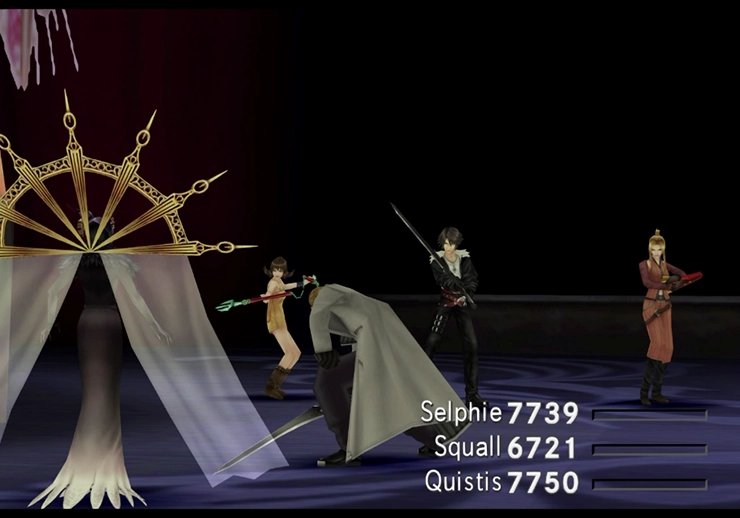
Boss Battle
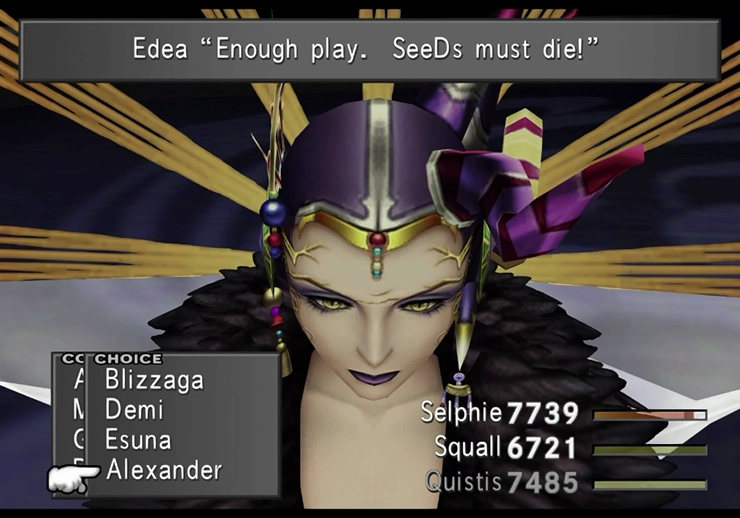
In Game Description: A sorceress bent on conquering the world. Hired Galbadia Garden forces to destroy SeeD, which stands in her way.
First things first, make sure that you Draw your next Guardian Force, Alexander, from Edea, as soon as you have the opportunity to do so. Reset your game if you accidentally completed the fight without Drawing Alexander or if you forgot to equip the ![]() Draw command to one of your characters.
Draw command to one of your characters.
Also, use your ![]() Mug command throughout the fight to try to obtain a
Mug command throughout the fight to try to obtain a ![]() Royal Crown from Edea.
Royal Crown from Edea.
Her attacks are all magic-based. Her most powerful attack is called Maelstrom, and it hits all of your party members for approximately half of their current hit points. Much like when Diablos cast ![]() Demi, this attack isn’t capable of KO’ing your party members on its own. Unlike Diablos, however, Edea has several additional attacks that are capable of finishing the job. These attacks include
Demi, this attack isn’t capable of KO’ing your party members on its own. Unlike Diablos, however, Edea has several additional attacks that are capable of finishing the job. These attacks include ![]() Blizzaga and
Blizzaga and ![]() Firaga.
Firaga.
Edea is also capable of casting a new spell called ![]() Death. Unfortunately, if this spell hits one of your party members, it’s game over for that character. You can use a
Death. Unfortunately, if this spell hits one of your party members, it’s game over for that character. You can use a ![]() Phoenix Down,
Phoenix Down, ![]() Life, or
Life, or ![]() Full-Life to bring them back into the battle.
Full-Life to bring them back into the battle.
Edea is vulnerable to ![]() Sleep, and she will also cast
Sleep, and she will also cast ![]() Reflect on herself, making regular attacks the preferred method for bringing her down. She doesn’t have much in the way of HP, though, so this should be a relatively straightforward fight.
Reflect on herself, making regular attacks the preferred method for bringing her down. She doesn’t have much in the way of HP, though, so this should be a relatively straightforward fight.
Level 1 to 29:
Alexander
Level 30 to 100:
Alexander
1x
1x
Achievement/Trophy
You will receive the Alexander Achievement/Trophy if you Draw Alexander from Edea before the battle concludes.
Guardian Forces
Alexander is a ![]() holy-elemental Guardian Force obtained by Drawing it from Edea. It provides the valuable Med Data ability, which doubles the effectiveness of healing items, along with powerful stat junction abilities like Spr-J and Elem-Def-Jx4.
holy-elemental Guardian Force obtained by Drawing it from Edea. It provides the valuable Med Data ability, which doubles the effectiveness of healing items, along with powerful stat junction abilities like Spr-J and Elem-Def-Jx4.
Congratulations, you have reached the end of Disc 2! Assuming that you’re playing the old school version of the game, that is. Otherwise, I guess you could consider this the end of Act 2 and the beginning of Act 3.