
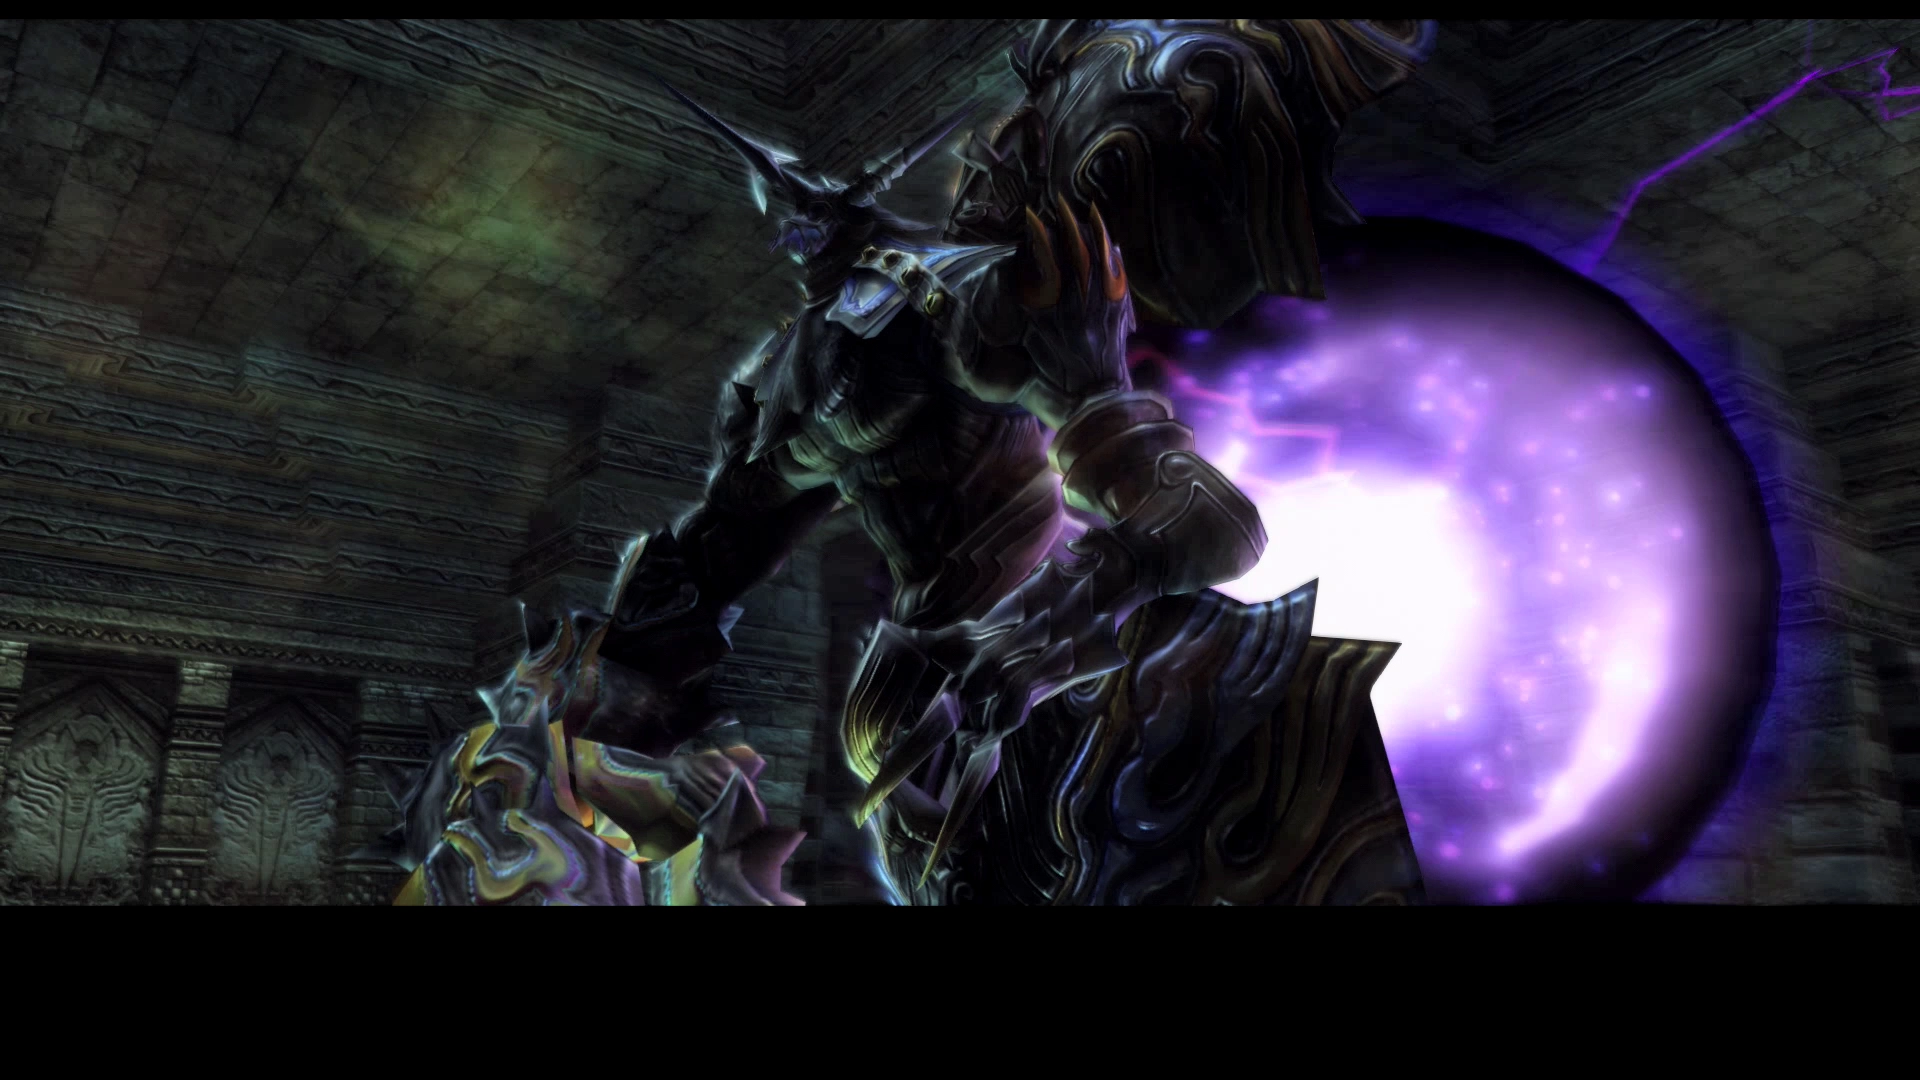
Zeromus, the Condemner
“Honoring the law more than any other, a scion of holy order and condemner of criminals. Created in opposition to Knight-Star Pashtarot, scion of light.
He turns his deep, abiding hatred for those who break the law into living darkness, therein to plunge the guilty in fell judgment. Over time, he came to care less for upholding the law and more for condemnation, and so tainted by hate, he sought to condemn the gods themselves to death. Thus did he earn the title ‘The Condemner,’ and thus did he fall from grace.”
Zeromus can be fought any time after you have defeated Judge Bergan and completed the events at Mt Bur-Omisace. That said, Zeromus is extremely difficult at this stage in the game, and it is highly recommended that you save the battle for much later on (either during the first or second visit to the Port of Balfonheim).
You will not have access to the Magick command during the battle, so stock up on ![]() X-Potions before traveling to the Stilshrine of Miriam. They can be purchased from the Leapin’ Bangaa in the Balfonheim Port. You should also ensure that you have enough
X-Potions before traveling to the Stilshrine of Miriam. They can be purchased from the Leapin’ Bangaa in the Balfonheim Port. You should also ensure that you have enough ![]() Power Armlets for all of your characters to prevent the Stop status effect.
Power Armlets for all of your characters to prevent the Stop status effect.
Location
In order to reach the room that Zeromus is hiding in you will need to have the ![]() Stone of the Condemner in your possession. The Stone is given to you by an Acolyte standing just outside the temple at the top of Mt Bur-Omisace.
Stone of the Condemner in your possession. The Stone is given to you by an Acolyte standing just outside the temple at the top of Mt Bur-Omisace.

Travel to the Stilshrine of Miriam and enter the Ward of Measure just south of the Save Crystal. Touch the Way Point at the south side of the room and you will be given an option to “Touch the Device.” You will then be prompted with an option to “Use the Stone of the Condemner” which you should select.
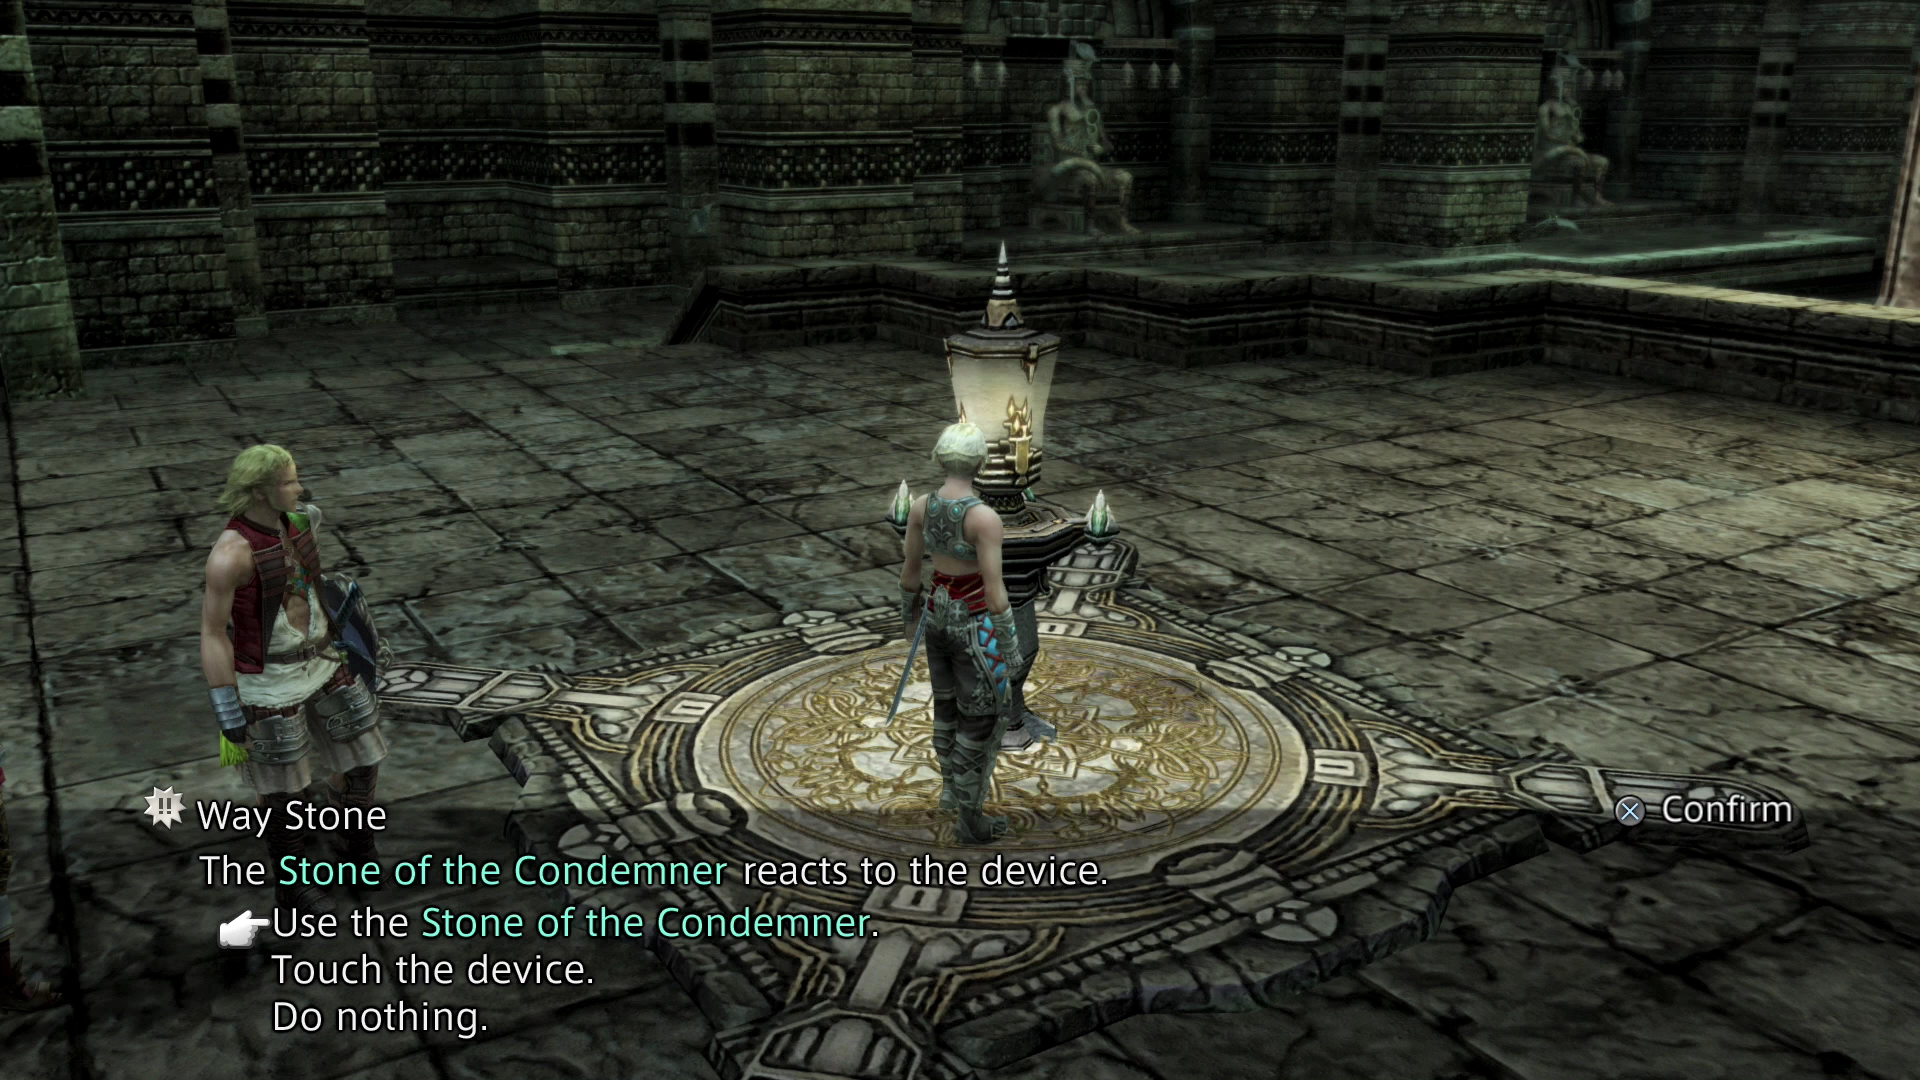
This will teleport you to the Throne of Veiled Gods. Zeromus is just behind the door in front of the Way Point so make sure you prepare your party before going through it.

Esper Battle
Level: 51
HP: 166,888
Steal: ![]() Cancer Gem (55%),
Cancer Gem (55%), ![]() Elixir (10%),
Elixir (10%), ![]() High Arcana (3%)
High Arcana (3%)
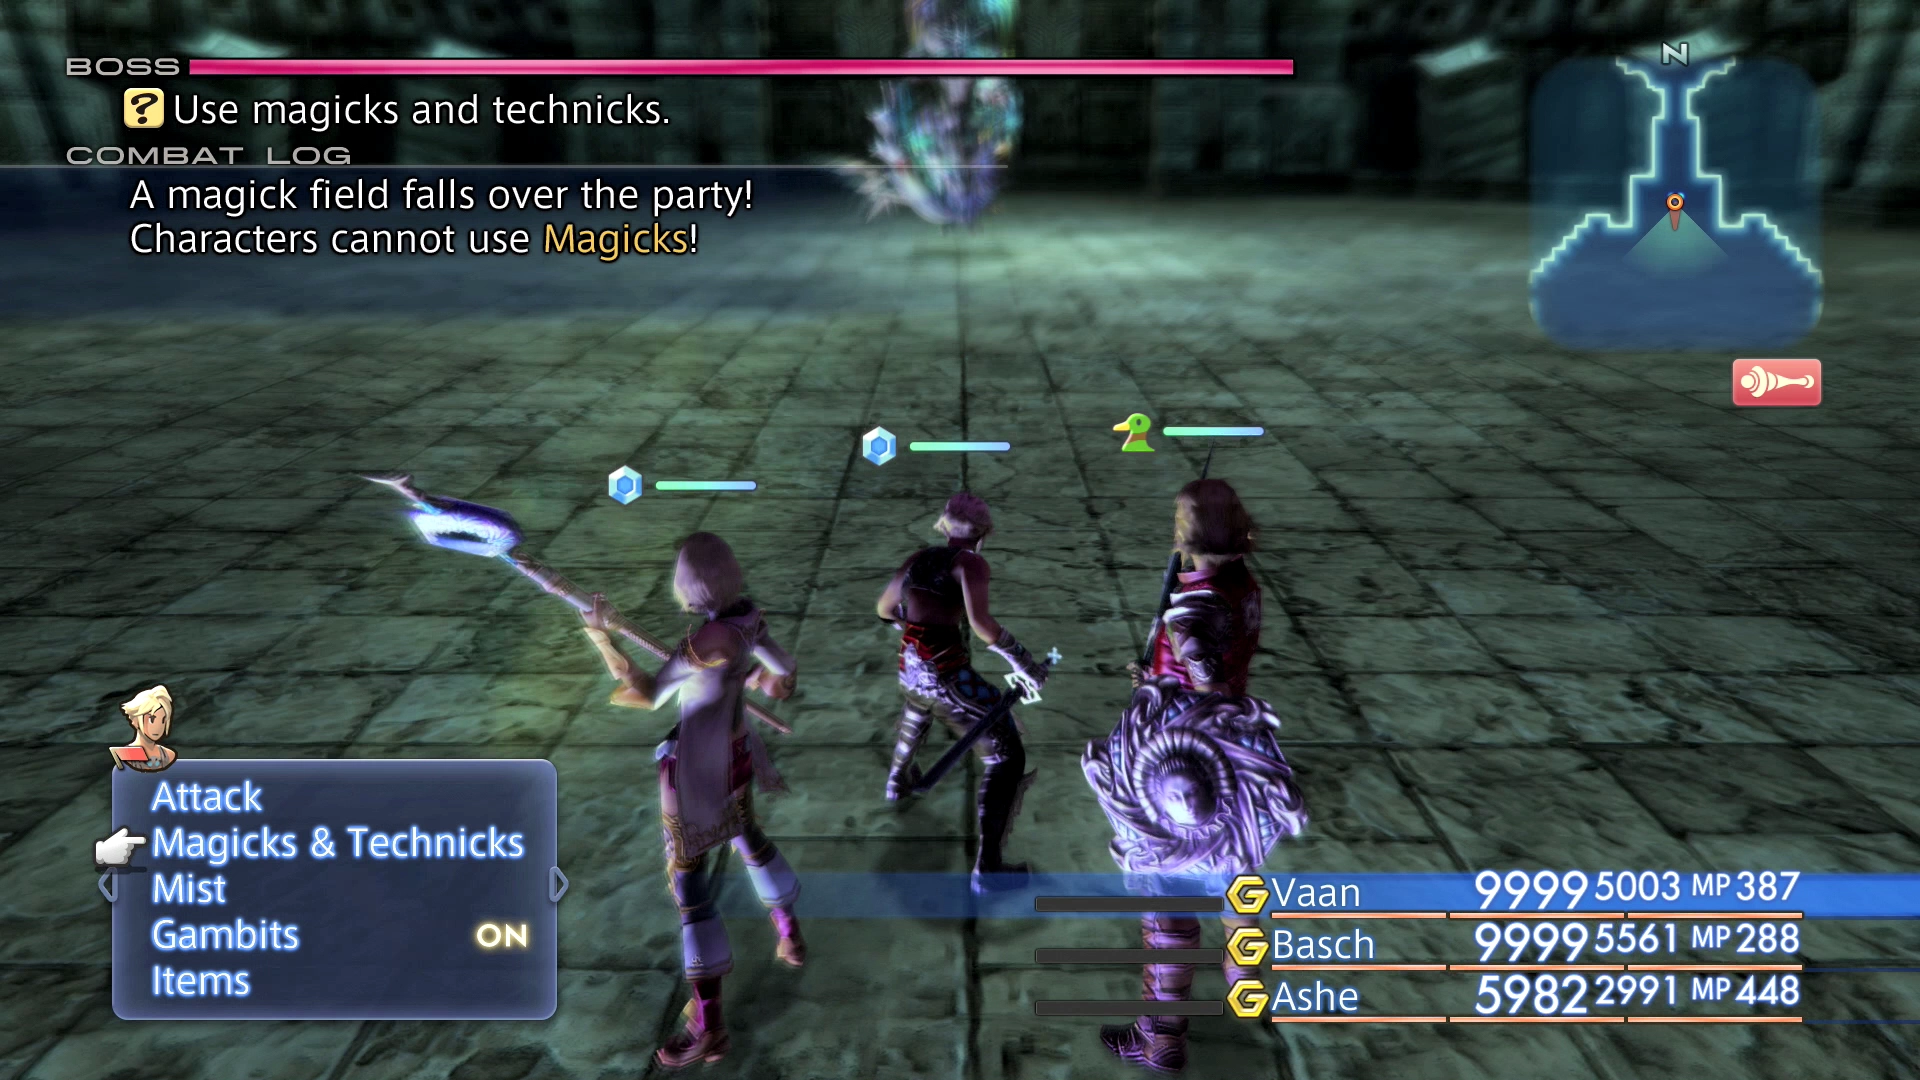
A Magick field will fall over the party as soon as you enter the battlefield which will prevent you from using Magick spells. This means that you won’t be able to recast your beneficial buff spells like ![]() Protect,
Protect, ![]() Shell,
Shell, ![]() Bubble, etc. so make sure that your party has them cast before you enter.
Bubble, etc. so make sure that your party has them cast before you enter.
Zeromus will also summon Dark Lord skeletons to help him during the battle which you will need to be prepared to fight. They will attack with regular attacks and cast Toxify which can Poison your party members.
You will need to change your strategy for any Magick-heavy party members that you may have had. Your healing character should switch to using ![]() X-Potions on party members when they drop too low, they should switch to using
X-Potions on party members when they drop too low, they should switch to using ![]() Phoenix Down items instead of casting
Phoenix Down items instead of casting ![]() Raise or
Raise or ![]() Arise (which won’t work), and they should have Gambits setup to use items on characters afflicted with status effects.
Arise (which won’t work), and they should have Gambits setup to use items on characters afflicted with status effects.
Zeromus’ attacks can cause the Stop effect, so make sure to equip one (or more) of your party members with a ![]() Power Armlet so that they are not all hit at the same time. You should also setup another Gambit to use an
Power Armlet so that they are not all hit at the same time. You should also setup another Gambit to use an ![]() Antidote on party members who are Poisoned from the Dark Lord’s attacks.
Antidote on party members who are Poisoned from the Dark Lord’s attacks.
Have your tank equip a ![]() Shell Shield to keep the
Shell Shield to keep the ![]() Shell status active throughout the fight which will reduce the number of negative status effects they are hit with. You may want to keep your tank equipped with a
Shell status active throughout the fight which will reduce the number of negative status effects they are hit with. You may want to keep your tank equipped with a ![]() Bubble Belt to deal with the onslaught of attacks.
Bubble Belt to deal with the onslaught of attacks.
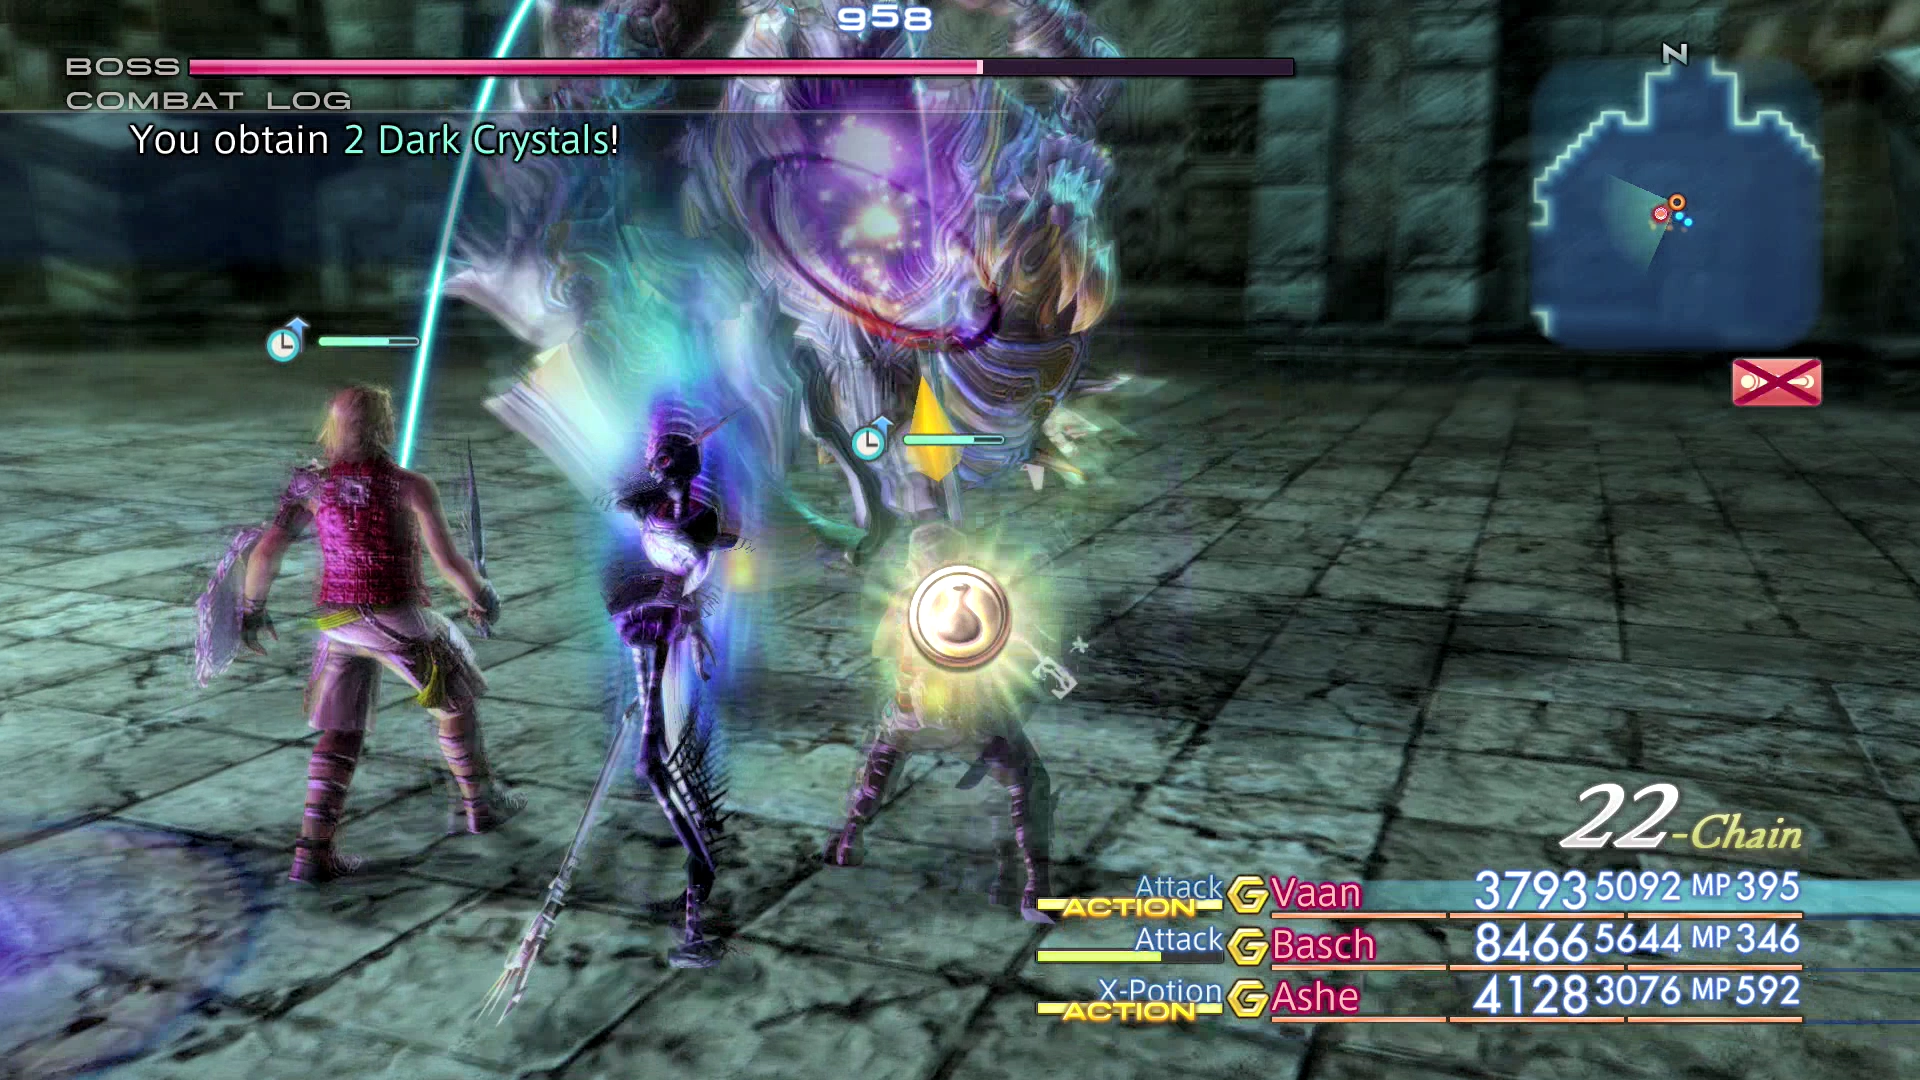
Make sure that your party members are using a Gambit to target Foe’s with the Lowest HP which will get them to switch and focus on Dark Lords as they spawn. This is necessary to ensure that your party is not overrun by enemies, but it is also extremely helpful as you can build up a chain while defeating Dark Lords which will cause you to get higher level loot (which may heal you)
This is a fight where you should not be hesitating to dig in to your stockpile of items. You should be using ![]() X-Potions,
X-Potions, ![]() Elixirs and
Elixirs and ![]() Megalixirs to make this fight easier. You should also consider using any of the
Megalixirs to make this fight easier. You should also consider using any of the ![]() Cura Motes,
Cura Motes, ![]() Bubble Motes and
Bubble Motes and ![]() Hastega Motes (once your buffs have worn off) as this will make the fight much easier.
Hastega Motes (once your buffs have worn off) as this will make the fight much easier.
Be prepared for some powerful attacks as Zeromus loses health – your Gambits should be geared towards using ![]() X-Potions whenever a character falls below 50%-60% of the HP. A video is included below demonstrating the battle in the original version of the game against Zeromus.
X-Potions whenever a character falls below 50%-60% of the HP. A video is included below demonstrating the battle in the original version of the game against Zeromus.
You can find a video of this battle in the Zodiac Age version below.
Congratulations – you now have Zeromus as an Esper which you can use in battle!
Zeromus can be summoned during a fight. He will use an attack called “Gravity Well,” which deals damage based on the foe’s maximum HP and Zeromus’ maximum HP. He will also use an attack called “Big Bang,” which is another Gravity-based attack which does fractional damage that depends on how much HP an enemy has.
This fight is typically completed when a player reaches the Balfonheim Port after completing the Draklor Laboratory area of the game or after reaching Balfonheim Port for the second time after completing Giruvegan and the Great Crystal.
Esper Locked Licenses
Unlocking Zeromus on the License Boards of certain jobs will unlock additional License Boards:
- Black Mage:
Heavy Armor 9 ( Giant’s Helmet,
  Carabineer Mail)
 - Bushi:
Magick Lores (x2) - Foebreaker:
Magick Lores (x4) - Machinist:
 Makara
 - Monk:
 Sight Unseeing
 - Red Battlemage:
Channeling - Time Battlemage:
Addle, Shear - White Mage: 270 HP
The optimal selection is to give Zeromus to your Time Battlemage. Addle and Shear are extremely useful Technicks that can be used all the way through the game. Alternatively, give it to your Red Battlemage if it does not have Channeling already.