
Temple of the Ancients
Before heading to the Temple, there is one key item you may need to complete as you approach the end of Disc 1. Read the information boxes below for more information.
Achievement/Trophy
Your last opportunity to obtain the  See the Light Achievement/Trophy, which involves teaching Aeris her final Limit Break, Great Gospel, is now. Once you’ve entered the Temple, you won’t be able to go back and get it.
Warning
The Achievement/Trophy section above mentions this, but as another reminder, this is the last point in the game where you can have Aeris learn her final Limit Break, the Great Gospel. Do not proceed past this section without visiting the See the Light heading of the Achievements/Trophies section if you plan to obtain it or if you plan to get all the Limit Breaks in the game.
Onward to the Temple
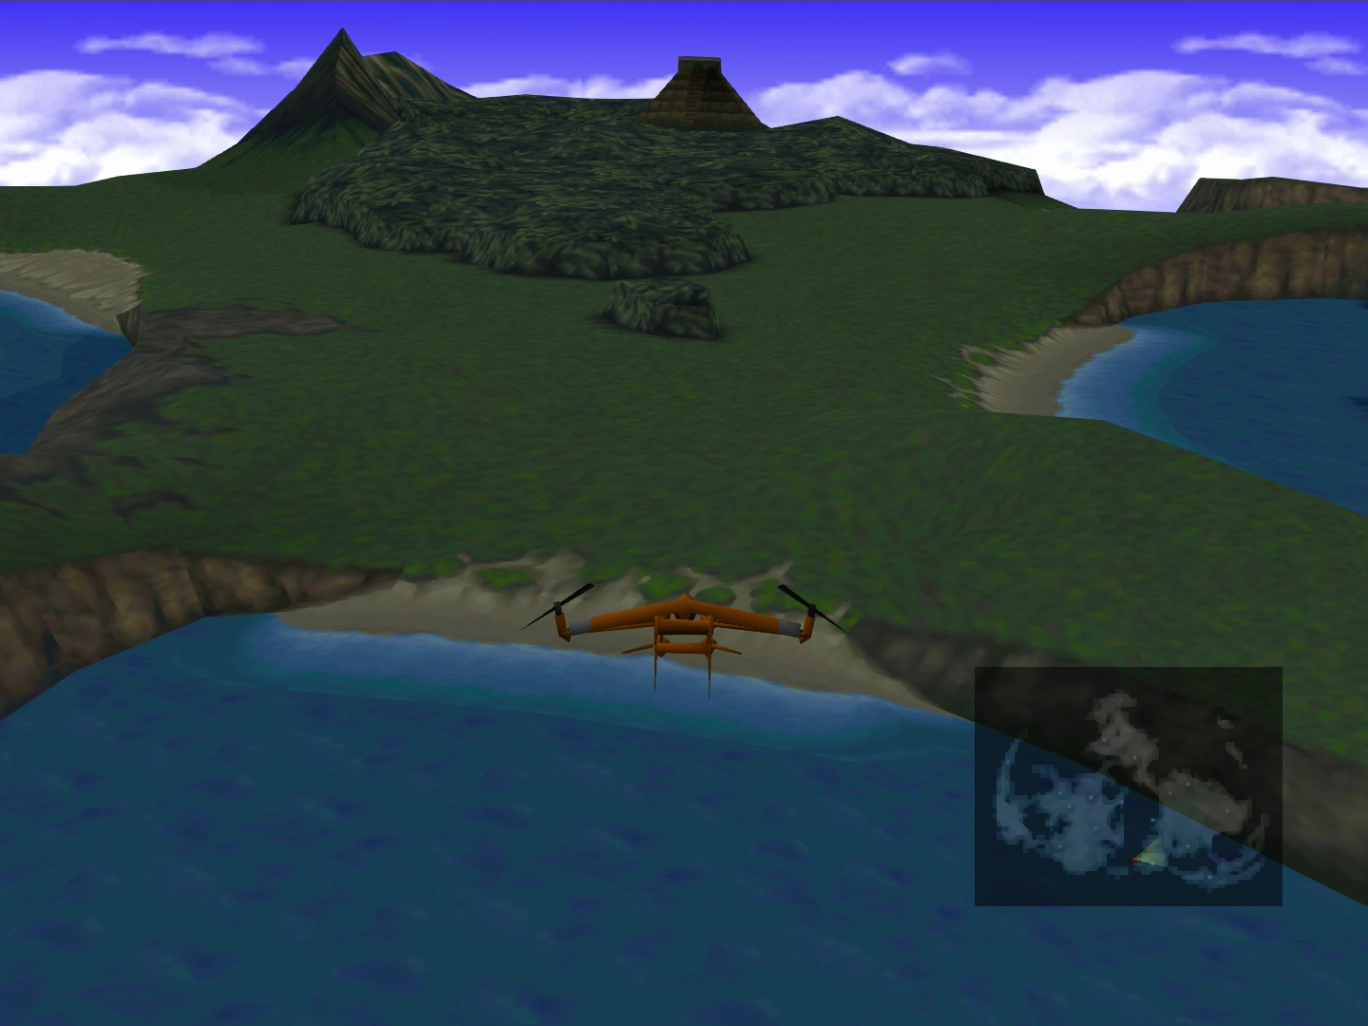
The Temple of the Ancients is on another continent. You will need to jump back into the Tiny Bronco to get there. If you are having trouble locating the Tiny Bronco, pull up the world map by using the ![]()
![]()
![]() button and look for the flashing blue dot.
button and look for the flashing blue dot.
Temple of the Ancients is on the island southeast of Gold Saucer. You do not have to travel too far to reach it. Use the map and the screenshots below to help you find the correct spot on the map.
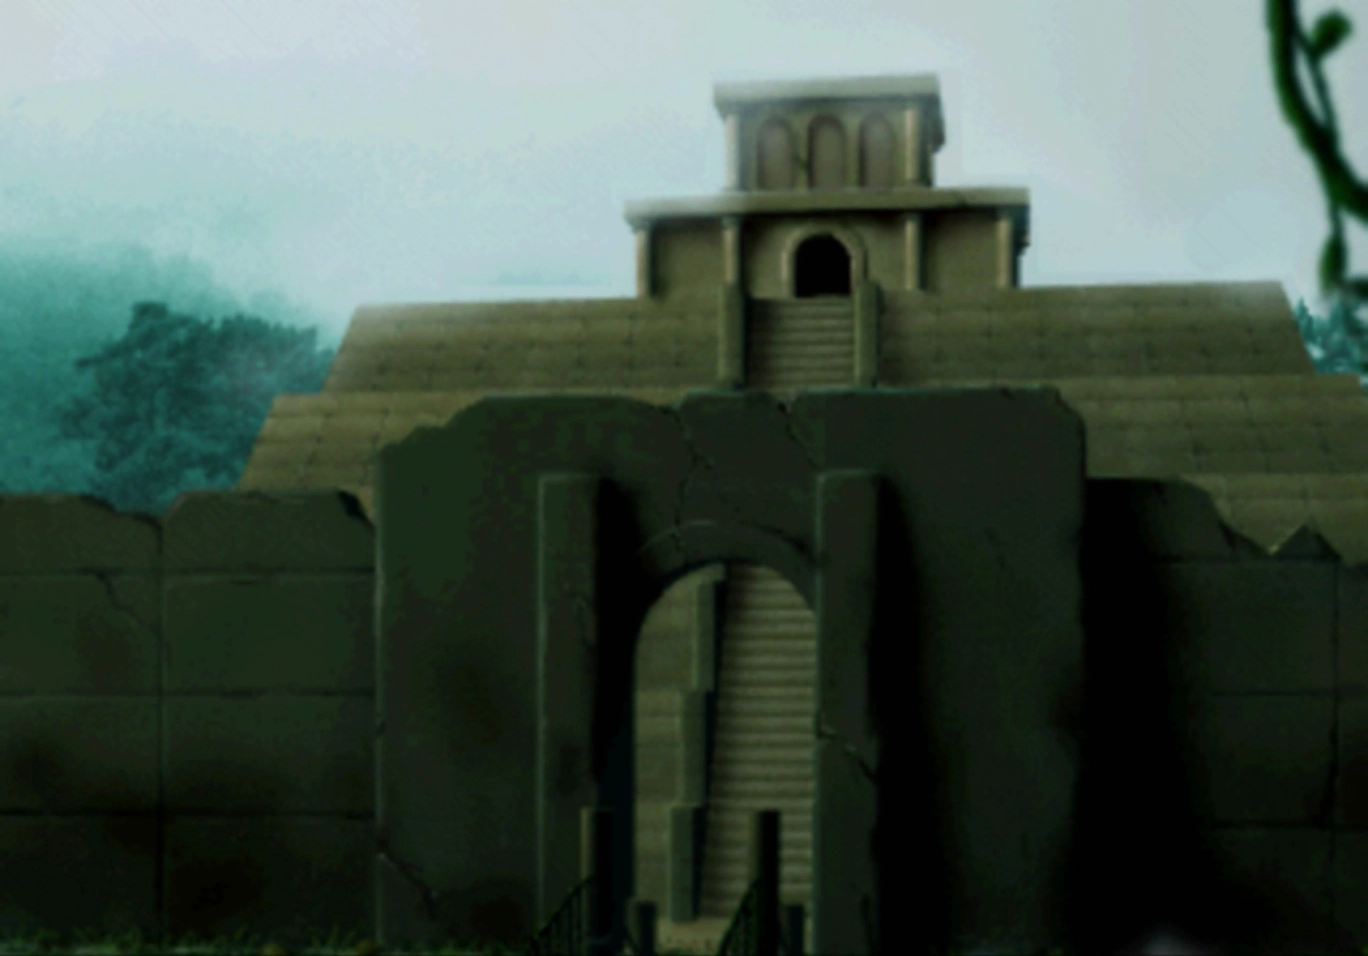
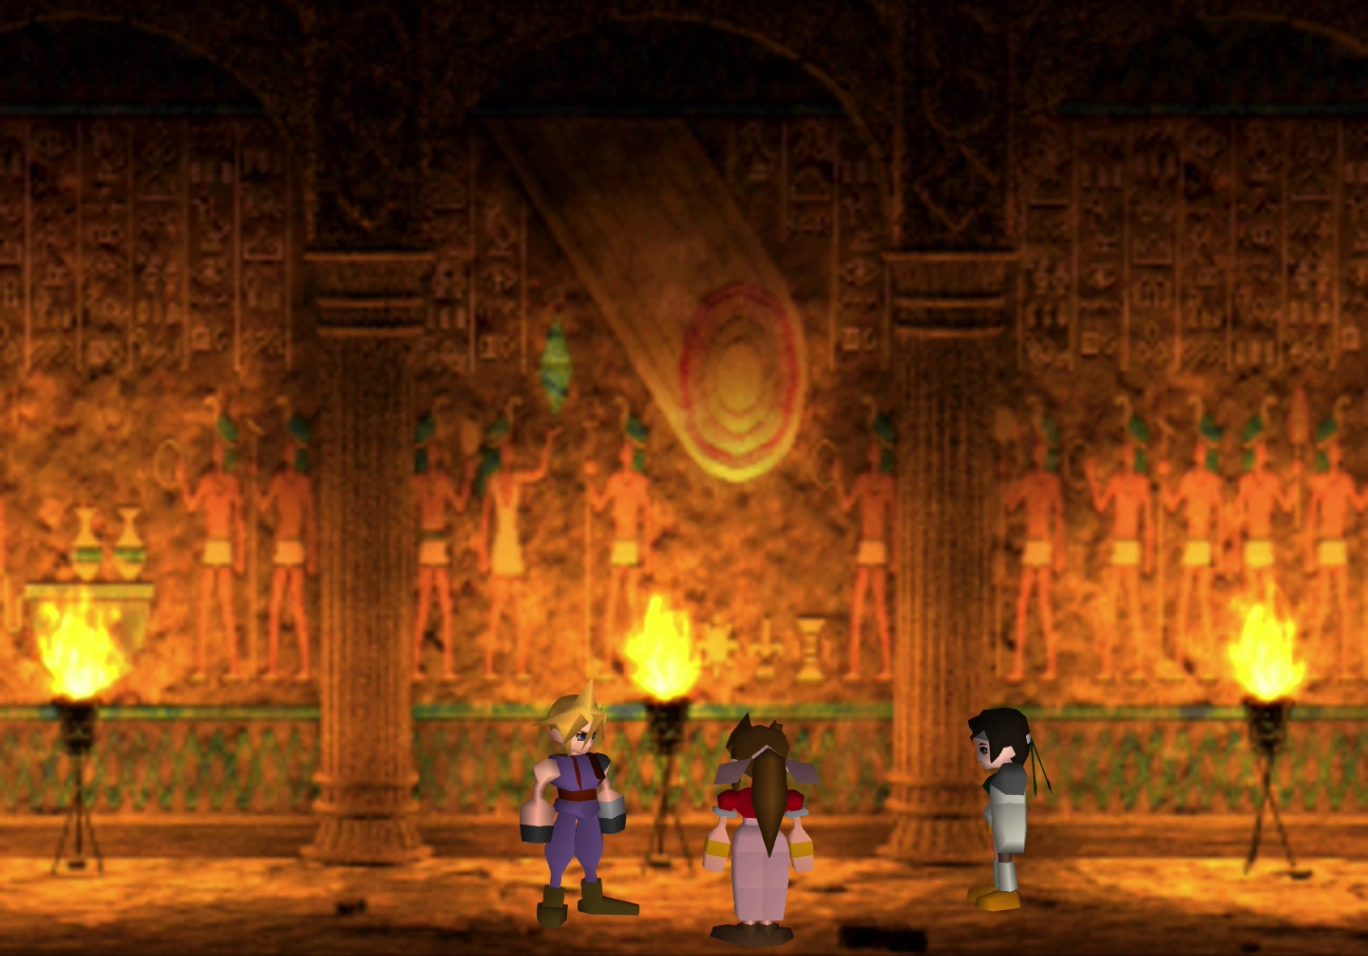
A brief scene will occur when Cloud crosses the bridge into the Temple involving Aeris. Next, the team will find Tseng injured in front of the pedestal at the top of the stairs.
Tseng will provide you with the Keystone that they stole, which will allow you to gain access to the Temple. Examine the pedestal to activate the passageway, which carries the team into the center of a vast labyrinth.
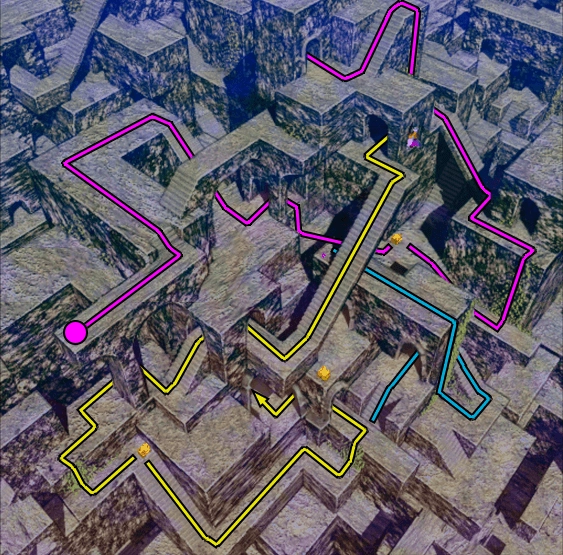
Use the map included above to help guide you through each area.
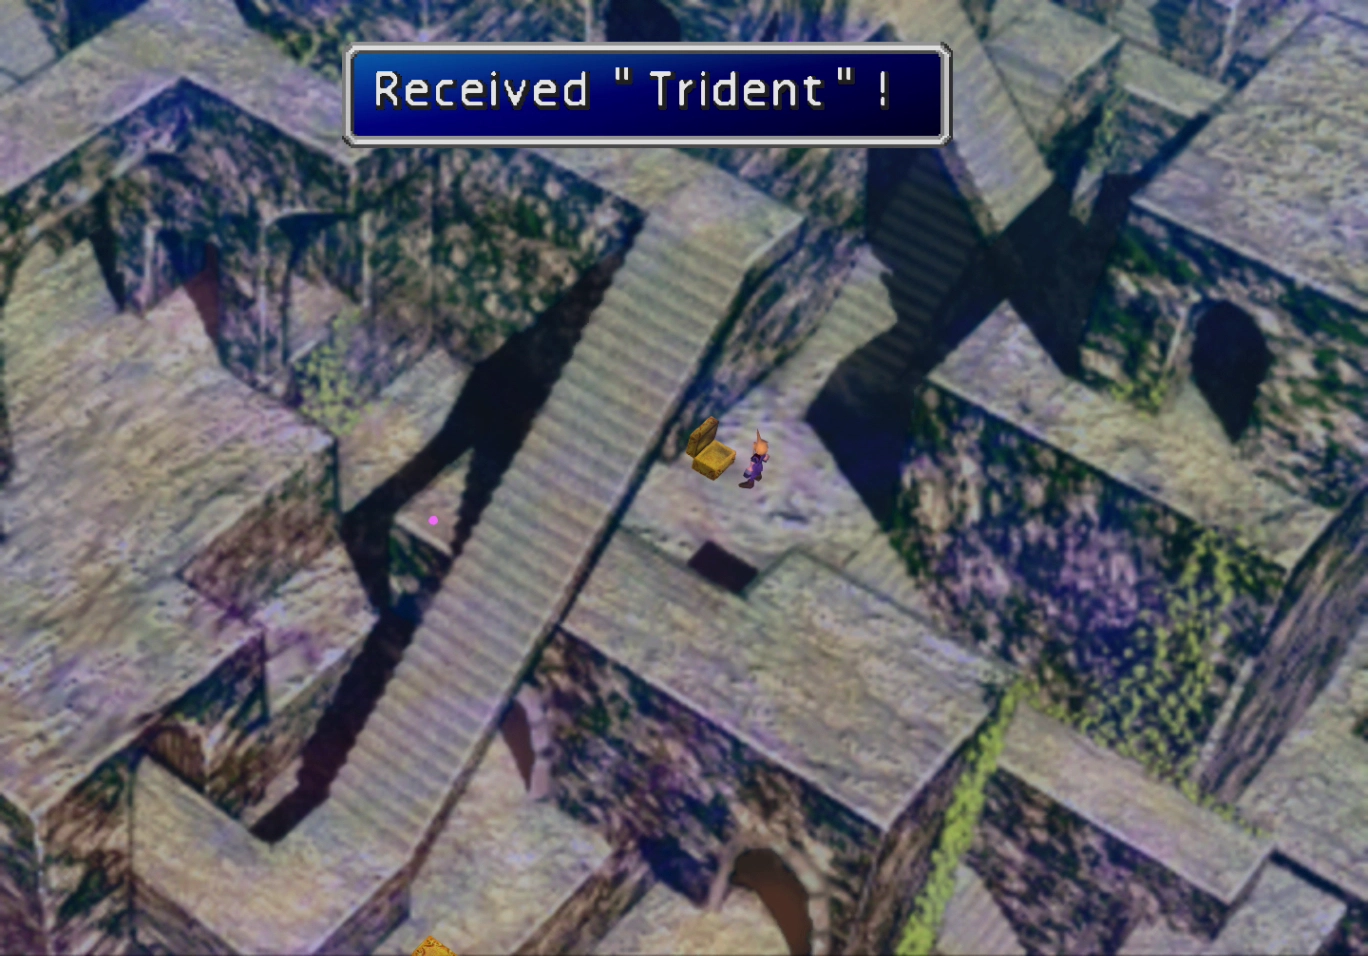
You start on the left side of the screen where the pink line begins. Follow it down the vines and grab the treasure chest just to the right of those vines, which contains a ![]() Trident (a weapon for Cid).
Trident (a weapon for Cid).
Continue to the right and climb the vines on the wall leading one level up. The doorway at the top of the vines has a magical barrier blocking entry.
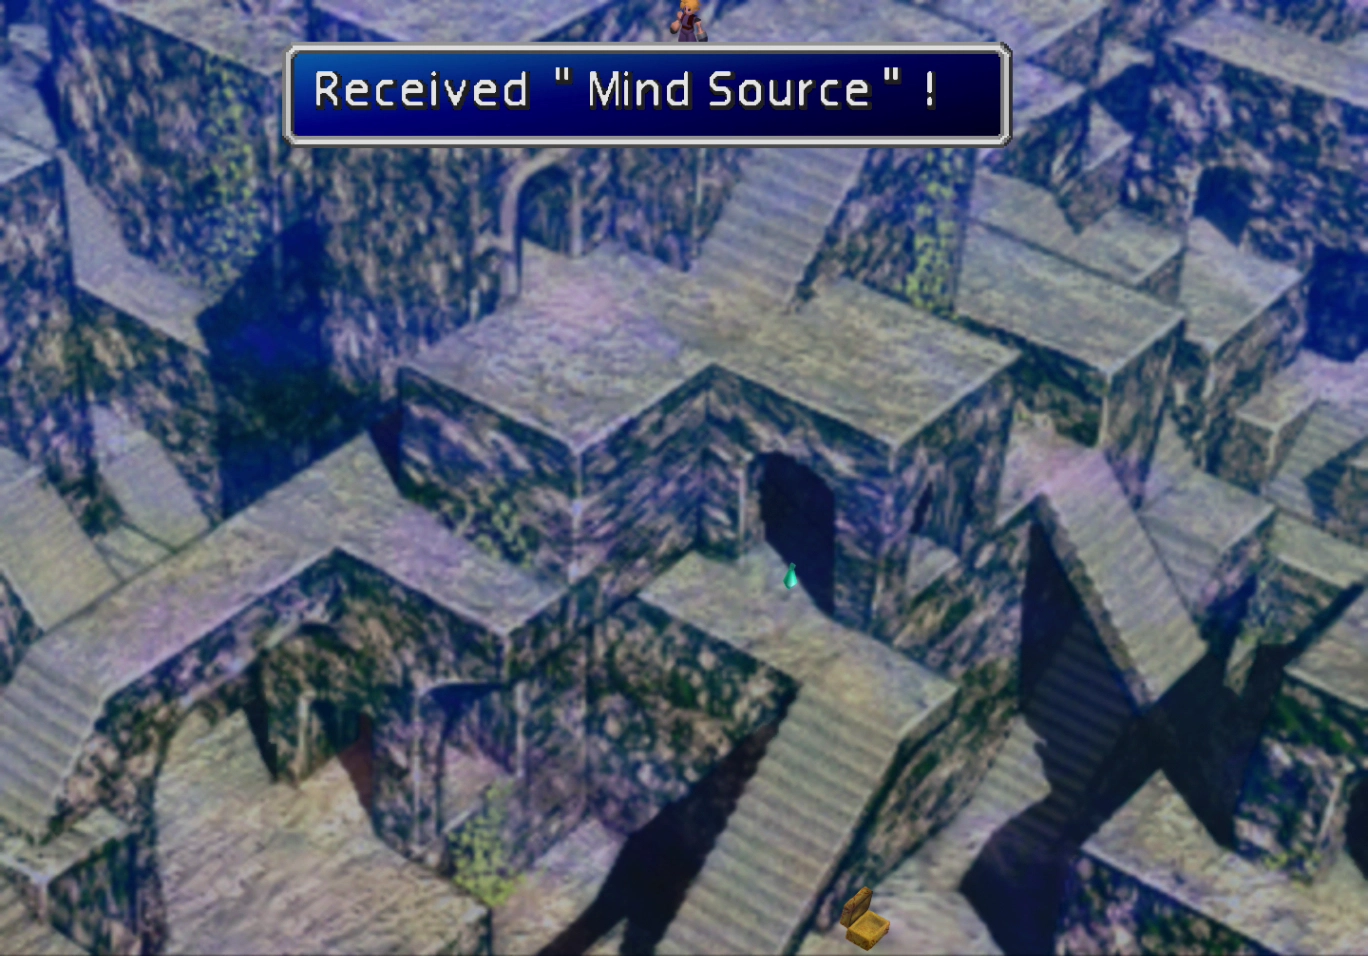
Continue to the left instead of up the stairs, and the small creature will bound away up the vines at the top of the screen. Climb up the vines and grab the ![]() Mind Source sitting on the ground.
Mind Source sitting on the ground.
Go down the ramp and through the doorway to find the strange creature sitting at the back of a small room. The treasure chest in this room contains a ![]() Silver Rifle weapon for Vincent.
Silver Rifle weapon for Vincent.
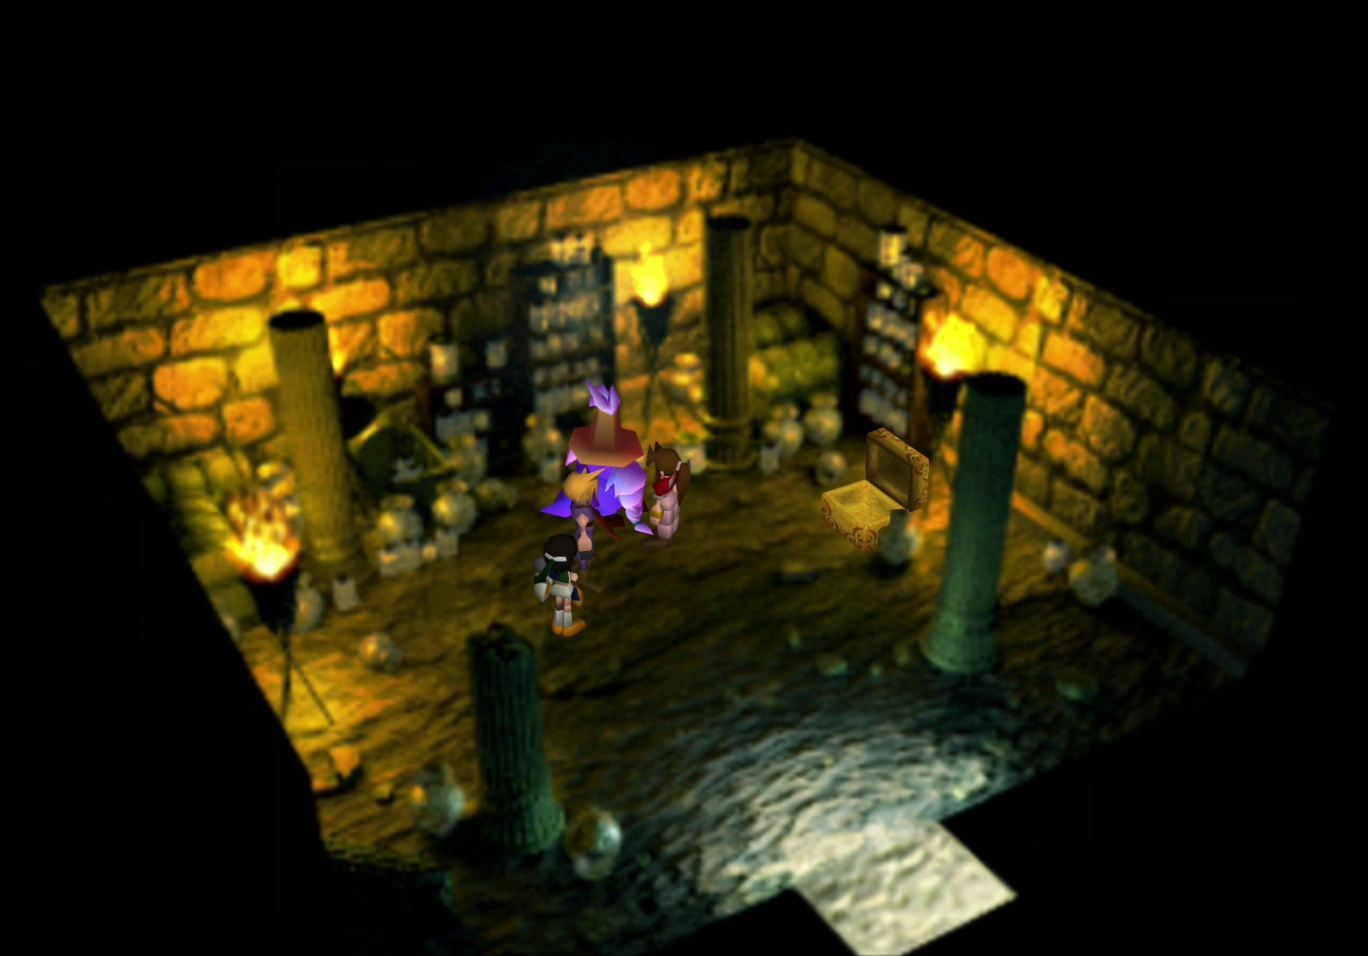
Speak to the purple creature (the spirit body of the ancients) and then speak to it again after Aeris finishes giving you an explanation of what it is. You can buy the following items from it:
You can also rest your characters for an HP and MP refill and save your game.
The next section of the Temple involves following the yellow line. Look for it on the map to help guide you.
Go back up the stairs and take the vines back down to the lower level. Travel through the doorway and pick up the ![]() Turbo Ether lying on the ground.
Turbo Ether lying on the ground.
Go down the long flight of stairs in the center of the labyrinth and then head left. Go down the vines when you get to the left-most section of the screen and grab the treasure chest on the lower level, which contains a ![]() Rocket Punch weapon for Barret.
Rocket Punch weapon for Barret.
Continue to the right, and you will see another purple creature run away from you. Following this creature leads to the end of the labyrinth portion of the Temple of the Ancients (the arrow at the end of the yellow line), but there is still one more item that you should try to obtain.
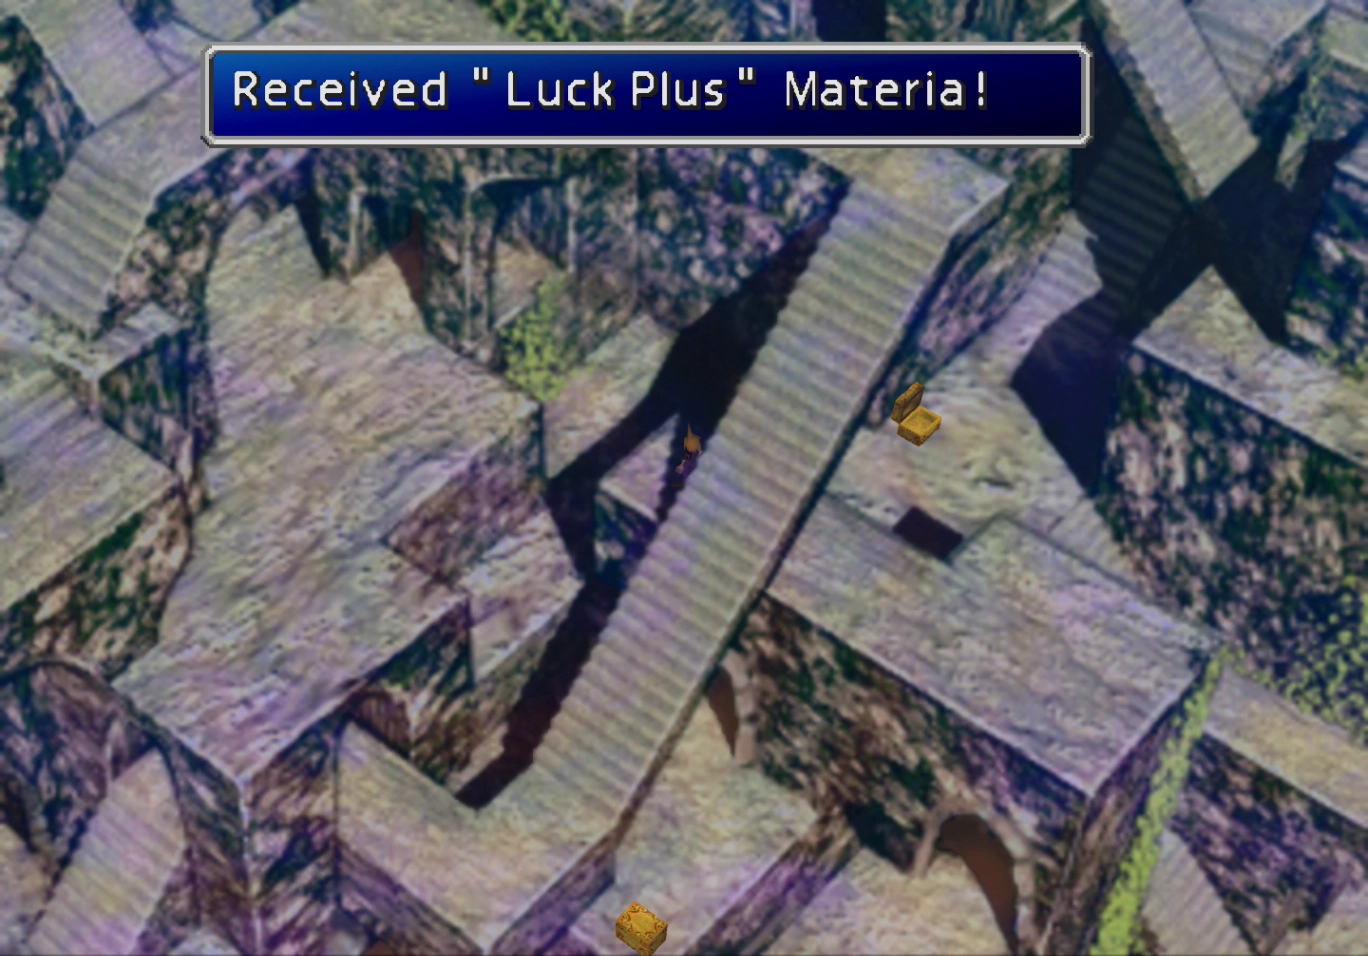
Follow the blue line (shown on the map above) up the stairs, around the ramp, and up the vines. At the end of this pathway, at the top level, is a purple Materia.
The game refers to it as “Lucky Plus Materia,” which is a misspelling of ![]() Luck Plus Materia. They fixed this in subsequent versions of the game.
Luck Plus Materia. They fixed this in subsequent versions of the game.
You cannot obtain the treasure chest in the center of the Temple of the Ancients maze until later on in the game (shown at the bottom of the screenshot above). Ignore it for now.
Travel back down to where the second purple creature went through the doorway to continue the game.
The next area of the Temple features a pathway that has several large boulders rolling from the right side of the screen to the left. To successfully navigate this pathway, you have to time your run so that Cloud fits into the small hole in the rock coming down the path.
The holes land in different areas each time, so you cannot plan to stay in the exact location where the hole in the previous rock landed. It may take some practice to nail down the timing. The video below demonstrates how you should time your run:

A video demonstration of how to successfully get through the hallway in the Temple of the Ancients.
Don’t forget to grab the ![]() Morph Materia sitting at the halfway point.
Morph Materia sitting at the halfway point.
Aeris will take you back to the glowing pool after you make it to the end of the passageway for some more dialog. The purple creature will reappear at the end of the passageway after the short cutscene is over, allowing you to refill your HP and MP and save your game.
Go down the stairs when you are ready to move on.

The Giant Clock Room
You will have control of a large clock in this room. You can use the ![]()
![]()
![]() button to rewind time, use the
button to rewind time, use the ![]()
![]()
![]() button to speed up time and press
button to speed up time and press ![]()
![]()
![]() when you are ready to move towards the next room.
when you are ready to move towards the next room.
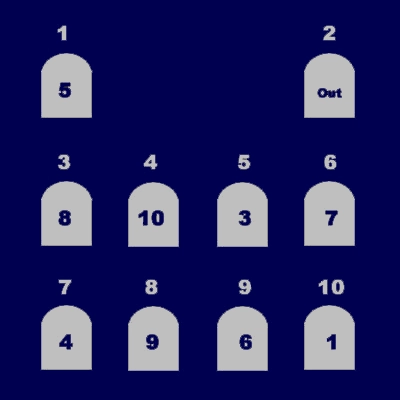
Each of the hours (1 through 12) is a separate doorway that you can travel through that either leads to a treasure or a battle. You can walk along the hour and the minute hand but be careful because the second hand, can knock you off the pathway if it crosses your path.
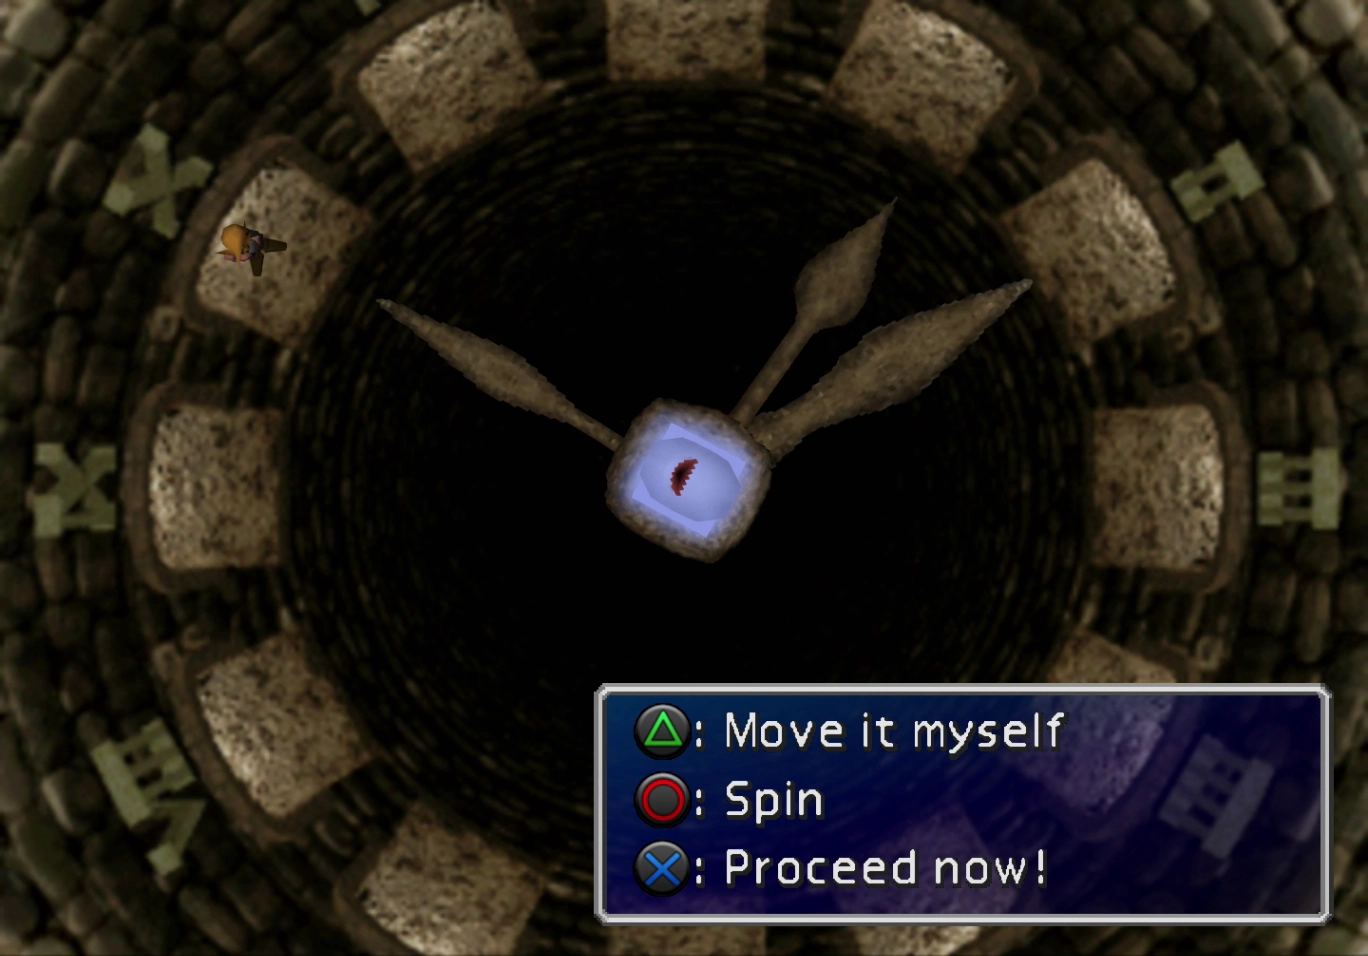
Most of the pathways lead to battles or empty rooms. The ones that lead to treasure are listed below. Rotate the clock so that you can travel to each of the rooms and grab the treasure:
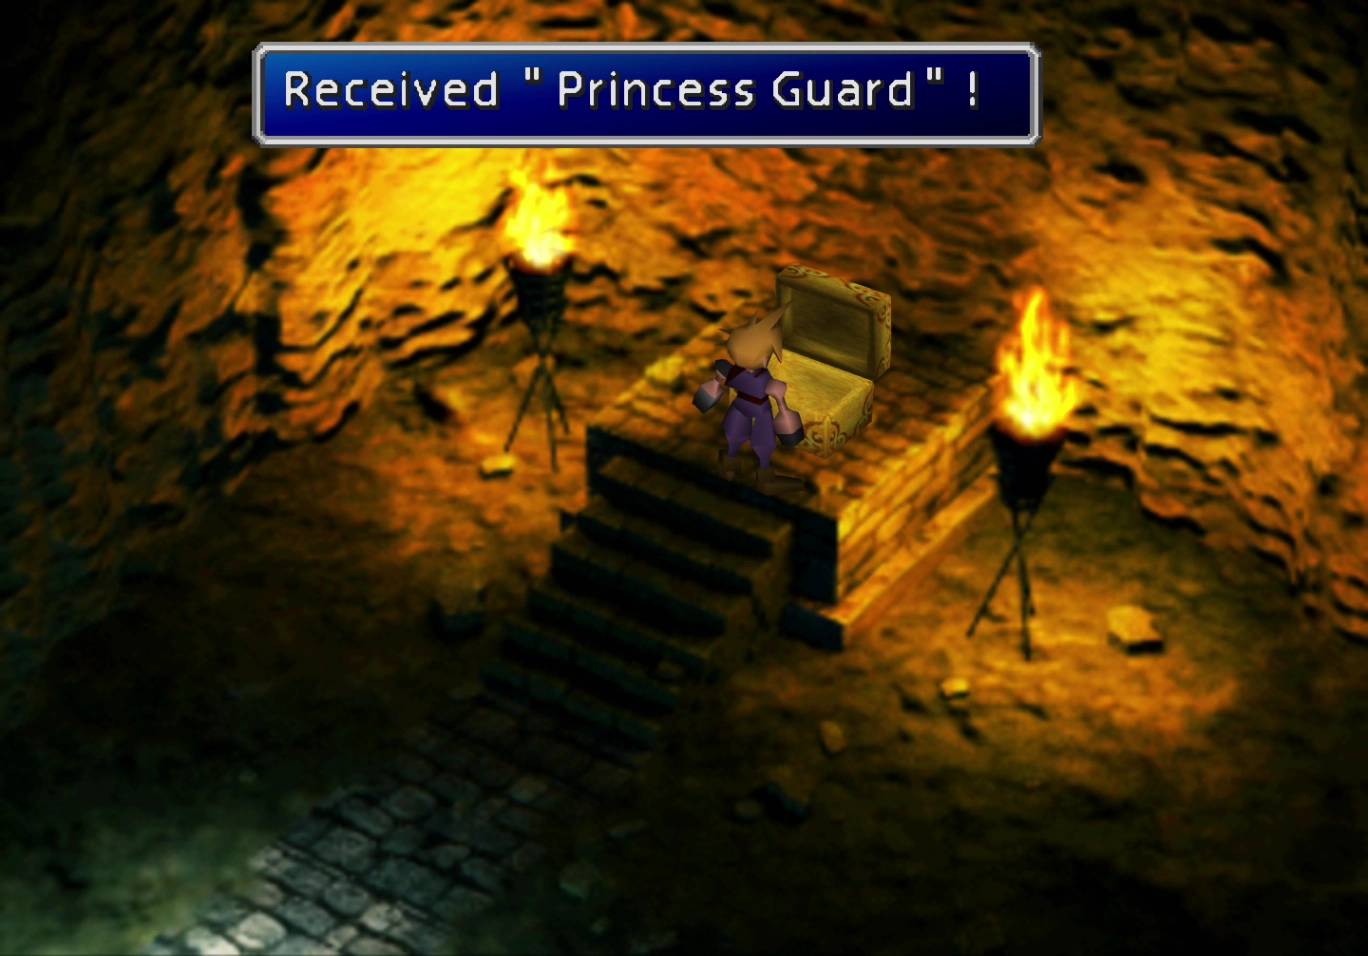
- 4 (IIII instead of IV) contains a treasure chest with a
 Princess Guard weapon for Aeris
 - 5 (V) contains a treasure chest with a
 Ribbon
 - 6 (VI) leads to the next room of the Temple of the Ancients
- 7 (VII) contains a treasure chest with a
 Trumpet Shell weapon for Cait Sith
 - 8 (VIII) contains a treasure chest with a
 Megalixir
If you get knocked off the clock by the second hand, which circles the clock and can hit you, two Ancient Dragons will ambush you, but they are not too difficult to defeat.
You will then get access to a treasure chest that contains a ![]() Nail Bat weapon for Cloud, which has no Materia slots but has very high attack power and is worth picking up (especially for the Wutai side quest if you have not done it already).
Nail Bat weapon for Cloud, which has no Materia slots but has very high attack power and is worth picking up (especially for the Wutai side quest if you have not done it already).
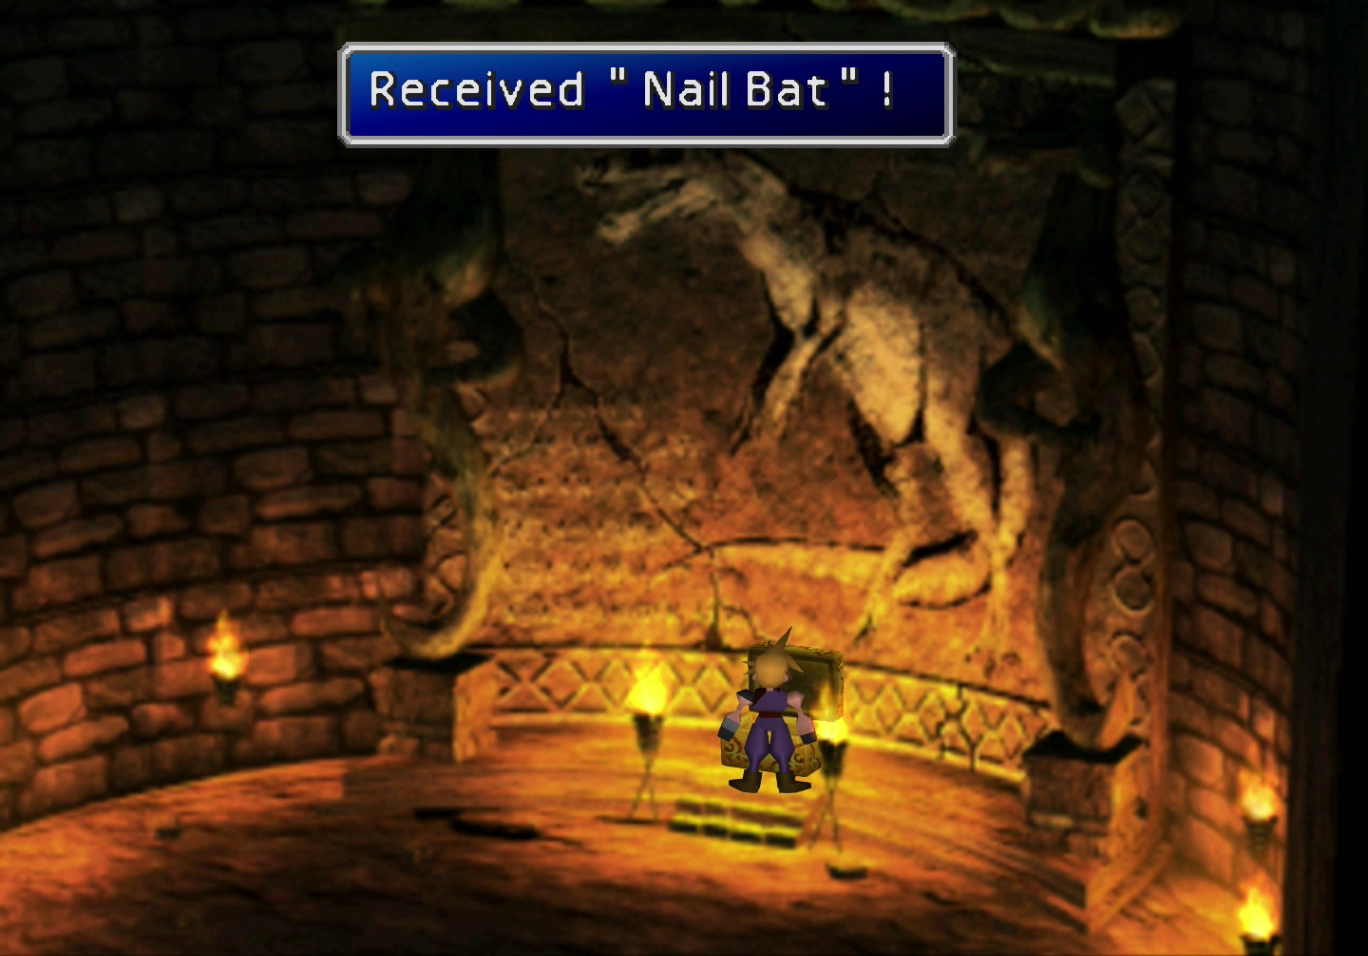
You will reappear in the labyrinth section of the game through the doorway that previously had a magical barrier blocking it and will have to run back. You should fall off the clock to pick up the ![]() Nail Bat.
Nail Bat.
Make sure that you grab the ![]() Princess Guard for Aeris. It has incredibly high attack power compared to some of her other weapons.
Princess Guard for Aeris. It has incredibly high attack power compared to some of her other weapons.
It is her Ultimate Weapon and is the first Ultimate Weapon that you are likely to receive in the game. Check out the Ultimate Weapons guide in the Side Quests section for more information; however, be aware that you cannot obtain any other Ultimate Weapons until much later in the game.
Warning
Be sure to pick up the ![]() Ribbon before leaving, as it is one of the most important and useful Accessories in the game.
Ribbon before leaving, as it is one of the most important and useful Accessories in the game.
Proceed through the door to the south (number 6 / VI) when you are ready to move into the next area.
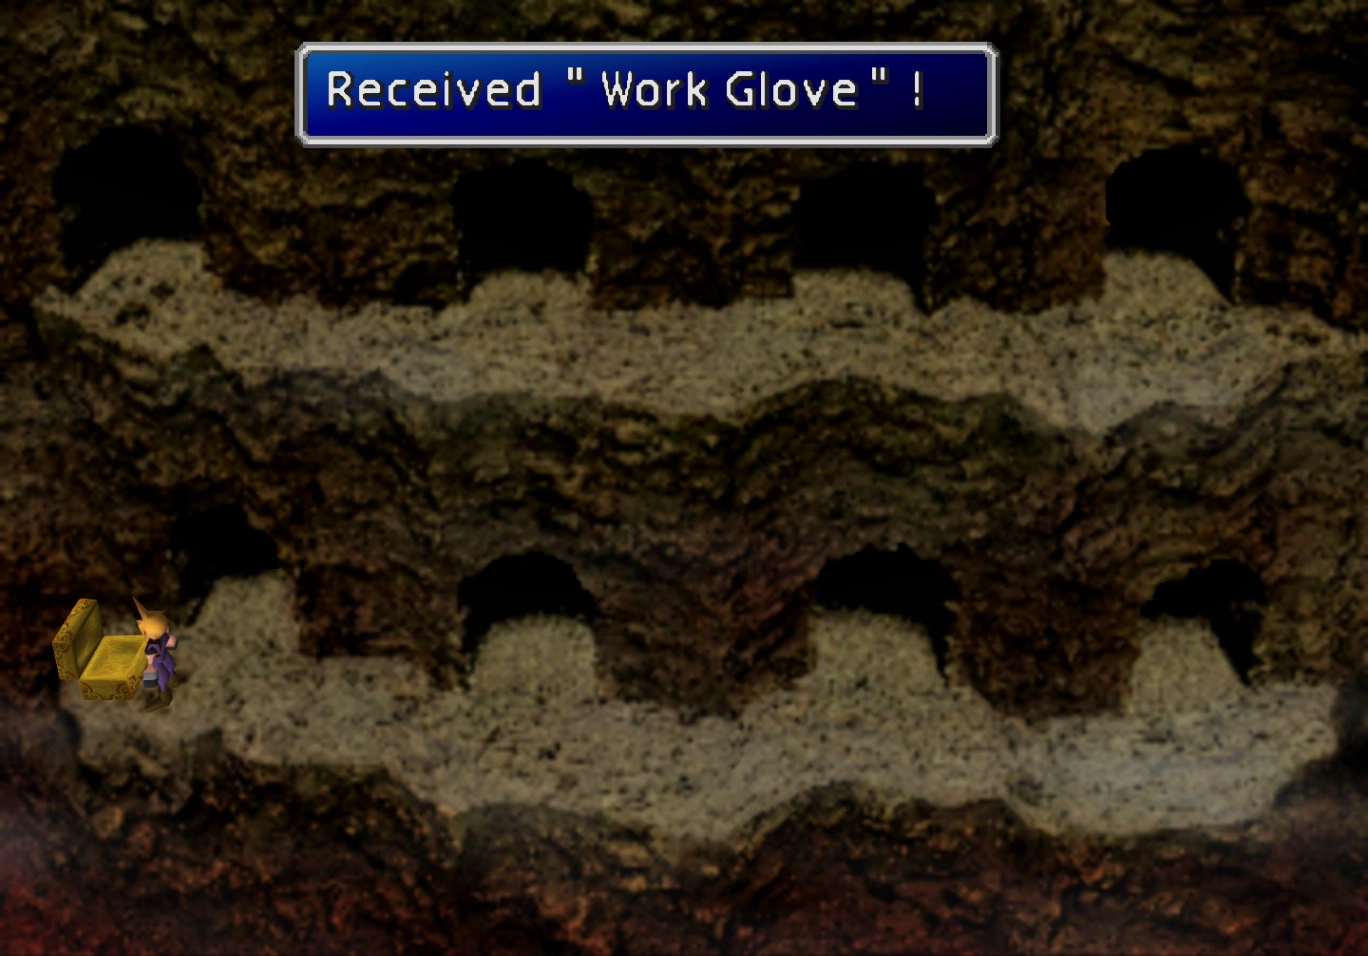
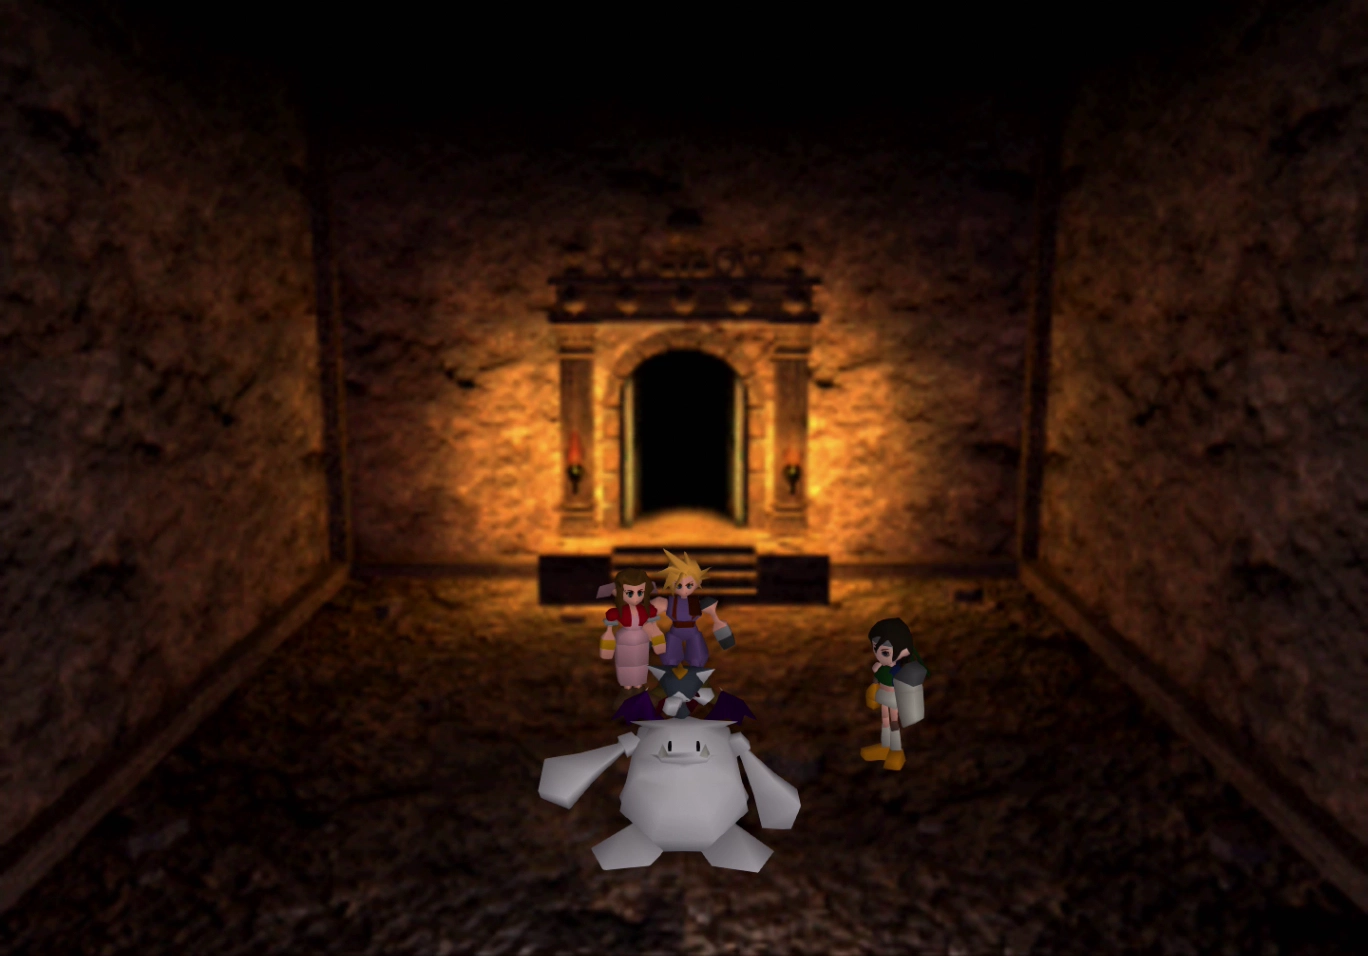
This next room has you chasing around the ‘guard’ creature to get the keys to proceed through the next doorway. You need to go through the door that the creature is about to come out or be waiting at the door as it emerges.
Begin by traveling to the bottom floor to pick up the ![]() Work Glove. You can do this by finding an area on the left side that allows you to jump down to the ledge below by pressing
Work Glove. You can do this by finding an area on the left side that allows you to jump down to the ledge below by pressing ![]()
![]()
![]() . The
. The ![]() Work Glove is another weapon with no Materia slots but high attack power stats.
Work Glove is another weapon with no Materia slots but high attack power stats.
Use the map below to help you find out which door the creature is about to come out of after he goes through one. The number in the middle of the doorway indicates which doorway the creature is about to come out of.
For example, if the creature enters the doorway on the top-left side of the screen (1) it will exit through doorway number 5.
Ensure that your team is fully rested and healed and that you’ve properly equipped your character’s Materia, as you have two boss battles coming up.
Boss Battle
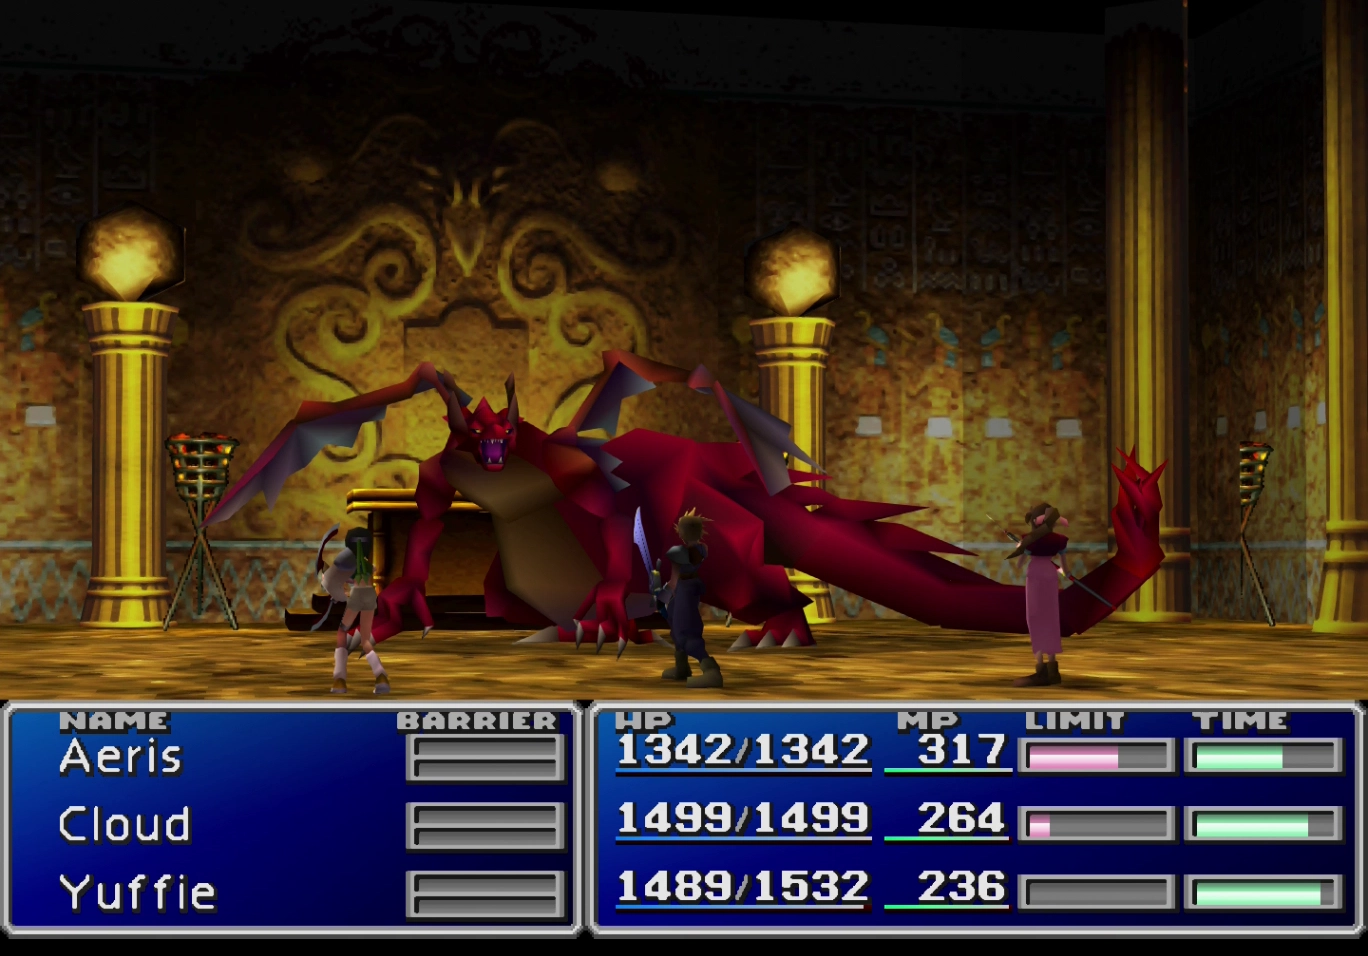
HP: 6,800
Reward: ![]() Dragon Armlet
Dragon Armlet
The first boss fight against the Red Dragon is not too difficult. The Red Dragon is susceptible to ![]() Poison Materia, so cast Bio or Bio2 on it early in the fight.
Poison Materia, so cast Bio or Bio2 on it early in the fight.
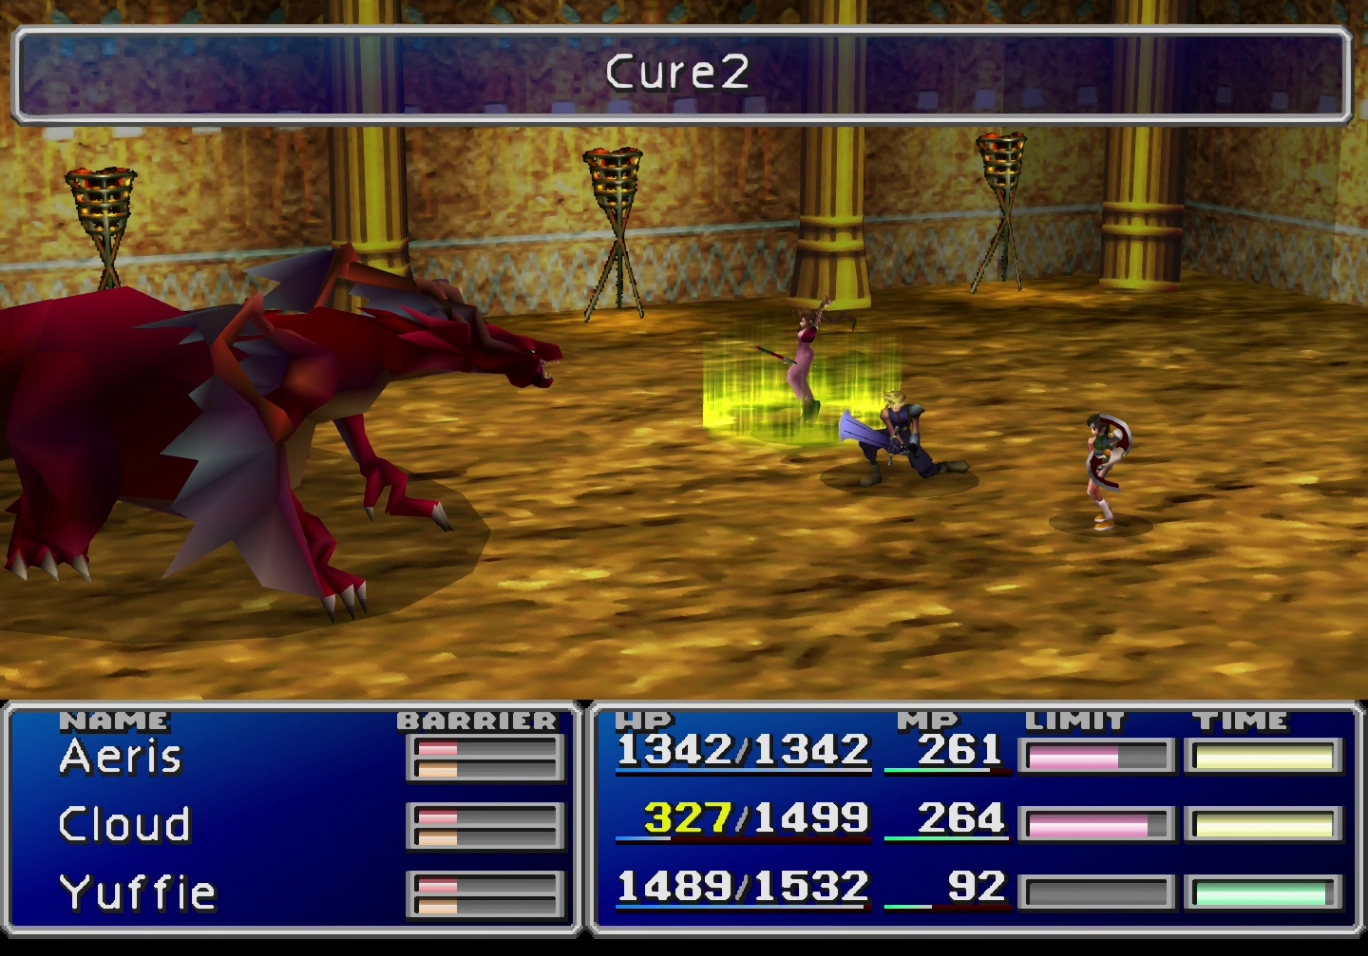
Use “Big Guard” from your ![]() Enemy Skill Materia and keep your characters healed throughout the battle.
Enemy Skill Materia and keep your characters healed throughout the battle.
You can equip one of your characters with the ![]() Fire Ring to reduce some of the fire damage dealt by the Red Dragon, and you can pair a
Fire Ring to reduce some of the fire damage dealt by the Red Dragon, and you can pair a ![]() Fire Materia with an
Fire Materia with an ![]() Elemental Attack Materia on your armor to absorb fire-based attacks. Do not pair these two Materia on your weapon, though, or your regular attacks will heal Red Dragon.
Elemental Attack Materia on your armor to absorb fire-based attacks. Do not pair these two Materia on your weapon, though, or your regular attacks will heal Red Dragon.
A video demonstration of this battle is included below for reference.

A video demonstration of how to successfully complete the fight against Red Dragon.
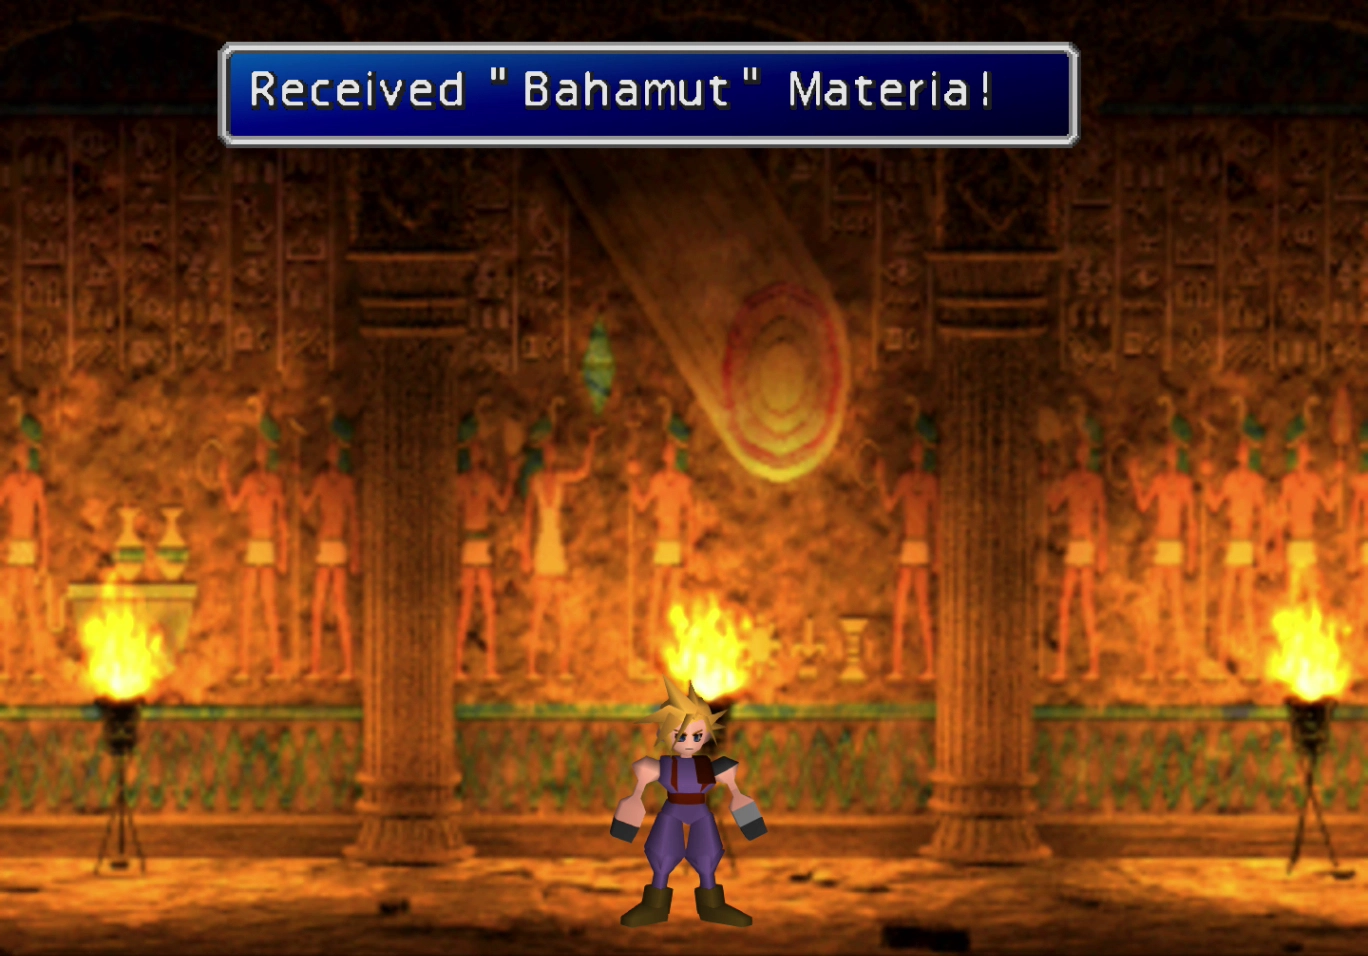
Pick up the ![]() Bahamut Materia that lands on the ground, and make sure to equip the
Bahamut Materia that lands on the ground, and make sure to equip the ![]() Dragon Armlet that dropped on one of your characters (not Aeris). Make sure that you remove any Materia, armor, and accessories from Aeris ahead of the upcoming fight.
Dragon Armlet that dropped on one of your characters (not Aeris). Make sure that you remove any Materia, armor, and accessories from Aeris ahead of the upcoming fight.
Warning
Remove any high-quality armor and unique weapons from Aeris before you continue. All characters have to have some armor equipped, so make sure that you equip Aeris with armor that you can easily replace (stuff that you’ve purchased). You can leave her Materia and accessories equipped.
Put as many characters as you can in the back row for the upcoming boss battle, as it is one of the most challenging fights in the game that you have faced so far. Use your ![]() Long Range Materia to allow one of your characters to do regular attack damage even in the back row (Cloud would be a good choice).
Long Range Materia to allow one of your characters to do regular attack damage even in the back row (Cloud would be a good choice).
Consider building up your Limit Breaks before the fight if you are having difficulty.
Achievement/Trophy
You can obtain the  Waiting in the Wings Achievement/Trophy as long as you don’t forget to grab the Bahamut Materia that drops on the ground.
Achievement/Trophy
To obtain the ![]() Bahamut ZERO Materia later on in the game, which will also give you with the Bahamutype-0 Achievement/Trophy, you need to obtain several items, including the Bahamut Materia that appears when Sephiroth leaves this area.
Bahamut ZERO Materia later on in the game, which will also give you with the Bahamutype-0 Achievement/Trophy, you need to obtain several items, including the Bahamut Materia that appears when Sephiroth leaves this area.
Do not move past this area until you pick up the ![]() Bahamut Materia on the ground, as there is no way to return once you do.
Bahamut Materia on the ground, as there is no way to return once you do.
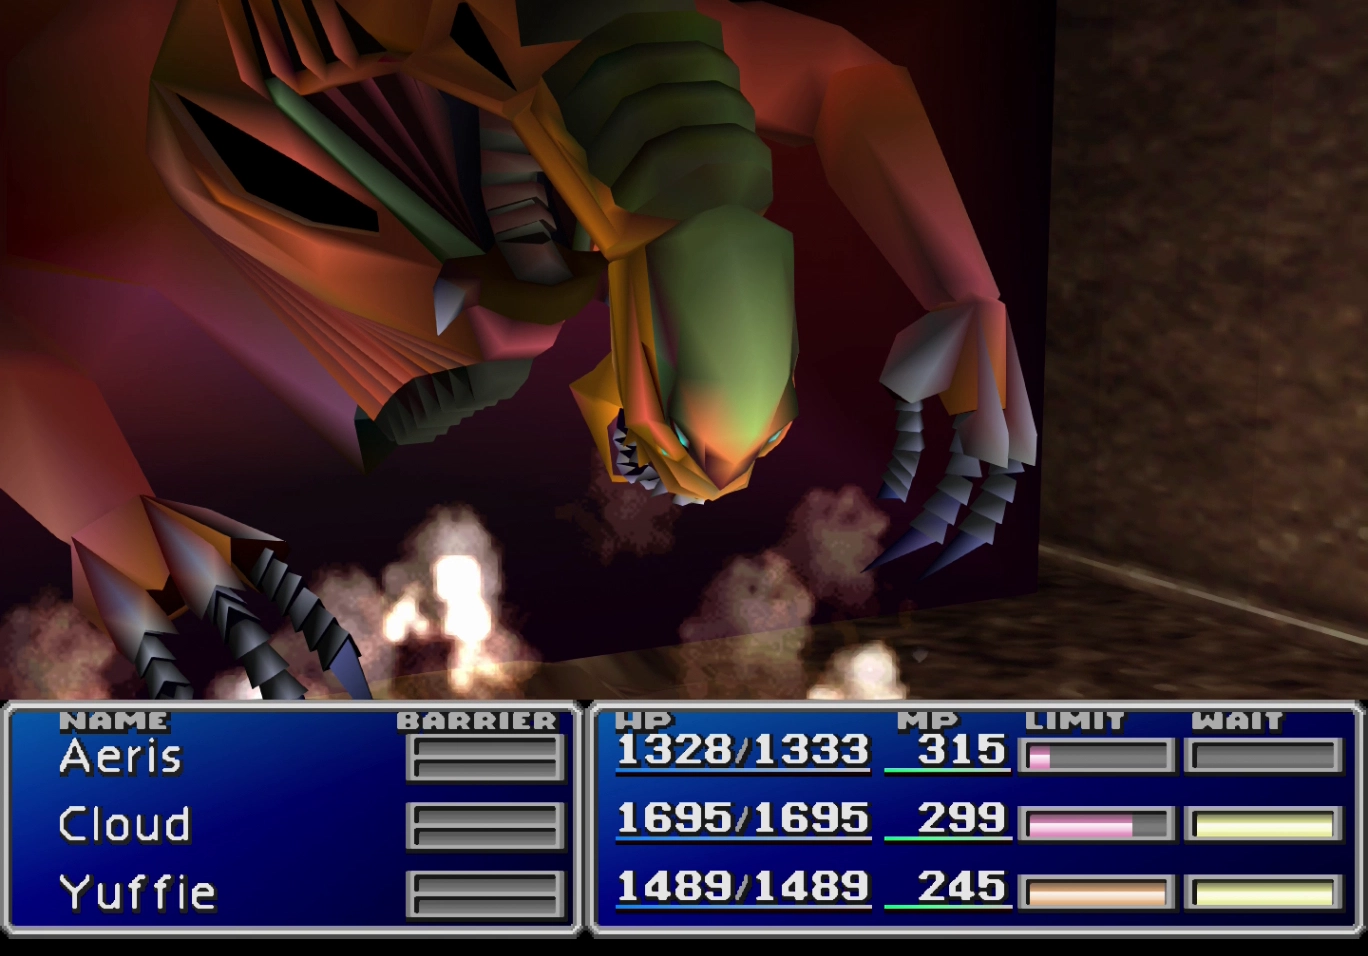
Walk to the right side of the room to find the Black Materia. A few scenes of dialog will occur before you can leave the area. Cross the clock again, and then get ready to begin the next boss battle.
Boss Battle
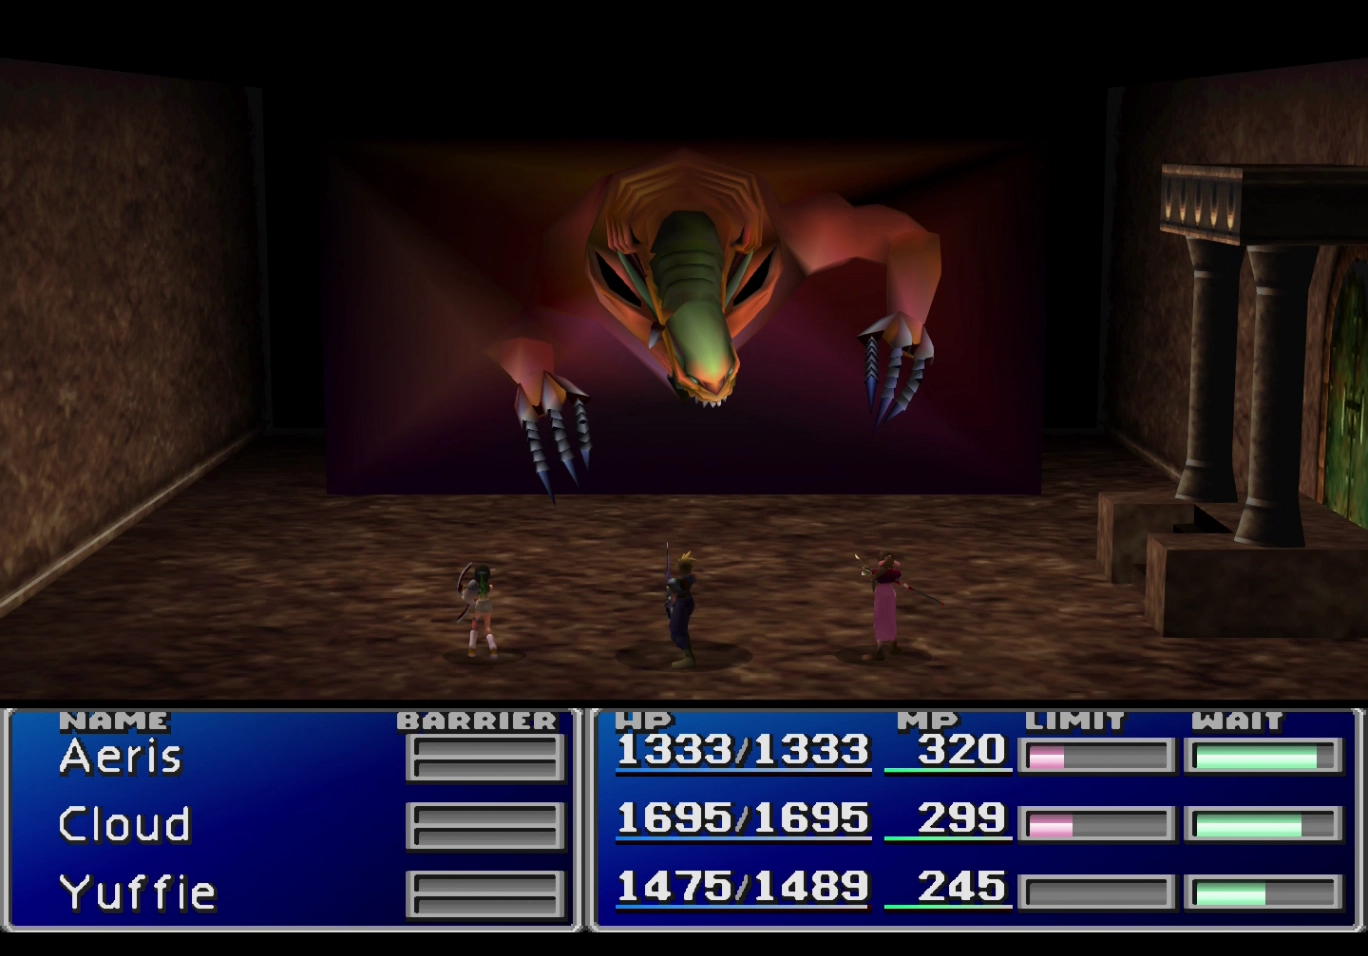
HP: 10,000
Reward: ![]() Gigas Armlet
Gigas Armlet
Your characters should be in the back row (check out the front and back row mechanics section for more information), and you should use “Big Guard” from your ![]() Enemy Skill Materia at the beginning of the battle.
Enemy Skill Materia at the beginning of the battle.
The ![]() Bahamut Summon Materia that you picked up after the boss battle against Red Dragon is also incredibly effective against Demon’s Gate, as it ignores the boss’s high defense stats.
Bahamut Summon Materia that you picked up after the boss battle against Red Dragon is also incredibly effective against Demon’s Gate, as it ignores the boss’s high defense stats.
Use Slow from your ![]() Time Materia if you have one. Demon’s Gate is susceptible to Slow, which significantly reduces the damage that it does.
Time Materia if you have one. Demon’s Gate is susceptible to Slow, which significantly reduces the damage that it does.
This battle is one of the most challenging boss battles in the game, at least up to this point. If you are having trouble completing it, you may have to level up your characters outside in the Temple of the Ancients or the walkway after the battle against the Red Dragon.
A video demonstration of this battle is included below for reference.
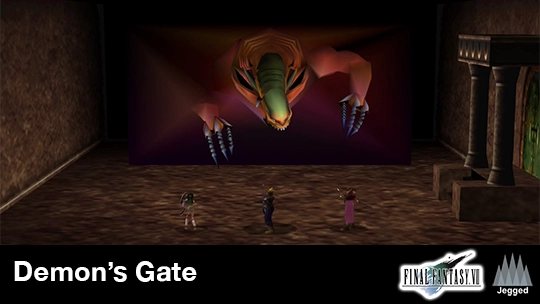
A video demonstration of how to successfully complete the fight against Demon’s Gate.
Cait Sith will shrink the Temple of the Ancients down into the Black Materia, and then Cloud will hand over the Black Materia to Sephiroth, who appears after the Temple shrinks. There are a few more cutscenes before the game continues in Gongaga Village.
Exit Gongaga, and you will find the Tiny Bronco parked a short distance away.
It’s time to make your way to Bone Village.