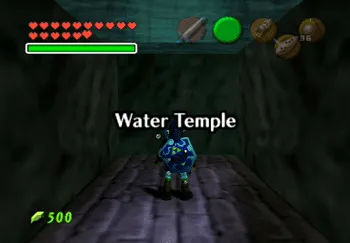
Water Temple
Welcome to the most frustrating dungeon in the game. The Water Temple test the patience of many gamers for a number of reasons. Aside from being a fairly difficult dungeon with a confusing layout, you will have to constantly switch your gear back and forth (equipping and then unequipping the ![]() Iron Boots) every time you need to sink down or swim back up to a surface.
Iron Boots) every time you need to sink down or swim back up to a surface.
The layout and puzzles can be very baffling. If you have found yourself part of the way through the dungeon it is highly encouraged that you read this walkthrough from the start and make sure you have completed all the necessary steps before trying to find whatever step you may be stuck at. So let’s get started…
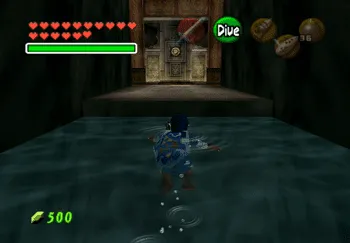
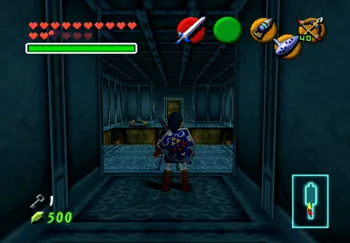
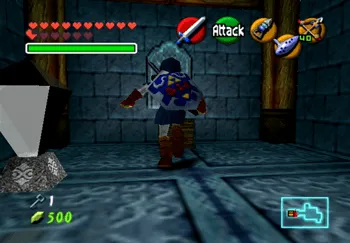
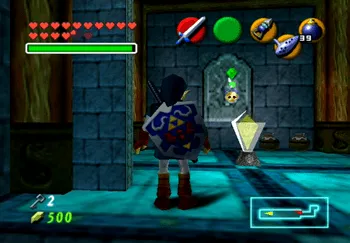
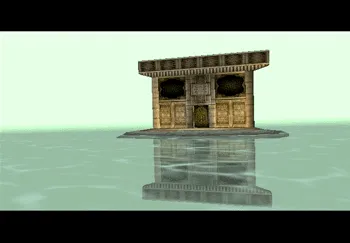
Enter the Water Temple and remove your ![]() Iron Boots to rise to the surface. This huge room is the main room of the dungeon and all the other rooms lead away from this large central area.
Iron Boots to rise to the surface. This huge room is the main room of the dungeon and all the other rooms lead away from this large central area.
It will be referred to as the “main room” going forward. You will also need to “rise” and “sink” by equipping and unequipping your ![]() Iron Boots. References to “rising” and “sinking” imply adjusting your equipment.
Iron Boots. References to “rising” and “sinking” imply adjusting your equipment.
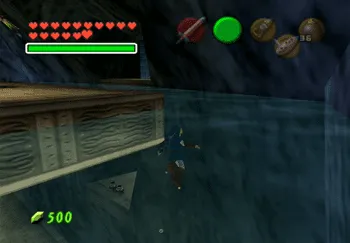
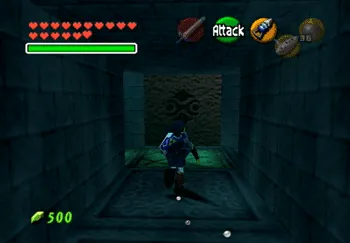
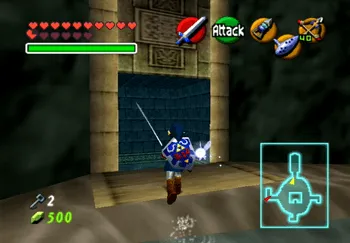
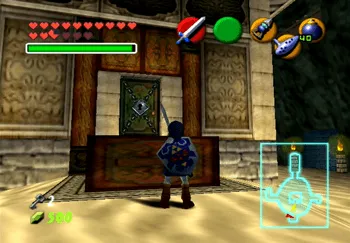
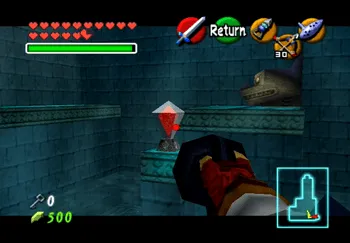
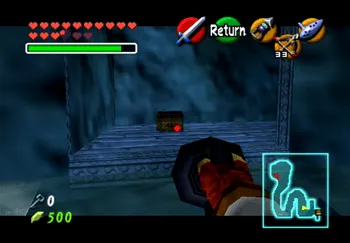
Enter the main room, take a right and swim over to the passageway on that side of the room. Follow the passageway along until you reach the water and then sink down to the bottom. Walk forward until you reach the red block and then pull it backwards as far as you can. Return out to the main room.
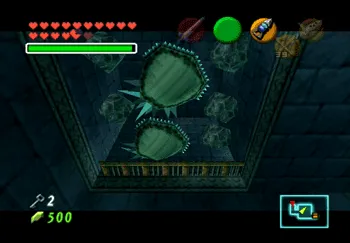
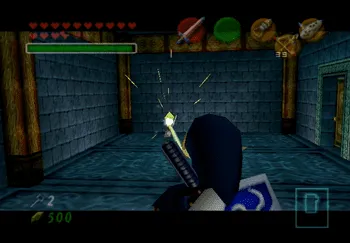
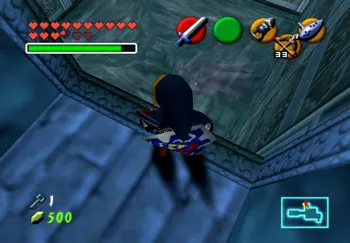
Directly below this platform on the second level of the dungeon is another platform with two pots out in front of it. Jump into the water and equip the ![]() Iron Boots and you should be able to sink down onto the second level. There are four Stingers down this hallway which can only be killed using your
Iron Boots and you should be able to sink down onto the second level. There are four Stingers down this hallway which can only be killed using your ![]() Hookshot.
Hookshot.
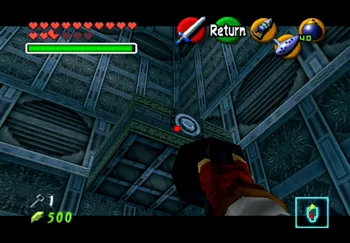
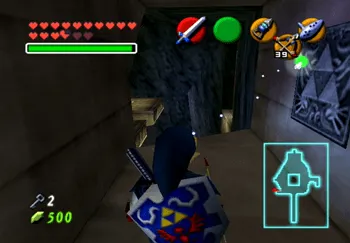
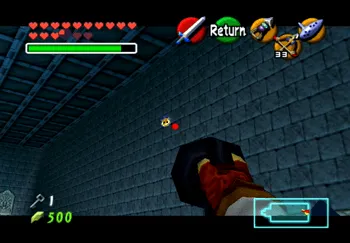
There is a ![]() Hookshot target at the end of the corridor that can be used to get over the spikes. There are more Hookshot targets on the roof that can be used to access the upper level.
Hookshot target at the end of the corridor that can be used to get over the spikes. There are more Hookshot targets on the roof that can be used to access the upper level.
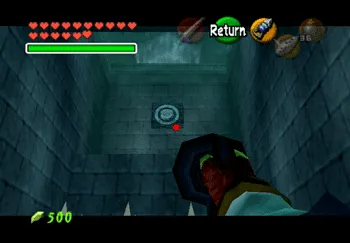
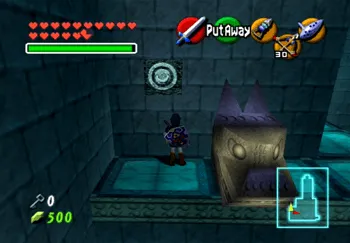
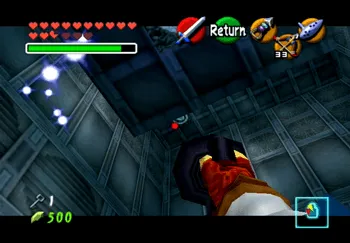
This room contains a crystal switch and a treasure chest blocked off by a water geyser. Hit the crystal switch using your Hookshot from across the room and then open the treasure chest to obtain the Compass. Return to the main room and use the ![]() Iron Boots to sink all the way to the bottom level.
Iron Boots to sink all the way to the bottom level.

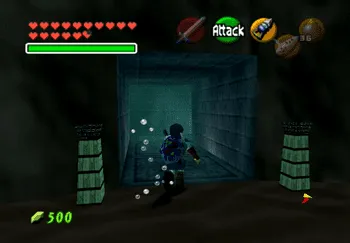
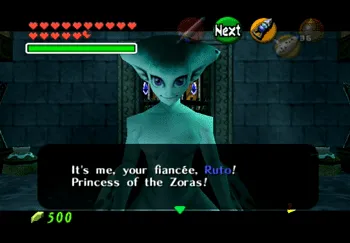
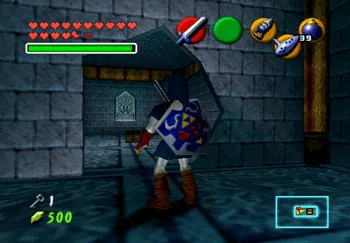
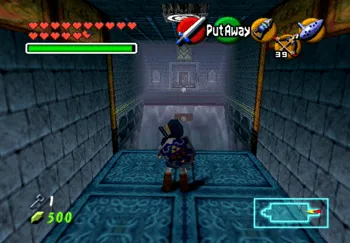
Travel through the doorway just below the previous one – the doorway with two unlit torches in front of it. At the end of the corridor you will run into adult Princess Ruto. Ruto will remind Link of his wedding vows and ask for assistance defeating the “evil monster” in the Water Temple.
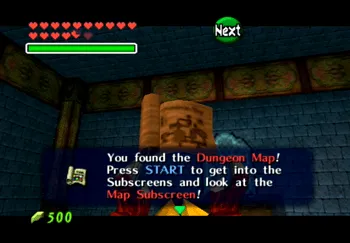
Unequip the ![]() Iron Boots and follow Princess Ruto to the surface. Go through the doorway and defeat Spike enemies to reveal another treasure chest that contains the Dungeon Map. Rest assured that even with the Dungeon Map and the Compass this dungeon is very difficult to navigate.
Iron Boots and follow Princess Ruto to the surface. Go through the doorway and defeat Spike enemies to reveal another treasure chest that contains the Dungeon Map. Rest assured that even with the Dungeon Map and the Compass this dungeon is very difficult to navigate.
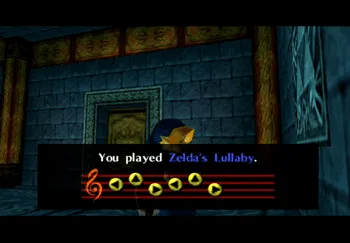
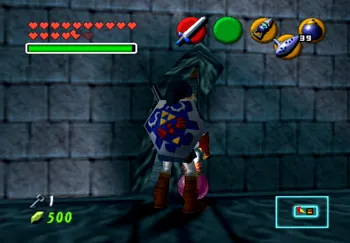
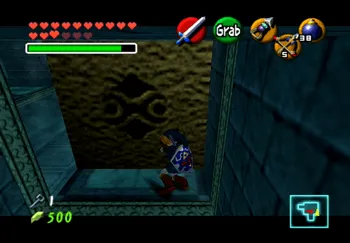
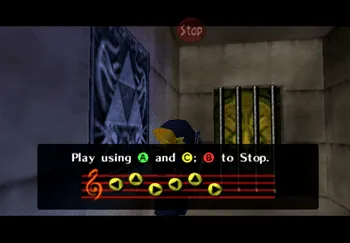
Exit the room and you will notice a Triforce on the southern wall. Pull out the ![]() Ocarina of Time and play Zelda’s Lullaby. This will cause the water level in the entire dungeon to drop down a level.
Ocarina of Time and play Zelda’s Lullaby. This will cause the water level in the entire dungeon to drop down a level.
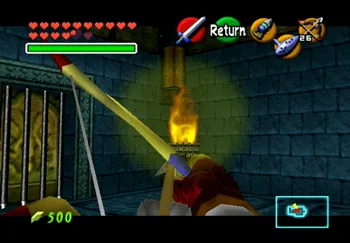
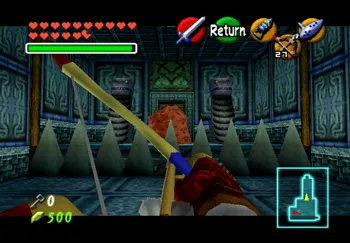
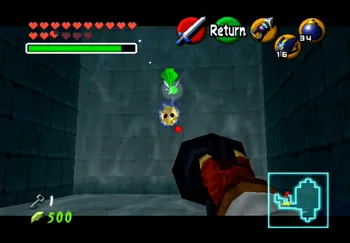
Drop down to the bottom level and break open both of the pots – they both contain arrows. Pull out your ![]() Fairy Bow and shoot arrows through the lit torch at both of the unlit torches.
Fairy Bow and shoot arrows through the lit torch at both of the unlit torches.
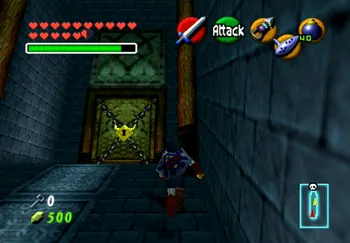
The arrows will carry the fire and light up the unlit torches. Once both of them are lit, the locked door on the east wall will open up. Go through it and into the next room.
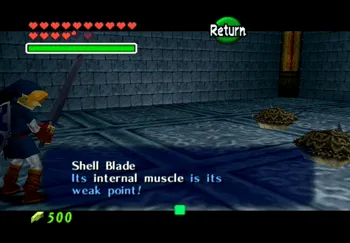
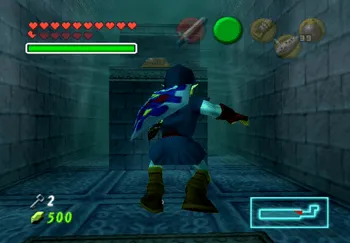
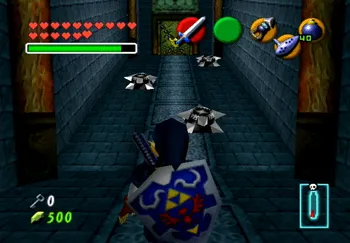
This next room has a new type of enemy called a Shell Blade. Shell Blades cannot be hurt when they lock up their shells. You have to wait for them to open up before attacking them. They tend to open up as they get closer to Link so move in close and then prepare to attack them with your sword.
Defeat all three Shell Blades to make a small treasure chest appear. Open the chest to obtain a Small Key. Head back to the main room (which is now completely devoid of water).
Walk over to the opposite side of the main room (the west side) and push the red block all the way down the corridor. Jump in the water and sink down to where the red block landed, follow the corridor north and then raise up out of the water.
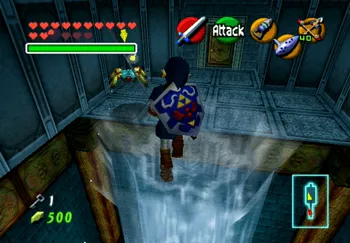
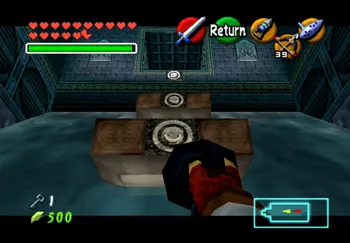
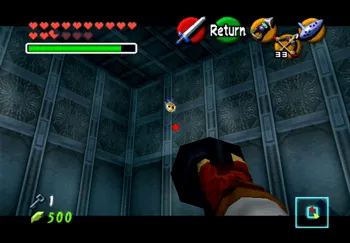
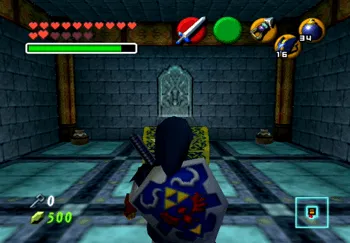
The next room has a huge pit in the center with a crystal switch to the right of the entrance. Hit the switch with your sword and then wait for the pillar of water to rise up. Jump onto the pillar of water and then across to the other side of the room and go through the doorway.
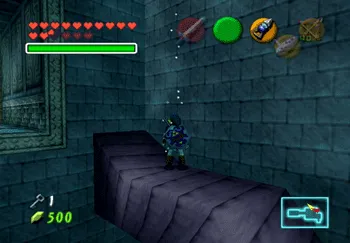
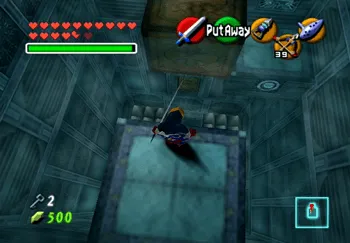
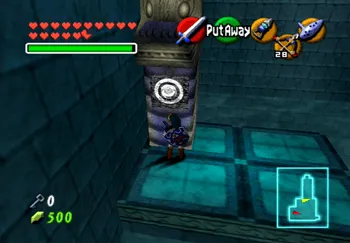
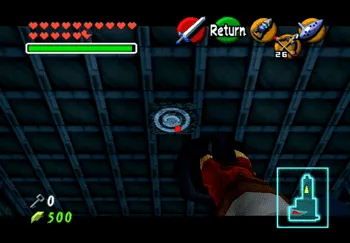
The water in the next room behaves like a whirlpool. Equip the ![]() Iron Boots to sink down to the bottom. You need to do it in such a way though that you land on the platform shown in the screenshot below.
Iron Boots to sink down to the bottom. You need to do it in such a way though that you land on the platform shown in the screenshot below.
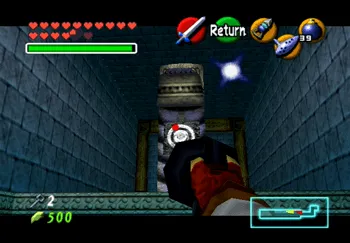
Unequip and re-equip your ![]() Iron Boots to drop Link in the proper spot and then aim the
Iron Boots to drop Link in the proper spot and then aim the ![]() Hookshot towards the dragon statue’s mouth at the crystal switch. Hit the crystal switch and then aim the
Hookshot towards the dragon statue’s mouth at the crystal switch. Hit the crystal switch and then aim the ![]() Hookshot at the target on the right side (west side) of the room.
Hookshot at the target on the right side (west side) of the room.

Unequip the ![]() Iron Boots once you get past the gate (watching out for the Shell Blades) and grab the small treasure chest to obtain another Small Key. Hit the crystal switch in this room, jump into the water, sink down and into the whirlpool room and then unequip the
Iron Boots once you get past the gate (watching out for the Shell Blades) and grab the small treasure chest to obtain another Small Key. Hit the crystal switch in this room, jump into the water, sink down and into the whirlpool room and then unequip the ![]() Iron Boots to rise up to the surface.
Iron Boots to rise up to the surface.
Swim back over to the exit and go into the previous room with the pillar of water. You can use the target on the opposite side of the room as opposed to hitting the crystal switch and jumping back across.
The water level will not be high enough to let you out once you reach the spot where the red block fell down. Use your ![]() Hookshot to get out instead by aiming it up towards the surface at the target near the ledge. Exit this area to get back out to the main room.
Hookshot to get out instead by aiming it up towards the surface at the target near the ledge. Exit this area to get back out to the main room.
Take a right and head to the south side, bottom floor of the main room. Go down the corridor and at the end of the hallway is a crack in the floor. Use a Bomb on the crack to open up a passageway underwater. Sink to the bottom, travel all the way down the passage to the west and then rise back up into the next room.
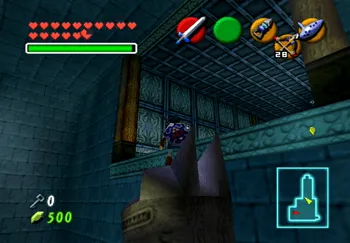
Step on the switch on the platform in the center of the room to raise the water level up and then use the ![]() Hookshot to reach the target on the strange looking stone statue.
Hookshot to reach the target on the strange looking stone statue.
On the west side of the room is a metal cage blocking the pathway with a clearly visible crystal switch on the other side. Your regular ![]() Master Sword,
Master Sword, ![]() Fairy Bow and
Fairy Bow and ![]() Hookshot will not reach the crystal switch, but you have a few options that you can use to hit it. You can:
Hookshot will not reach the crystal switch, but you have a few options that you can use to hit it. You can:
- Take a close up swing at the switch with the
 Biggoron’s Sword which can reach right through
 - Hold the
 button to charge up a magic attack
 - Use
 Din’s Fire
Kill the ![]() Gold Skulltula on the far wall and pick up the token (number 78 of 100). Travel back out to the main room once you have picked up the token.
Gold Skulltula on the far wall and pick up the token (number 78 of 100). Travel back out to the main room once you have picked up the token.
Straight ahead of Link there should be a locked door leading into the central pillar of the main room. Climb up onto the platform and use one of the two Small Keys that you have to enter through this doorway into the central pillar. You now need to climb this central pillar by using the ![]() Hookshot to reach each of the ledges.
Hookshot to reach each of the ledges.
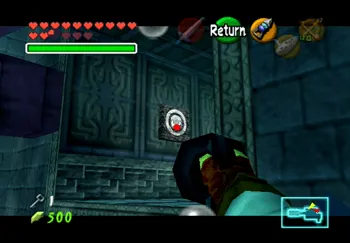
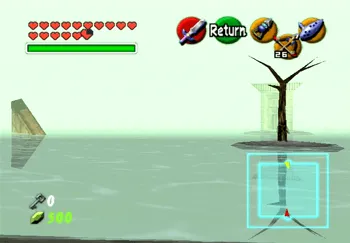
There is another Triforce symbol on the wall of the first ledge that you can reach (on the southern side) shown in the screenshot below. Pull out the ![]() Ocarina of Time and play Zelda’s Lullaby in front of this Triforce to cause the water level to rise up.
Ocarina of Time and play Zelda’s Lullaby in front of this Triforce to cause the water level to rise up.
This will also cause Link to now be submerged in water and no longer be able to stand on the previous platform. Swim over to the platform with the doorway and then look across to the opposite side of the room.
There will be a floating block in front of Link that raised up when the water level was raised. Below that floating block is a secret passageway at the bottom of this central pillar. Equip the ![]() Iron Boots and drop down.
Iron Boots and drop down.
Follow the corridor along until you reach a room with a crystal switch in the corner. Have your ![]() Hookshot ready as a multitude of enemies will drop down as soon as you hit the switch.
Hookshot ready as a multitude of enemies will drop down as soon as you hit the switch.
These enemies need to be killed in order to move forward, so hit the switch whenever you are ready. A gate will release in the southeastern corner of the room. Rise up to the room above and open up the small treasure chest to obtain another Small Key. Return to the previous room and exit.
Equip the ![]() Iron Boots and sink back down to the lower level and go east through the passageway that you went through to meet up with Princess Ruto previously (the one with the two unlit torches in front of it).
Iron Boots and sink back down to the lower level and go east through the passageway that you went through to meet up with Princess Ruto previously (the one with the two unlit torches in front of it).
Rise up to the second level to find a wall with a huge crack in it. Place a ![]() Bomb in front of the crack to blow up the wall and then open up the treasure chest inside to obtain another Small Key.
Bomb in front of the crack to blow up the wall and then open up the treasure chest inside to obtain another Small Key.
Return to the main room and go to the west side of the central pillar to find a locked door. Use one of the Small Keys to go through the locked doorway to find another crystal switch and a pillar of water.
Stand on the pillar of water but then notice that the sound of a Blue Tektite (spider) enemy jumping around. Move away from the water pillar and wait for the Blue Tektite to drop down and then destroy it – otherwise it will hit you as you try to reach the next room.

Stand on the pillar of water and fire and arrow at the crystal switch to rise up into the next room. Go through the doorway at the top of the room which leads back out to another area of the main room with a Triforce on the side wall. Pull out your ![]() Ocarina of Time and play Zelda’s Lullaby to raise the water level back up to the highest level.
Ocarina of Time and play Zelda’s Lullaby to raise the water level back up to the highest level.
There is a locked door which you can now get through on the west side of the main room. Watch out for the two Keese Bats hanging off the walls right near the entrance. The platforms on the opposite side of this room slowly scroll downwards to the bottom put in the center of the room.
Each of them has a ![]() Hookshot target on them though, so the objective of this room is to quickly
Hookshot target on them though, so the objective of this room is to quickly ![]() Hookshot up from platform to reach the top of the other room. Drop down to the lowest platform on the east side and then quickly reach the opposite of the room. Go through the locked doorway once you reach it.
Hookshot up from platform to reach the top of the other room. Drop down to the lowest platform on the east side and then quickly reach the opposite of the room. Go through the locked doorway once you reach it.
The next room is loaded with Blue Tektites. Take care of them using your ![]() Fairy Bow before you proceed with the next steps. Use the
Fairy Bow before you proceed with the next steps. Use the ![]() Hookshot to hit the crystal switch in the center of the room.
Hookshot to hit the crystal switch in the center of the room. ![]() Hookshot over to the platform on the southwest side of the room.
Hookshot over to the platform on the southwest side of the room.
Hit the crystal switch again to lower the water level. ![]() Hookshot over to the northern platform by aiming at the Hookshot target to the left of the statue target. Climb over the statue on this platform.
Hookshot over to the northern platform by aiming at the Hookshot target to the left of the statue target. Climb over the statue on this platform.
Hit the crystal switch again and then ![]() Hookshot eastward onto the final platform. Hit the crystal switch again and then hop onto the head of the stone statue. Hit the crystal switch one more time to cause the statue to rise while Link is standing on it, raising him up to the upper platform.
Hookshot eastward onto the final platform. Hit the crystal switch again and then hop onto the head of the stone statue. Hit the crystal switch one more time to cause the statue to rise while Link is standing on it, raising him up to the upper platform.
There are two Blue Tektites to kill up here along with a Like Like. It is recommended that you use your ![]() Fairy Bow to kill the Like Like and then
Fairy Bow to kill the Like Like and then ![]() Hookshot over the spikes using the
Hookshot over the spikes using the ![]() Hookshot target above where the Like Like was sitting. Go through the doorway to begin one of the most infamous battles in Legend of Zelda: Ocarina of Time…
Hookshot target above where the Like Like was sitting. Go through the doorway to begin one of the most infamous battles in Legend of Zelda: Ocarina of Time…
Dark Link
Approach the doorway on the far side of the room and then turn around to make Dark Link appear near the lone tree in the center of the pool. The premise of this fight is that you will be battling against an enemy who knows all of Link’s attacks and has the same strengths and weaknesses that he does.
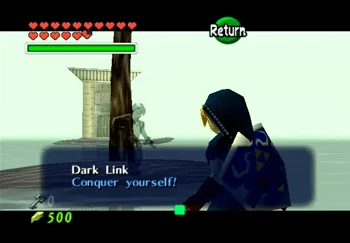
Dark Link has as many hearts as Link does and you will have to hit him over and over again if you have been obtaining all the Heart Pieces and follow this strategy guide (which means up to potentially 16 hits to defeat him).

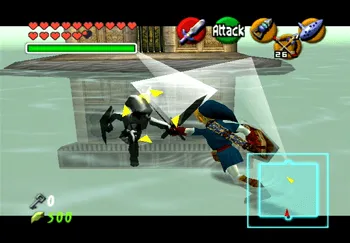
There are a variety of strategies that can be used to defeat him. L or ![]() Targeting can be extremely ineffective as Dark Link will counter nearly every attack by doing the same attack, causing both swords to clash.
Targeting can be extremely ineffective as Dark Link will counter nearly every attack by doing the same attack, causing both swords to clash.
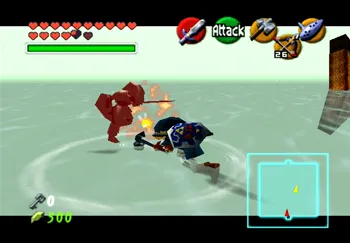
An effective method for getting around this is to avoid L or ![]() Target and to run towards Dark Link swinging your sword. This will reduce the likelihood of him countering Link’s attacks.
Target and to run towards Dark Link swinging your sword. This will reduce the likelihood of him countering Link’s attacks.
Alternative, more underhanded strategies, include using the ![]() Megaton Hammer, using magic (such as the spin attack or
Megaton Hammer, using magic (such as the spin attack or ![]() Din’s Fire) or using
Din’s Fire) or using ![]() Biggoron’s Sword.
Biggoron’s Sword.
Use the Biggoron’s Sword strategy in the same way that you would use a regular attack strategy – charge in at Dark Link without L or ![]() Targeting and swing like mad. You will hit him and he will hit you, but his attacks will only take off a quarter of a heart, so you will come out on top every time.
Targeting and swing like mad. You will hit him and he will hit you, but his attacks will only take off a quarter of a heart, so you will come out on top every time.
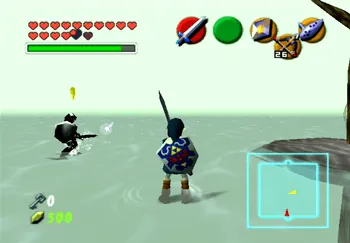
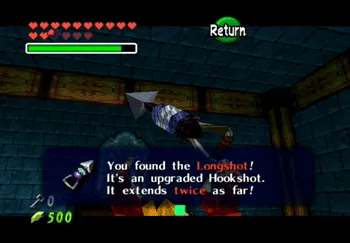
Go through the doorway on the north side of the room after you defeat Dark Link to find a treasure chest that contains a new item called the ![]() Longshot which replaces the
Longshot which replaces the ![]() Hookshot. It functions in exactly the same way but it extends twice as far as the
Hookshot. It functions in exactly the same way but it extends twice as far as the ![]() Hookshot.
Hookshot.
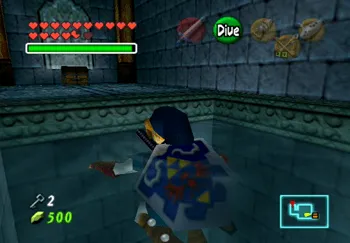
The block on the north side of the room behind the treasure chest is a stone of time. Pull out the ![]() Ocarina of Time and play the Song of Time to move the stone out of the way. Drop down below.
Ocarina of Time and play the Song of Time to move the stone out of the way. Drop down below.
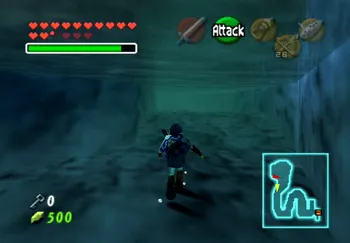
Swim down the water channel and be careful to dodge the whirlpools. Use the ![]() Iron Boots near the second whirlpool as there is a
Iron Boots near the second whirlpool as there is a ![]() Gold Skulltula hanging from the wall right beside it.
Gold Skulltula hanging from the wall right beside it.
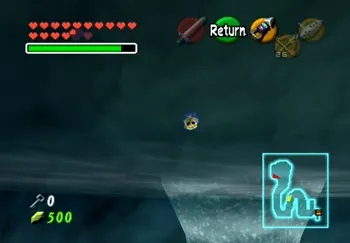
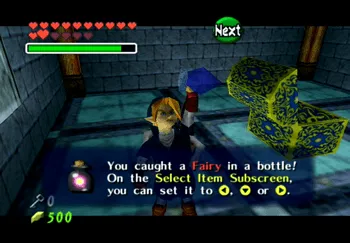
Destroy it with the ![]() Longshot and obtain the token (number 79 of 100). There is a platform with two pots near the two whirlpools further down – one of the pots contains a Pink Fairy.
Longshot and obtain the token (number 79 of 100). There is a platform with two pots near the two whirlpools further down – one of the pots contains a Pink Fairy.
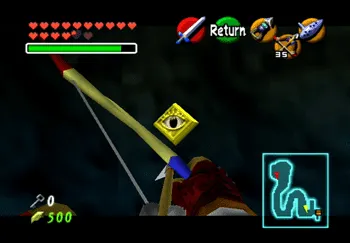
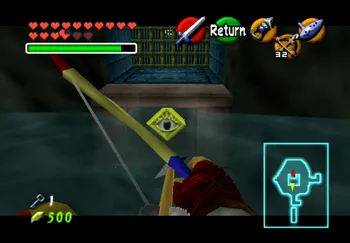
Use the ![]() Iron Boots to reach the platform across from the golden eye. Hit the golden eye with the
Iron Boots to reach the platform across from the golden eye. Hit the golden eye with the ![]() Fairy Bow and then use the
Fairy Bow and then use the ![]() Longshot and aim for the treasure chest to quickly get through to the other side of the doorway.
Longshot and aim for the treasure chest to quickly get through to the other side of the doorway.
Open up the treasure chest to obtain another Small Key. Continue down the corridor to reach the room with the dragon statue and whirlpool inside it. Go through the room and back out into the main corridor.
Float back up to the top of the main room and go through the door on the west side of the screen again. This should be the room with the moving platforms that you had to ![]() Longshot onto.
Longshot onto.
On the northern wall you will find a ![]() Gold Skulltula hanging out. You can reach this Gold Skulltula now with the
Gold Skulltula hanging out. You can reach this Gold Skulltula now with the ![]() Longshot. Hit it and collect the token (number 80 of 100).
Longshot. Hit it and collect the token (number 80 of 100).
Go back to the main room, sink down using the ![]() Iron Boots and go through the passageway leading to where you met up with Princess Ruto (the one with the two unlit torches out front). Float back up to the Triforce and play Zelda’s Lullaby to lower the water level again.
Iron Boots and go through the passageway leading to where you met up with Princess Ruto (the one with the two unlit torches out front). Float back up to the Triforce and play Zelda’s Lullaby to lower the water level again.
Re-enter the central pillar in the main room again using the doorway on the south side. Use the ![]() Longshot to get up to the next level and play Zelda’s Lullaby in front of the Triforce to raise the water level back up.
Longshot to get up to the next level and play Zelda’s Lullaby in front of the Triforce to raise the water level back up.

Aim for one of the targets to jump across or you can use the ![]() Longshot targets on the roof in the central pillar to lift Link up to one of the upper platforms. This should bring you close enough to target and destroy the
Longshot targets on the roof in the central pillar to lift Link up to one of the upper platforms. This should bring you close enough to target and destroy the ![]() Gold Skulltula on the southern wall to obtain another token (number 81 of 100).
Gold Skulltula on the southern wall to obtain another token (number 81 of 100).
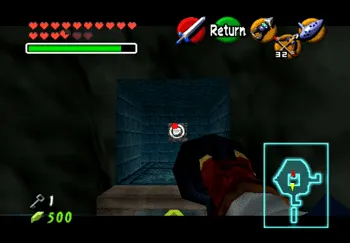
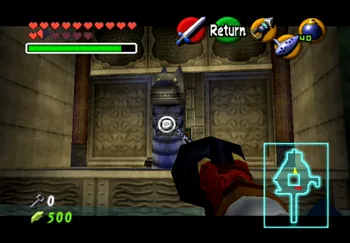
Travel to the south side of the central pillar in the main room. You should see a locked door with a golden eye below it. Hit the golden eye with an arrow from your ![]() Fairy Bow and then use the
Fairy Bow and then use the ![]() Longshot to get through the gate before the timer runs out.
Longshot to get through the gate before the timer runs out.
Head down the pathway until you reach the red block which you can push backwards down the path. Enter the adjacent room to find another treasure chest with a Small Key.
Go back to the main room and sink down to the bottom level. Go through the doorway on the north side of the dungeon and proceed down the corridor. ![]() Longshot up onto the platform and then look northward for another
Longshot up onto the platform and then look northward for another ![]() Longshot target. Longshot over to the target and use a Small Key on the locked door.
Longshot target. Longshot over to the target and use a Small Key on the locked door.
Kill all the Blue Tektites if you can with your ![]() Fairy Bow. Swim across the channel of water and go through the doorway on the opposite side. Drop down into the next room, kill the Stingers, and then use a
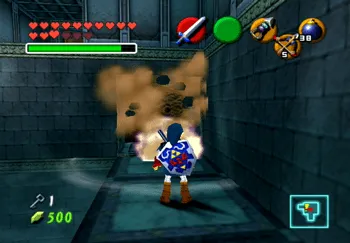
Fairy Bow. Swim across the channel of water and go through the doorway on the opposite side. Drop down into the next room, kill the Stingers, and then use a ![]() Bomb on the wall of multicolored bricks on it in the southwest corner of the room.
Bomb on the wall of multicolored bricks on it in the southwest corner of the room.
Go down the corridor and push the brown block as far as it will go. There is another wall in the southeast corner of the room that can also be destroyed with a ![]() Bomb (the one with the crack in it). Blow it up and then continue pulling the brown block out onto the platform.
Bomb (the one with the crack in it). Blow it up and then continue pulling the brown block out onto the platform.
The goal of this puzzle is to push the brown block into the hole where the switch is located (underwater). This will cause the water level in the room to rise giving you access to the doorway on the west side of the room.
The next room is fairly straight forward. Stand on the switch and then use the water pillars to reach the opposite side. Wait for a boulder to go rolling down the water channel and then equip your ![]() Iron Boots, jump into the water, face west and destroy the
Iron Boots, jump into the water, face west and destroy the ![]() Gold Skulltula hanging on the wall. Grab the token with the
Gold Skulltula hanging on the wall. Grab the token with the ![]() Longshot as well (number 82 of 100).
Longshot as well (number 82 of 100).

Follow the pathway west by sinking down into the lower corridor and then rising back up once you reach the end of the path headed west. Use the Small Key to get through the doorway and into the final room which contains the Boss Key.
The pots in this room contain Pink Fairies so restock your Bottles if needed. Travel all the way back out to the main room.
Go through the doorway on the west side. These are all rooms which you have traveled through before. Go through each of them until you end up at the Triforce at the top of the dungeon and then play Zelda’s Lullaby to raise the water level up to the top level.
Travel to the north side of the central pillar and look for a statue that has risen up with the rising water level. Use the ![]() Longshot to reach the target attached to it and then go through the doorway behind the statue.
Longshot to reach the target attached to it and then go through the doorway behind the statue.
Note that the two pots here also contain Pink Fairies so stock up if you have not already. Go through the doorway when you are ready.
The next room contains a number of spikes sliding slowly back and forth on the pathway leading up to the boss door. You can climb up to the top, albeit very slowly, so be cautious about the path you choose and run straight up or you will slide back down. Your best bet is to stand on one of the sides and continue running straight. Go through the Boss Door at the top once you reach it.
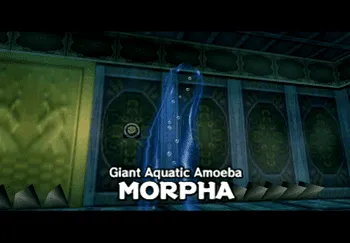
Morpha
Giant Aquatic Anemone
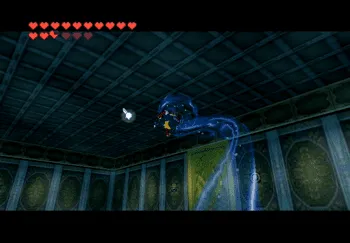
Jump onto one of the central platforms in the middle of the water to begin the opening cinematic and begin the boss fight. You need to attack the nucleus in order to actually do damage to Morpha.
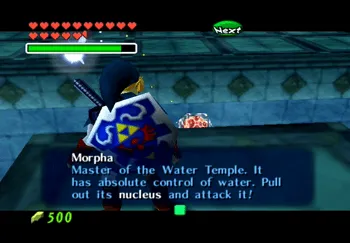
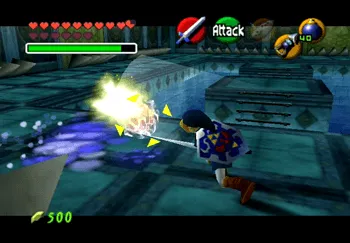
Use the ![]() Longshot to pull the nucleus close to you and then swing at it with your sword. Just be careful not to let it touch you when it morphs into its water form as it does a ton of damage that way. This boss does not take too many hits to destroy.
Longshot to pull the nucleus close to you and then swing at it with your sword. Just be careful not to let it touch you when it morphs into its water form as it does a ton of damage that way. This boss does not take too many hits to destroy.
Make sure that you grab the Heart Container and then hop into the portal. That’s it for the Water Temple!

Princess Ruto will give Link the ![]() Medallion of Water and the waters of Lake Hylia will rise back up.
Medallion of Water and the waters of Lake Hylia will rise back up.