Forest Temple
Note: Getting stuck in one of the temples or dungeons can be an extremely frustrating experience. If you have found yourself stuck part way through the temple it is highly encouraged that you read through the guide from the start. This will ensure that you pick up any items or secrets that you may have missed.

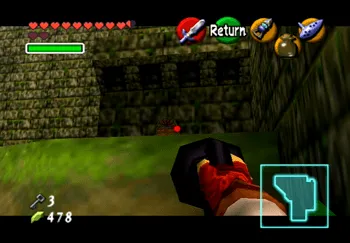
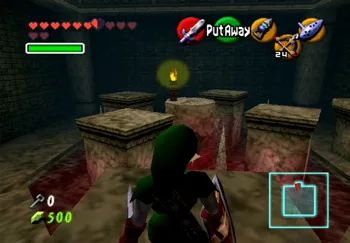
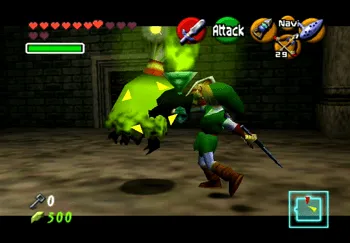
To start things off, walk forward until two Wolfos enemies appear out of the ground. Destroy both of them by attacking them when their guards are down. There are some vines on the right side of the entrance attached to the stone wall.
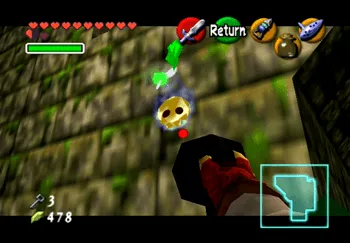
Climb the wall and jump onto the large cutoff tree on the left side. Turn around and kill the ![]() Gold Skulltula on the wall using your
Gold Skulltula on the wall using your ![]() Hookshot and then grab the token (number 55 of 100).
Hookshot and then grab the token (number 55 of 100).

From the top of the tree trunk, use the ![]() or
or ![]() Button to rotate your camera so that you can see across to the opposite side of the room. You should notice a small chest on the top of the opposite tree trunk.
Button to rotate your camera so that you can see across to the opposite side of the room. You should notice a small chest on the top of the opposite tree trunk.
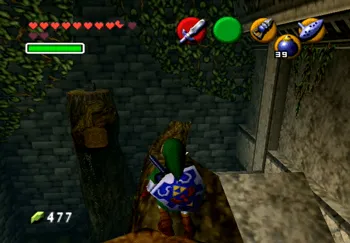
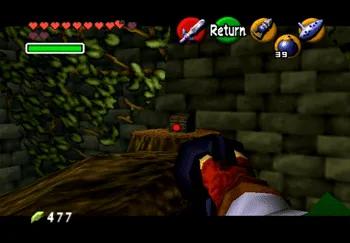
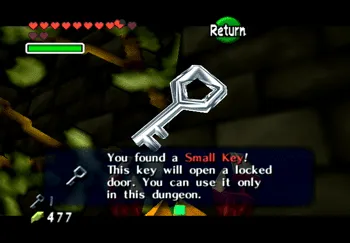
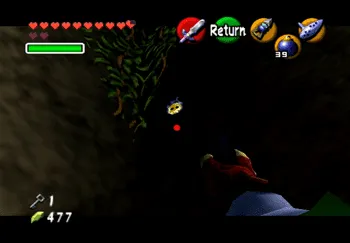
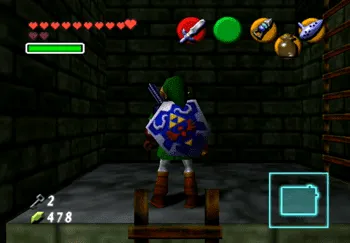
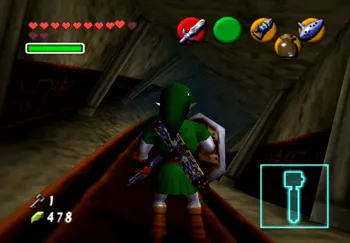
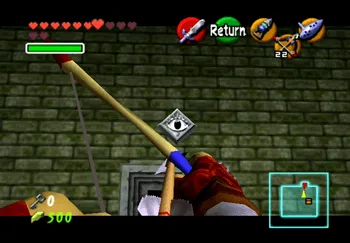
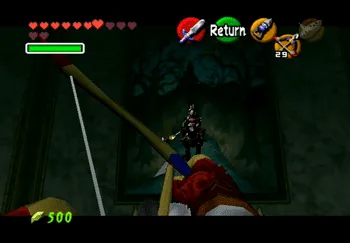
Rather than attempting to jump the small gap between the trees, use the ![]() Hookshot to launch Link over to the opposite tree. You can do this by getting close enough to the treasure chest to use the
Hookshot to launch Link over to the opposite tree. You can do this by getting close enough to the treasure chest to use the ![]() Hookshot on it (as shown in the screenshot below). Link will find a Small Key inside. Head through the doorway of this room afterwards.
Hookshot on it (as shown in the screenshot below). Link will find a Small Key inside. Head through the doorway of this room afterwards.
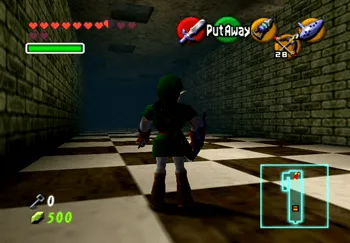
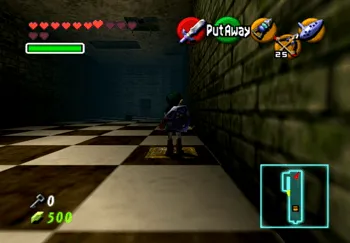
This hallway has a regular Skulltula that will drop down as you attempt to pass. Wait for it to spin around, exposing its weak side, and then attack it with the ![]() Master Sword. Proceed through the doorway on the opposite end of the hallway.
Master Sword. Proceed through the doorway on the opposite end of the hallway.
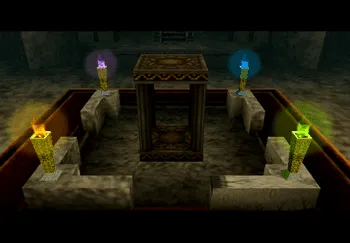
The next room has a small cinematic involving four different colored Poes. The Poes, known as the Poe Sisters, will disappear off into the dungeon with four different colored flames and the small elevator that was in the middle of the room will disappear. The objective of this dungeon is to destroy each of the different colored Poes to proceed down the elevator in the center of the room.

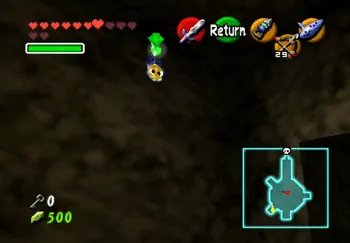
The first thing you should do is find the ![]() Gold Skulltula in this room. The Gold Skulltula is located directly north of the entrance to the room.
Gold Skulltula in this room. The Gold Skulltula is located directly north of the entrance to the room.
Climb up onto the ledge and search the area to the right of the stairs leading up to the doorway. Use the screenshots below to help you find it. Destroy the Gold Skulltula and obtain the token using the ![]() Hookshot (number 56 of 100).
Hookshot (number 56 of 100).
Take the doorway on the far side of the room – next to where you found the Gold Skulltula. This will be your first encounter with a Blue Bubble enemy. You can use Link’s ![]() Hylian Shield to block its advances which will cause it to lose its flame and start bouncing around on the ground. Use regular attacks with the
Hylian Shield to block its advances which will cause it to lose its flame and start bouncing around on the ground. Use regular attacks with the ![]() Master Sword to defeat it and then proceed through the next doorway.
Master Sword to defeat it and then proceed through the next doorway.
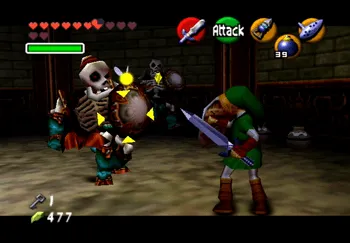
The door will lock behind you as you enter the next room and this will be the first time that you have to do battle against two enemies known as Stalfos. They are fairly difficult to defeat.
Use L or ![]() Targeting to target one of the Stalfos – the other will not attack you while you have the first one targeted. Stalfos keep their shield up constantly and only lower it temporarily just before they are about to attack.
Targeting to target one of the Stalfos – the other will not attack you while you have the first one targeted. Stalfos keep their shield up constantly and only lower it temporarily just before they are about to attack.
Use jump attacks right after they attempt to attack you. The difficulty comes from the amount of damage that they deal with their attacks so be very cautious and patient during this fight. A small treasure chest will appear in the room after you defeat them which contains another Small Key – you should now have two in total.
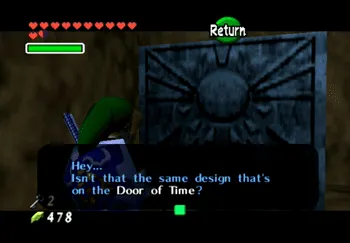
Return to the main chamber where you encountered the four Poes. Take the passageway leading northwest into the corner (use the Map sub screen to help orient Link) which is located directly to the right from the room that Link exits.
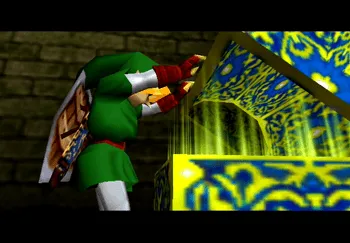
There is a large blue stone inside the crevice. Navi will provide a hint regarding the block (“Isn’t that the same design that’s on the Door of Time?”). Pull out the ![]() Ocarina of Time and play the Song of Time. This will cause the blue stone to disappear. Go through the doorway that appears.
Ocarina of Time and play the Song of Time. This will cause the blue stone to disappear. Go through the doorway that appears.
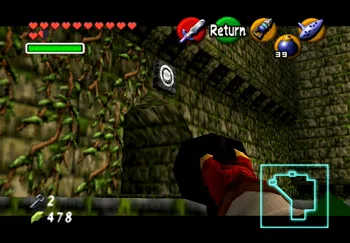
For starters, kill all the enemies in this room to make things easier. There is a Big Deku Baba directly in front of the door, an Octorok in the pool of water and a number of Skulltulas hanging on the vines on the wall on the east side of the room (which can be killed with the ![]() Hookshot – except the third one highest up which cannot be reached).
Hookshot – except the third one highest up which cannot be reached).
Climb the vines on this wall and be cautious of the last Skulltula that still hangs near the top. You can sneak around it by passing while it is not looking directly at you. You should also make sure to climb the vines on the furthest right side possible to reduce the risk of being attacked. Climb up until you reach the cutout with the door in it and proceed through.
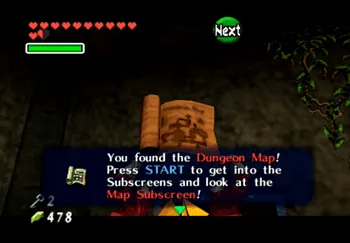
Kill the Blue Bubble in this next room to release the locks on the doors and to make a treasure chest appear. The treasure chest contains the Dungeon Map. Proceed through the door on the opposite side of the room (on the east side) and into the next room. This will lead you to a small balcony. There is a Skulltula on the side wall that you can kill with your ![]() Hookshot.
Hookshot.
You can ![]() Hookshot over to the vines on the wall by targeting the wall or you can climb on the railing of the balcony and look over to the other balcony to find a small grey and white target that you can aim for with the
Hookshot over to the vines on the wall by targeting the wall or you can climb on the railing of the balcony and look over to the other balcony to find a small grey and white target that you can aim for with the ![]() Hookshot. Use either method to get over to the other balcony and step on the switch near the back. This will cause the water in the well below to disappear.
Hookshot. Use either method to get over to the other balcony and step on the switch near the back. This will cause the water in the well below to disappear.
Drop down to the room below (making sure to roll as you land so that you don’t hurt poor Link) and kill the Octorok and Big Deku Baba. On the northwestern side of room you will notice a large island surrounded by water that can’t be reached.
There is a treasure chest that you can use on the north side of the island though to ![]() Hookshot to. Make sure that you aim for the back of the treasure chest otherwise Link will just fall off of the platform.
Hookshot to. Make sure that you aim for the back of the treasure chest otherwise Link will just fall off of the platform.
Open the treasure chest to receive a Recovery Heart and kill the ![]() Gold Skulltula on the far wall (number 57 of 100).
Gold Skulltula on the far wall (number 57 of 100).

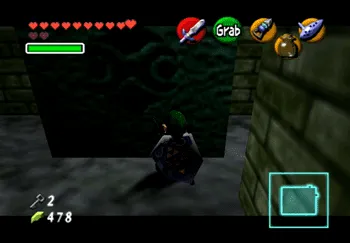
Head over to the well and use the ladder to climb down. Follow the pathway underground until you reach the vines near the end with the treasure chest sitting on the ground. Open it up to obtain the third Small Key.
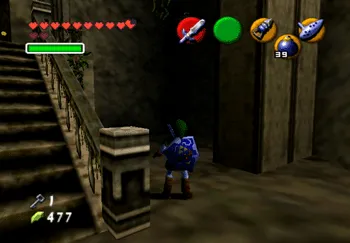
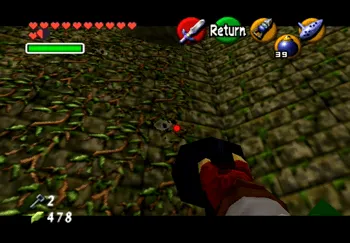
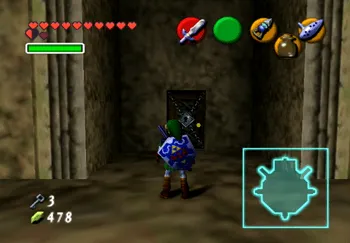
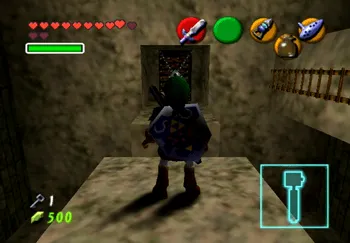
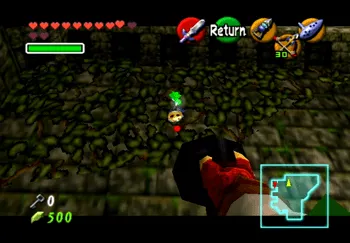
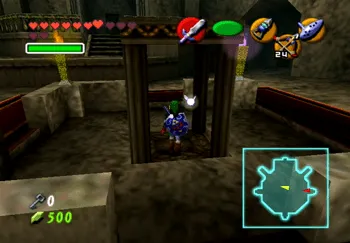
Climb the vines or go back to the ladder and exit whichever room you head back to back into the main chamber (where the four Poes appeared). There is a doorway on the west side of the room that is locked (shown in the screenshot below). Use one of your Small Keys to open the doorway and proceed through.
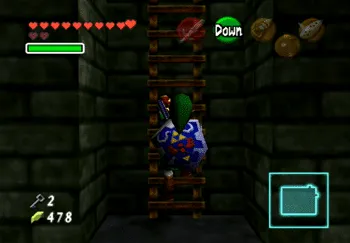
The first room you enter is another hallway with a Skulltula to destroy. The second room has a Blue Bubble that you should kill. Climb up the ladders on the far wall and walk down the hallway. Navi will point out that there are arrows painted on the floor.
To the left of the first arrow is a very large block that blocks off the entire passageway. Grab the block and pull it towards you in the direction of the arrows. Push the block forward down the hallway in the direction that the arrows were leading until the block stops moving.
The passageway where the block was sitting will now have opened up. There is a ladder on the left side of this passageway – ignore the ladder at first and continue down the hallway taking a right, followed by another right, until you reach the blue block again. Push the block one more time until it drops into a crevice. You will hear a “success” sound once the block has been pushed far enough.
Go back into the passageway, climb the ladder and follow pathway around until you reach another small passageway with what appears to be another red block blocking the path. Push the red block as far forward as it will go.
Return down to the lower level and climb up onto the blue block, and then the ledge above that. Proceed down the hallway and you should see the red block again from another angle. Push it forward until it drops into a little crevice and then climb on it to reach the next level up.
Follow the pathway around to a ladder and climb the ladder into the next room. This room will have two Blue Bubbles flying around which should be defeated and then go through the locked door using one of your Small Keys.
This will lead you into a weirdly twisted hallway. Navi will confirm this as you move forward. She will interrupt you as you enter the next room as well indicating that there are shadows of monsters that hang from the ceiling.
The shadows will continue to grow over Link if he stays in this room too long – once the shadow reaches a certain size a monster, called a Wallmaster, will drop down and try to attack you. You can wait for these creatures to drop, by continuing to move when you see their shadows, and then turn around and defeat them before they climb back up the walls.
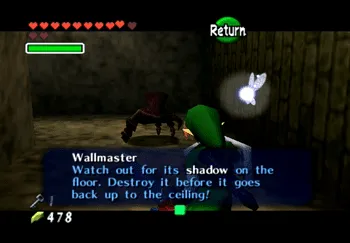
Note: Defeating Wallmasters is an extremely profitable venture – each defeated Wallmaster will drop between 35 to 80 Rupees.
Jump across the stone platforms and go through the final locked door using the last of your Small Keys. Go down the hallway and down the stairs – ignore the laughing Poe that you see in the pictures as you pass.
Go through the doorway and prepare to do battle with another Stalfos, this time dealing with a huge hole in the center of the room. Once you defeat the first Stalfos you will have to defeat two more that come down and ambush you, but at least the hole in the center of the room is gone.
Use the jars on the sides of the room to replenish your health – each of them contains a Heart. The Stalfos will revive themselves if you do not defeat them both relatively quickly in succession. Make sure that you take turns attacking each Stalfos so that the second one can be brought down very quickly after you defeat the first.
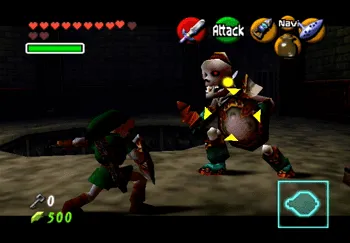
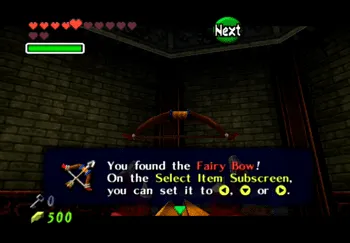
A large treasure chest will appear at the conclusion of the battle. Open it up to obtain the ![]() Fairy Bow – a new and unique item that Link desperately requires in order to complete this dungeon.
Fairy Bow – a new and unique item that Link desperately requires in order to complete this dungeon.
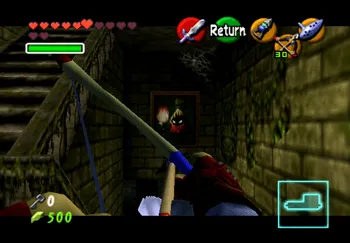
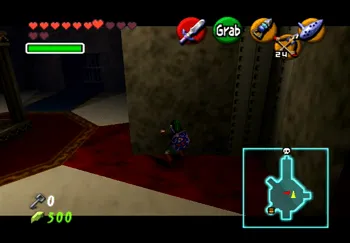
There are two exits leading out of this room – one with a red carpet and one with a blue carpet. Take the one with the red carpet leading out back to the room with the Poe that appeared in the picture frames.
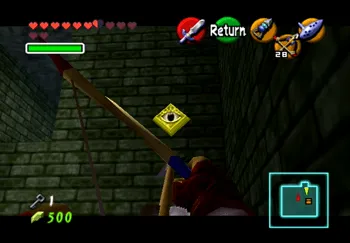
Pull out the ![]() Fairy Bow when you are far enough away from one of the picture frames so that the Poe does not disappear (as shown in the screenshot below). Use the
Fairy Bow when you are far enough away from one of the picture frames so that the Poe does not disappear (as shown in the screenshot below). Use the ![]() Fairy Bow to launch an arrow at the picture frame and hit the Poe. The Poe will laugh and the picture frame will burn away. Do this with each of the picture frames in the hallway. The Poe will appear once you destroy the third and final frame.
Fairy Bow to launch an arrow at the picture frame and hit the Poe. The Poe will laugh and the picture frame will burn away. Do this with each of the picture frames in the hallway. The Poe will appear once you destroy the third and final frame.
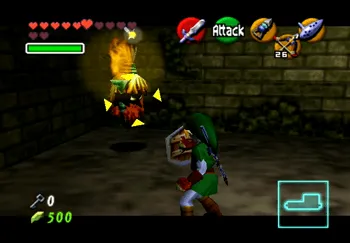
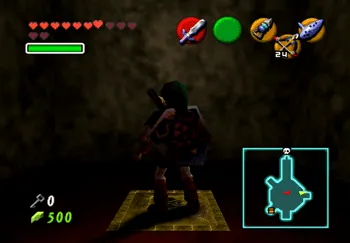
Travel down the stairs and prepare to do battle with Joelle – the first of the Poe sisters. Defeating Poes is relatively straightforward. You can only attack and hit them when they are visible.
Let her hit you with her spinning attack by blocking it with the ![]() Hylian Shield and then attack her with your
Hylian Shield and then attack her with your ![]() Master Sword or your
Master Sword or your ![]() Fairy Bow. Her flame will light up the torch in near the doorway after you defeat her and a small treasure chest will appear with another Small Key.
Fairy Bow. Her flame will light up the torch in near the doorway after you defeat her and a small treasure chest will appear with another Small Key.
Go back through the room where Link obtained the ![]() Fairy Bow and travel across to the other doorway (the one with the blue carpet). Follow the same procedure that you used to defeat the Poe, Joelle, in the previous stairwell by aiming your
Fairy Bow and travel across to the other doorway (the one with the blue carpet). Follow the same procedure that you used to defeat the Poe, Joelle, in the previous stairwell by aiming your ![]() Fairy Bow at each of the pictures.
Fairy Bow at each of the pictures.
Defeating Beth, the next Poe Sister, uses exactly the same strategy that you used to defeat Joelle. Beth’s blue flame will light up the torch and another treasure chest will appear which contains the Compass.

Travel all the way back to the previous room where you defeated Joelle, back up the stairs, across the platforms and down the twisted hallway. Go through the door and then turn around to find a grey eye above the door. Use the ![]() Fairy Bow to hit the eye which will “untwist” the previous hallway.
Fairy Bow to hit the eye which will “untwist” the previous hallway.
Travel down the now straightened corridor and into the previous room. Be careful not to drop down into the hole in the floor or you will be forced to fight two Blue Bubbles and then travel all the way back here. You also need to watch out for Wallmasters again. Open the large blue and gold chest in the corner of the room to obtain the Boss Key.
At this point you can now drop down the hole in the center of the room intentionally. Kill the two Blue Bubbles and proceed through the unlocked doorway. This will lead you to the previous room with the well in it.
Jump on to the stone archway to grab the two Recovery Hearts floating there and then look towards the north wall to find a ![]() Gold Skulltula hanging near the top of the wall. Use your
Gold Skulltula hanging near the top of the wall. Use your ![]() Hookshot to defeat it and obtain the token (number 58 of 100).
Hookshot to defeat it and obtain the token (number 58 of 100).

Jump back on to the upper platform. There are two doors located on the walls past the Big Deku Baba. One on the south wall that has a handle and one on the west wall, on the right, that does not.
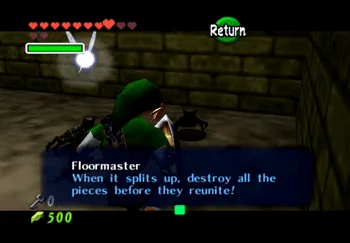
Go through the doorway on the right first (the one without the yellow handle). You will find a Wallmaster here that is already on the ground. Defeat it by allowing it to attack you, shielding, and then counterattacking with the ![]() Master Sword.
Master Sword.
It will split up into three Floormaster creatures which must also be defeated. Defeat them quickly or they will transform back into a Wallmaster. You can use your ![]() Fairy Bow and L or
Fairy Bow and L or ![]() Targeting to make it easier to hit them when they run away. A treasure chest will appear which contains another Small Key.
Targeting to make it easier to hit them when they run away. A treasure chest will appear which contains another Small Key.
Exit the room and go through the door to the right (on the south wall with the yellow handle). This will lead you back into the room with the large blocks. Climb up the second level and look for a fenced area.
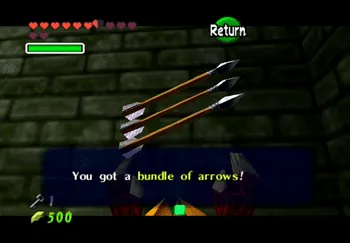
There is a golden eye on the far wall which you can hit with your ![]() Fairy Bow which will drop a small treasure chest. Jump across to grab the treasure chest which contains a pretty lackluster reward – a bundle of arrows.
Fairy Bow which will drop a small treasure chest. Jump across to grab the treasure chest which contains a pretty lackluster reward – a bundle of arrows.
Continue climbing until you reach the room with the two Blue Bubbles with the grey eye above the door. The eye should still be closed from when you straightened this hallway to obtain the Boss Key.
Hit the eye again with the ![]() Fairy Bow to cause it to open and to twist the hallway again. Follow the pathway all the way through again: jumping across the platforms, down the stairs, through the room where you fought the Stalfos, and back up the other stairs.
Fairy Bow to cause it to open and to twist the hallway again. Follow the pathway all the way through again: jumping across the platforms, down the stairs, through the room where you fought the Stalfos, and back up the other stairs.

Unlock the doorway at the top of the stairs if you have not done so already and proceed through. Navi will give you another heads-up that this room contains Wallmasters that you will have to watch out for.
Remember that you can kill the Wallmaster by dodging it as it drops in to grab you (just keep running around until it does) and then attacking it with the ![]() Master Sword. Climb the ladder on the south side of the room and proceed down the hallway.
Master Sword. Climb the ladder on the south side of the room and proceed down the hallway.
There are two Green Bubbles (flaming skulls) down this pathway that you will need to defeat, either with the ![]() Master Sword or with the
Master Sword or with the ![]() Fairy Bow. Use the Small Key to proceed through the doorway at the end of the hallway.
Fairy Bow. Use the Small Key to proceed through the doorway at the end of the hallway.
This room has a number of platforms circling around a central pillar that has a lit brazier on it. There is an eye that can be seen on the west wall which is covered in ice.
In order to solve this room’s puzzle you have to stand on one of the rotating platforms, aim the ![]() Fairy Bow towards the eye, wait until your sightline passes through the flame and then shoot the arrow. The arrow will carry the flame to the eye, melting the ice and closing the eye, allowing you to continue.
Fairy Bow towards the eye, wait until your sightline passes through the flame and then shoot the arrow. The arrow will carry the flame to the eye, melting the ice and closing the eye, allowing you to continue.
Successfully hitting the eye with a flaming arrow will cause the corridor that you passed through to now twist similar to the previous corridor. Walk back through it and then drop down into the hole in the center of the room (watching out for Wallmasters).
This will lead you into a large room with a checkerboard pattern on the floor. Step forward and the roof will begin to shake and drop down. It will continue to do this creating an obstacle for you to watch out for as you try to navigate through. Navi will give you a heads-up regarding this as well.
The first area that you need to get to is a yellow switch on the floor of the right side of the room. Just watch out for a Skulltula that stands in the pathway if you try to walk straight towards it.
You can stand in the black square two squares away from the Skulltula to cause it to drop down and then kill it, either with your ![]() Fairy Bow or with your
Fairy Bow or with your ![]() Master Sword after waiting for the roof to go back up.
Master Sword after waiting for the roof to go back up.
Stepping on the switch will cause the doorway at the back of the room to unlock. The next stop is the square with the treasure chest in it just in front of the door, though be cautious about this because, again, there is a Skulltula that drops down from the roof. The treasure chest contains another bundle of arrows. Go through the doorway into the next room.
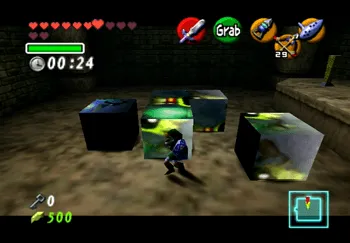
The next room has a large picture on the wall – a picture of the next Poe Sister, Amy. Use the ![]() Fairy Bow on the picture and this will cause a group of blocks to fall down from the roof. You will have 1:00 minute to rearrange the blocks to form the picture of the Poe.
Fairy Bow on the picture and this will cause a group of blocks to fall down from the roof. You will have 1:00 minute to rearrange the blocks to form the picture of the Poe.
Only four of the 5 blocks that drop are required – the block in the middle can be disregarded and pushed out of the way. Amy will appear after the puzzle is completed. Defeat her using the same tactics that applied to the other two Poe Sisters and her green flame will be added to the torch in the room. The locked door will unlock – proceed through it to continue.
The next hallway has another Skulltula that will drop down from the ceiling. Defeat it and continue along. This will lead you back out to the main room of the Forest Temple, with three of the four torches lit, and the final Poe Sister, Meg, standing ominously in the center of the room.
Meg is not like the other three Poe Sisters. She is essentially a mini-boss. She will split into multiple images of herself and surround Link. The goal is to attack the “real” Meg. She can be easily identified as the image that does an extra little spin whenever the four images appear.
Target the correct image of Meg and then use the ![]() Fairy Bow to shoot an arrow at her. Four arrows will defeat her. Once her flame has been added to the fourth and final torch an elevator will appear in the center of the room. Jump onto the elevator and take it down to the lower floor.
Fairy Bow to shoot an arrow at her. Four arrows will defeat her. Once her flame has been added to the fourth and final torch an elevator will appear in the center of the room. Jump onto the elevator and take it down to the lower floor.


The next room is a little more confusing that the previous rooms. The entire room is actually capable of rotating around an axis. Use the two side blocks on either side of the room to push the walls and rotate them around the room.
Assuming you are looking from the top, rotate the room counterclockwise. One of the doorways will now lead into a room with a switch on it. Enter the room with the switch and stand on it.
Rotate the room counterclockwise again to reveal another room with another switch. Rotate it counterclockwise one more time to reveal a room with a Skulltula, a small treasure chest, and a ![]() Gold Skulltula on the wall. Defeat the Skulltula, open the treasure chest which contains yet another bundle of arrows, and defeat the Gold Skulltula to obtain the next token (number 59 of 100).
Gold Skulltula on the wall. Defeat the Skulltula, open the treasure chest which contains yet another bundle of arrows, and defeat the Gold Skulltula to obtain the next token (number 59 of 100).
Rotate the room counterclockwise one last time. This will reveal another room with the third and final switch and will open up the final doorway leading you to the boss room. Use the Boss Key on the door and head inside. Travel up the stairs and into the center of the room. Nothing will happen until you attempt to leave which will cause the doorway to lock behind you.
Phantom Ganon
Evil Spirit from Beyond
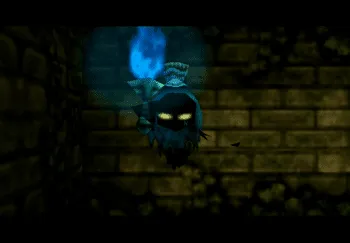
The premise behind this boss is that he will run towards Link coming out of one of the picture frames. You can see him approach Link by looking at each of the picture frames until you find him.
He will appear to be riding towards Link through two of the picture frames however one of them is a fake, and that fake Phantom Ganon will just turn around and not jump out of the picture. The real Phantom Ganon appears brighter than the fake ones which can be helpful for distinguishing which one is the real one.

Aim your ![]() Fairy Bow at the painting once you have found the correct picture and fire an arrow at Phantom Ganon as he appears. You can fire the arrow as soon as the purple portal appears. Phantom Ganon will jump off of his horse after you have hit him 3 times.
Fairy Bow at the painting once you have found the correct picture and fire an arrow at Phantom Ganon as he appears. You can fire the arrow as soon as the purple portal appears. Phantom Ganon will jump off of his horse after you have hit him 3 times.
The next stage of the fight involves reflecting balls of light back at Phantom Ganon as he shoots them at you. You cannot do this with your ![]() Hylian Shield though. Start things off by Z or L Targeting him and then you have to swing your
Hylian Shield though. Start things off by Z or L Targeting him and then you have to swing your ![]() Master Sword at the balls of electricity as they approach.
Master Sword at the balls of electricity as they approach.
Phantom Ganon will smack the electric attacks back at you. This ends up turning it into a game of Pong to see who misses first. Make sure that you are far enough away from him to allow you to have enough time to react.
After rebounding the attack a few times it will hit Phantom Ganon, weakening him, and allowing you to attack him while he is vulnerable with your ![]() Master Sword. Do this a few times to defeat him.
Master Sword. Do this a few times to defeat him.
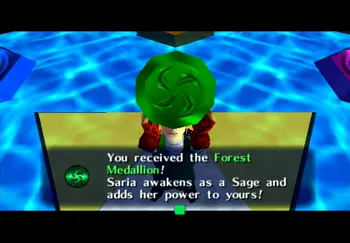
Grab the Heart Container and then jump into the portal to exit the Forest Temple!
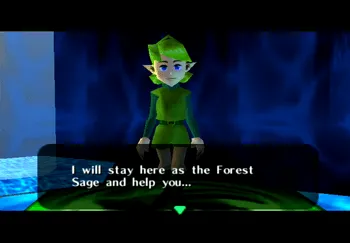
Link will be transported back to the Temple of Time and Saria will reveal herself as the Forest Sage. She will then provide Link with the ![]() Forest Medallion and return him to the Great Deku Tree where he will find a new sprout growing at the base of the tree. The Deku Tree Sprout will reveal that Link is not a Kokiri and that he is actually a Hylian. He will then tell Link the story about his mother and how he came to wind up in the Kokiri Forest.
Forest Medallion and return him to the Great Deku Tree where he will find a new sprout growing at the base of the tree. The Deku Tree Sprout will reveal that Link is not a Kokiri and that he is actually a Hylian. He will then tell Link the story about his mother and how he came to wind up in the Kokiri Forest.

The next destination is Goron City and to complete the Fire Temple, but there are a number of side quest items you can complete before continuing to the next temple. They are detailed on the next page.