

Alchemist
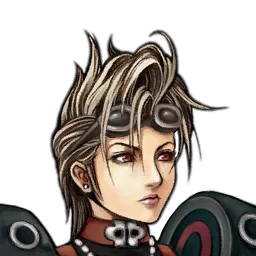
A Dressphere modeled after the “Mix” functionality that Rikku had in Final Fantasy X, and you can tell because wearers of this Dressphere will look like Al Bhed soldiers wielding guns.
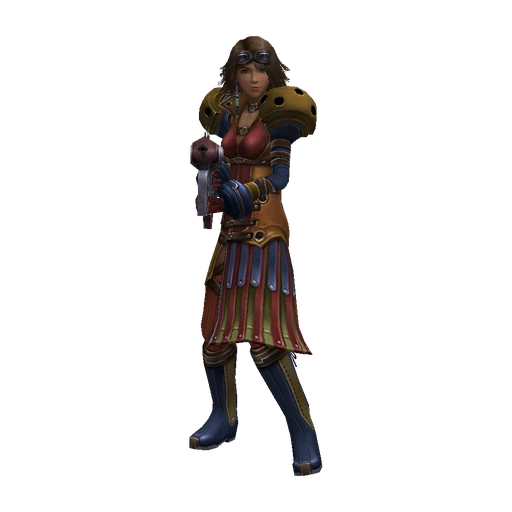

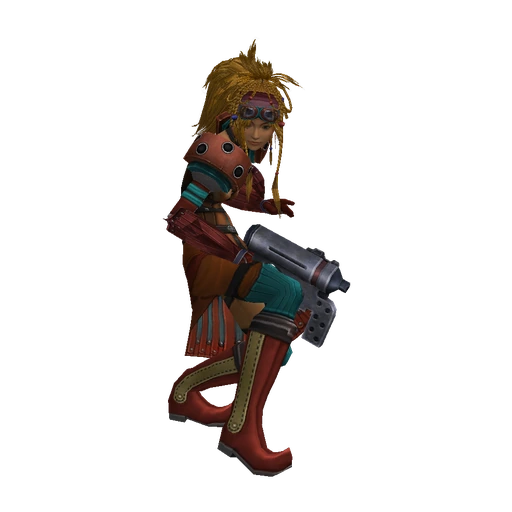

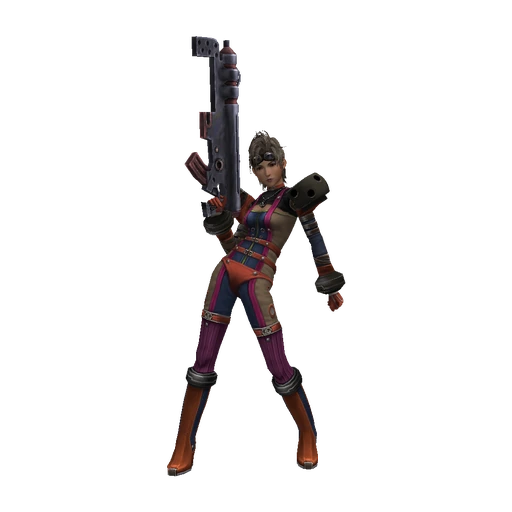
Overview
This is one of the stronger Dresspheres in the game, and it earns its spot near the top of the tier list as one of the Best Dresspheres. The only difficulty a player may run into using this Dressphere has to do with the lack of abilities that it has access to when you first obtain it, but this can be compensated for if you use  Mix properly.
Helpful Hint
As a reminder, you can use Mix to combine a  Potion and a Hi-Potion when you first get an Alchemist, and this will create the same effect as a Mega-Potion. You should have a high stock of both Potions and Hi-Potions from regular battle drops, but consider restocking your supplies at a shop if you’re running low on either.
The Alchemist becomes a top-tier healer as soon as it can pull Mega-Potions from its stash. From that point forward, it can now heal all party members at the same time, and once you gain access to  Items Lv. 2 and Chemist auto-abilities, its effectiveness as a healer gets even more impressive. It doesn’t take long before it supplants the
  White Mage as the most effective healer in the game.
The best part about an Alchemist, though, is that you have access to a pretty strong regular  Attack when they don’t need to be healing. It makes up for the biggest weakness that a White Mage has, at least on the healing front. You’ll find that many players and guides recommend a party setup of two
  Dark Knights and an Alchemist, and there’s no doubt that this combination can carry you through nearly every battle of the game.
Check out the section below for a full list of items you can create using Mix.
Achievement/Trophy
You’ll automatically obtain the  Alchemist achievement/trophy after using the Mix command 30 times in battle.

How to Obtain It
You’ll obtain the Alchemist Dressphere once you clear out the Chocobo Ranch (formerly the Monster Arena) in the Calm Lands:
Walkthrough

Bikanel Desert and the Calm Lands in Chapter 2, with Nhadala’s Oasis Mission and getting Clasko settled in at the Chocobo Ranch.
The Dressphere itself is the reward for the “Clean Sweep” Mission inside the Facility Ruins, so what really matters is whether Clasko ever reaches the Calm Lands. If you skipped the “Foggy Fiend Frenzy!” Mission in Chapter 1, or never invited him aboard the Celsius, look for him on Mushroom Rock Road in Chapter 2 before the path down to the Ravine. He heads for the Calm Lands on his own after that, and you can finish “Clean Sweep” in Chapter 3 instead. The same applies if you invited him aboard but never stopped at the Calm Lands in Chapter 2: he turns up there in Chapter 3 anyway.
The one way to lose the Dressphere for good is to never speak to Clasko in Chapter 1 or Chapter 2. The ranch never opens, and he does not appear again for the rest of the game.
List of Abilities
| Ability | AP | Prerequisites |
|---|---|---|
| Attack | 0 | |
| Mix | 0 | |
| Potion (Alchemist Ability) | 10 | |
| Hi-Potion (Alchemist Ability) | 40 | Potion |
| Mega-Potion (Alchemist Ability) | 120 | Hi-Potion |
| X-Potion (Alchemist Ability) | 160 | Mega-Potion |
| Remedy (Alchemist Ability) | 20 | |
| Dispel Tonic (Alchemist Ability) | 20 | Remedy |
| Phoenix Down (Alchemist Ability) | 30 | |
| Mega Phoenix (Alchemist Ability) | 200 | Phoenix Down |
| Ether (Alchemist Ability) | 400 | Dispel Tonic |
| Elixir (Alchemist Ability) | 999 | Ether |
| Items Lv. 2 | 30 | |
| Chemist | 40 | |
| Elementalist | 80 | |
| Physicist | 100 | Chemist and Elementalist |
Stats
The Alchemist’s stats are the same for Yuna, Rikku, and Paine.
| Level | HP | MP | Strength | Magic | Defense | Magic Defense | Agility | Accuracy | Evasion | Luck |
|---|---|---|---|---|---|---|---|---|---|---|
| 1 | 118 | 15 | 14 | 3 | 11 | 2 | 50 | 117 | 1 | 9 |
| 10 | 447 | 29 | 29 | 8 | 19 | 6 | 51 | 118 | 2 | 10 |
| 20 | 788 | 42 | 44 | 12 | 26 | 10 | 52 | 119 | 3 | 11 |
| 30 | 1102 | 54 | 57 | 17 | 32 | 14 | 53 | 121 | 4 | 12 |
| 40 | 1390 | 65 | 70 | 20 | 38 | 17 | 55 | 121 | 4 | 12 |
| 50 | 1652 | 75 | 81 | 23 | 42 | 21 | 55 | 123 | 4 | 13 |
| 60 | 1887 | 84 | 92 | 26 | 45 | 24 | 56 | 123 | 5 | 13 |
| 70 | 2096 | 92 | 103 | 27 | 48 | 27 | 57 | 124 | 5 | 13 |
| 80 | 2278 | 98 | 112 | 28 | 51 | 30 | 57 | 124 | 5 | 13 |
| 90 | 2435 | 104 | 120 | 29 | 52 | 33 | 58 | 124 | 5 | 13 |
| 99 | 2553 | 107 | 125 | 29 | 52 | 35 | 58 | 124 | 4 | 12 |
Mix Table
Every item you can Mix belongs to one of the groups below. The group of the stronger item decides what the Mix does, and when both items are equally strong, the one you pick first counts as the stronger.
| Group | Strength 1 | Strength 2 | Strength 3 | Strength 4 |
|---|---|---|---|---|
| Healing | Megalixir | X-PotionMega-PotionTurbo EtherElixir Healing Spring Healing Spring | Hi-PotionEtherGysahl GreensSylkis GreensMimett GreensPahsana Greens | Potion |
| Phoenix | – | – | Mega Phoenix | Phoenix Down |
| Curative | – | – | Remedy | AntidoteSoftEye DropsEcho Screen |
| Damage |  Supreme Gem Supreme Gem | L-BombShining Gem | GrenadeS-BombM-Bomb | Budget Grenade |
| Status | – | Gold Hourglass | Sleep GrenadeSilence GrenadeDark GrenadePetrify GrenadeSilver HourglassFarplane Shadow | Poison FangCandle of Life |
| Fire | – | Fire Gem | Bomb Core | Bomb Fragment |
| Ice | – | Ice Gem | Arctic Wind | Antarctic Wind |
| Lightning | – | Lightning Gem | Lightning Marble | Electro Marble |
| Water | – | Water Gem | Dragon Scale | Fish Scale |
| Gravity | – | Twin StarsThree Stars | Shadow Gem | – |
| Holy | – | Blessed Gem | – | Holy Water |
| Stamina | Stamina Tonic | Stamina Tablet | – | – |
| Mana | Mana Tonic | Mana Tablet | – | – |
| Haste | Chocobo Wing | – | Chocobo Feather | – |
| Curtain | – | – | Lunar CurtainLight Curtain | – |
| Star Curtain | – | – | Star Curtain | – |
| Spring | – | – | Soul Spring | Mana SpringStamina Spring |
| Hero Drink | – | – | – | Hero Drink |
| Dispel | – | Dispel Tonic | – | – |
| Dark Matter | Dark Matter | – | – | – |
The stronger of the two items decides which row below applies, and its strength decides which result you get. Strength 1 is the strongest. A Potion and a Potion produce a Hi-Potion, a Potion and an Elixir produce an Ultra Potion, and two Megalixirs produce a Final Elixir. When both items are equally strong, the order you pick them in matters: Poison Fang first and Holy Water second produce a Blaster Mine, but Holy Water first produces an Archangel.
| Stronger Item | Other Item | Effect | Strength 1 | Strength 2 | Strength 3 | Strength 4 |
|---|---|---|---|---|---|---|
| Healing | Phoenix | Revives and heals the party | Fantasy Phoenix | Final Phoenix | Final Phoenix | Mega Phoenix |
| Healing | Anything else | Heals the party | Final Elixir | Ultra Potion | Mega-Potion | Hi-Potion |
| Phoenix | Anything | Revives the party | Fantasy Phoenix | Final Phoenix | Final Phoenix | Mega Phoenix |
| Curative | Anything | Cures status ailments | – | – | Panacea | Remedy |
| Damage | Anything | Physical damage to all enemies | Sunburst | Cluster Bomb | Potato Masher | Pineapple |
| Fire, Ice, Lightning, Water, or Gravity | Holy | Holy damage to one enemy | White Hole | White Hole | Archangel | Archangel |
| Holy | Anything | Holy damage to one enemy | White Hole | White Hole | Archangel | Archangel |
| Fire or Status | The other one | Fire damage plus status ailments to random enemies | Abaddon Flame | Abaddon Flame | Brimstone | Brimstone |
| Ice or Status | The other one | Ice damage plus status ailments to random enemies | Krysta | Krysta | Black Ice | Black Ice |
| Lightning or Status | The other one | Lightning damage plus status ailments to random enemies | Thunderblast | Thunderblast | Electroshock | Electroshock |
| Water or Status | The other one | Water damage plus status ailments to random enemies | Dark Rain | Dark Rain | Aqua Toxin | Aqua Toxin |
| Gravity or Status | The other one | Gravity damage plus status ailments to all enemies | Grand Slam | Grand Slam | Tallboy | Tallboy |
| Fire or Ice | The other one | Physical damage to all enemies | Sunburst | Cluster Bomb | Potato Masher | Pineapple |
| Lightning or Water | The other one | Physical damage to all enemies | Sunburst | Cluster Bomb | Potato Masher | Pineapple |
| Fire | Anything else | Fire damage to random enemies | Burning Soul | Burning Soul | Firestorm | Heat Blaster |
| Ice | Anything else | Ice damage to random enemies | Winter Storm | Winter Storm | Icefall | Snow Flurry |
| Lightning | Anything else | Lightning damage to random enemies | Lightning Bolt | Lightning Bolt | Rolling Thunder | Thunderbolt |
| Water | Anything else | Water damage to random enemies | Tidal Wave | Tidal Wave | Flash Flood | Waterfall |
| Gravity | Anything else | Gravity damage to all enemies | Black Hole | Black Hole | Nega Burst | Nega Burst |
| Status | Anything else | Physical damage plus status ailments to all enemies | Hazardous Shell | Hazardous Shell | Blaster Mine | Blaster Mine |
| Stamina, Mana, Haste, Curtain, Star Curtain, Spring, or Hero Drink | Status | Physical damage plus status ailments to all enemies | Hazardous Shell | Hazardous Shell | Blaster Mine | Blaster Mine |
| Stamina or Mana | The other one | Drains HP and MP from one enemy | Soul Sea | Soul Sea | – | – |
| Stamina | Anything else | Restores and boosts HP | Mega Cocktail | Mega Vitality | – | – |
| Mana | Anything else | Restores and boosts MP | Mega Cocktail | Mega Mana | – | – |
| Haste | Anything else | Casts Haste on the party, plus Protect, Shell, and Reflect at Strength 1 | Final Wall | – | Chocobo Wing | – |
| Curtain | Anything else | Casts Protect and Shell on the party | – | – | Wall | – |
| Star Curtain | Anything else | Casts Protect, Shell, and Reflect on the party | – | – | Hi-Wall | – |
| Spring | Anything else | Drains HP and MP from one enemy | – | – | Soul Spring | Soul Spring |
| Hero Drink | Anything else | Makes one party member invulnerable | – | – | – | Hero Drink |
| Dispel | Anything | Heals half the party’s HP and cures status ailments | – | Ultra Cure | – | – |
| Dark Matter | Anything | Makes the party invulnerable | Miracle Drink | – | – | – |