
Necrohol of Nabudis
“Palace once home to the royal family of Nabradia. Called the Verdpale Palace, it once stood proudly in the middle of a lake. Now it stands in ruin, destroyed in the attack on Nabudis two years ago. Though the ghost of the building remains in the crumbling walls, it is wholly gutted and lies half-submerged in murk.
Now Mist flows freely through its abandoned halls, and its glorious memory is profaned by a menagerie of vile creatures.”
The Necrohol of Nabudis is an area of the game that you do not have to travel to during a regular playthrough of the game, however, there are quite a few side quests and hunts that involve traveling to this location.
This is where you will find the ![]() Zodiac Spear in the original PlayStation 2 version of the game and obtain an optional Esper named Chaos. First thing’s first…
Zodiac Spear in the original PlayStation 2 version of the game and obtain an optional Esper named Chaos. First thing’s first…
Accessing the Necrohol
The Necrohol of Nabudis can be accessed once you have reached the Salikawood for the first time. In order to reach it, you must travel to the Grand Bower area of the Salikawood and defeat an optional boss – King Bomb.
Travel to the zone before the Grand Bower to find an orange Save Crystal, save your game and read the preparation tips below when you are ready to begin the fight.

Boss Battle

Level: 34
HP: 37,596
Steal: ![]() Bomb Shell (55%),
Bomb Shell (55%), ![]() Fire Crystal (10%),
Fire Crystal (10%), ![]() Bomb Fragment (3%)
Bomb Fragment (3%)
Make liberal use of the orange Save Crystal just outside the Grand Bower before you initiate the fight. Make sure that you cast ![]() Protect,
Protect, ![]() Shell,
Shell, ![]() Regen,
Regen, ![]() Bravery and
Bravery and ![]() Faith on all of your characters and then touch the orange Save Crystal again to refill the MP that you spent casting those spells.
Faith on all of your characters and then touch the orange Save Crystal again to refill the MP that you spent casting those spells.
Set up a Gambit with one (or more) of your characters to use a ![]() Handkerchief item on any of your allies to remove the Oil status effect. This negative status effect can be devastating during the fight as King Bomb and all of its summoned Bombs will attack with fire-based Magick (which does increased damage to characters affected by Oil). You may want to set up one of your characters to use Water-based Magick against these enemies as they are weak to that element.
Handkerchief item on any of your allies to remove the Oil status effect. This negative status effect can be devastating during the fight as King Bomb and all of its summoned Bombs will attack with fire-based Magick (which does increased damage to characters affected by Oil). You may want to set up one of your characters to use Water-based Magick against these enemies as they are weak to that element.
![]() Dispel King Bomb at the beginning of the fight to remove its Haste Status and have one of your party members continually cast
Dispel King Bomb at the beginning of the fight to remove its Haste Status and have one of your party members continually cast ![]() Silence on it. It will cast
Silence on it. It will cast ![]() Renew on itself twice if not Silenced which isn’t the end of the world, but is preventable.
Renew on itself twice if not Silenced which isn’t the end of the world, but is preventable.
Try equipping one (or many) of your characters with Fire-resistant armor if you are struggling with this fight. This includes equipping ![]() Adamant Hats,
Adamant Hats, ![]() Adamant Vests and
Adamant Vests and ![]() Flame Shields as necessary.
Flame Shields as necessary.

You can find a video of this battle in the Zodiac Age version below.
You can now gain access to the Corridor of Ages area which has direct access into the south side of the Necrohol of Nabudis. There is another entrance that you can use to get inside the Necrohol from the north which involves traveling through the Nabreus Deadlands. This pathway involves traveling to the northernmost section of the Deadlands and heading east (as shown on the map below).


The Zodiac Spear
The most important reason to travel to the Necrohol of Nabudis (in the original PlayStation 2 version of the game) is to obtain the ![]() Zodiac Spear. Obtaining this extremely powerful weapon early on in the game can make it much easier to quest and complete the more difficult Hunts that are available.
Zodiac Spear. Obtaining this extremely powerful weapon early on in the game can make it much easier to quest and complete the more difficult Hunts that are available.
More information about the Zodiac Spear side quest and how to travel through the Necrohol at early levels is included on the Zodiac Spear page which can be accessed using the link below:
Side Quests
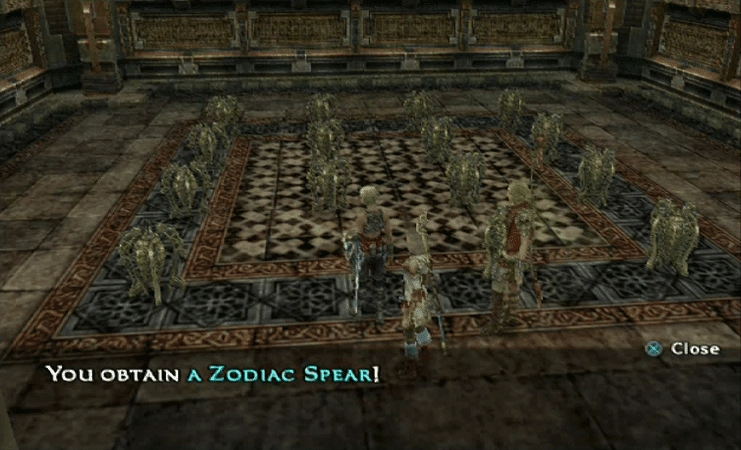
Obtaining the most powerful weapon in the game from the Necrohol of Nabudis.
Reminder: The Zodiac Spear cannot be obtained in the Necrohol of Nabudis in the Zodiac Age version of the game.
The Baknamy Merchant
There is a hidden shopkeeper that you can find in an area of the Necrohol of Nabudis. The merchant is located in the Hall of Effulgent Light in the original PlayStation 2 version of the game or in the northwest corner of the Cloister of the Highborn in the Zodiac Age version of the game. Use the proper map below to help you find him:

The Baknamy Merchant appears invisible until you get close enough as shown in the screenshot below:

Press the ![]()
![]()
![]() button to make the Baknamy Merchant appear.
button to make the Baknamy Merchant appear.

The Merchant’s item list changes depending on where you are in the game. A complete list of the items in each version of the game is included below:
The following spell becomes available after you can access the Sky Fortress Bahamut:
The following ammunition becomes available after reaching Old Archades:
The following ammunition becomes available after reaching Draklor Laboratory:
The following spell becomes available after reaching the Pharos at Ridorana:
The following items become available after reaching the Pharos - Third Ascent:
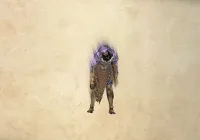
Obtaining Chaos
One of the last things that you can do involves obtaining an optional Esper named Chaos, Walker of the Wheel. Details regarding the battle against Chaos himself are detailed on the Chaos Esper page, but there are a few things you need to do before you can challenge him.
For starters, you will need to complete the Three Medallions side quest which cannot be completed until after you have reached the Port of Balfonheim. Check out the Three Medallions page for more information using the link below:
Side Quests

Obtaining the Medallion of Bravery, the Medallion of Love and the Lusterless Medallion from the Nu Mou creatures located throughout Ivalice.
The actual medallion that you require in order to access the room where Chaos is located is the Medallion of Might. In order to turn the Lusterless Medallion into the Medallion of Might, you will need to use the Medallion of Love and the Medallion of Bravery to access two other rooms in the Necrohol that contain two other bosses, Humbaba Mistant and Fury and defeat each of them first.
The first boss that you destroy is Humbaba Mistant (note: you can start with either Humbaba Mistant or Fury; both are available and it does not matter which you KO first). Travel through the Salikawood and enter the Necrohol of Nabudis from the south.
Travel north through the Hall of Effulgent Light and into the Cloister of Distant Song. Humbaba Mistant is located in the westernmost room – the Cloister of Solace. Use the map below to help you locate it:

Note that the battle will begin as soon as you open the door, so you may wish to read ahead to the boss tips below and make sure that your party is prepared before you enter.
Approach the Door of Horrors and choose to “Examine the Depression.” Choose to “Use the Medallion of Bravery” when presented with the option.

Boss Battle

Level: 46
HP: 314,086
Steal: ![]() Beastlord Hide (55%),
Beastlord Hide (55%), ![]() Beastlord Horn (10%),
Beastlord Horn (10%), ![]() Behemoth Steak (3%)
Behemoth Steak (3%)
This boss battle is fairly straightforward and doesn’t require much strategy. Make sure your party is fully buffed before entering the room as Humbaba Mistant has a lot of HP that you will have to burn through and can do some pretty heavy damage which increases as its health drops. It also has the ability to combo its attacks which means your party members will be taking a lot of hits and will require a lot of healing.
Make sure that you enter the room with ![]() Protect,
Protect, ![]() Shell,
Shell, ![]() Bravery,
Bravery, ![]() Faith and
Faith and ![]() Haste on each of your characters. Your tank should be equipped with a
Haste on each of your characters. Your tank should be equipped with a ![]() Bubble Belt. Alternatively, you can have a support character cast
Bubble Belt. Alternatively, you can have a support character cast ![]() Bubble on that character, but the
Bubble on that character, but the ![]() Bubble Belt is easier, always up and does not require any of your healer’s casting time.
Bubble Belt is easier, always up and does not require any of your healer’s casting time.
One of your characters (at minimum) should have a ![]() Black Belt equipped as Humbaba Mistant’s Tremor attack can cause Disable which can wreak havoc on your party if all three of them are hit with it. Set up an
Black Belt equipped as Humbaba Mistant’s Tremor attack can cause Disable which can wreak havoc on your party if all three of them are hit with it. Set up an ![]() Esuna Gambit to remove the status from the other party members.
Esuna Gambit to remove the status from the other party members.

You also need to set up a ![]() Dispel Gambit in order to deal with its positive status effects. He will also hit your characters with Immobilize, but this negative status effect should not cause too many problems. With how large Humbaba Mistant is, most of your characters will be able to hit him from wherever they are standing, regardless of whether they are immobilized.
Dispel Gambit in order to deal with its positive status effects. He will also hit your characters with Immobilize, but this negative status effect should not cause too many problems. With how large Humbaba Mistant is, most of your characters will be able to hit him from wherever they are standing, regardless of whether they are immobilized.
Humbaba Mistant’s attacks hit for a lot more HP as his health drops so be sure to keep all of your buffs (![]() Protect,
Protect, ![]() Shell,
Shell, ![]() Bubble) up.
Bubble) up.

You can find a video of this battle in the Zodiac Age version below.
There is a short cutscene that takes place once the battle is over. Humbaba Mistant will shrink down to a very small size and will be crushed by his own gigantic sword. You will receive a completed map of the Necrohol of Nabudis once the battle is complete.
The game also notifies you that the “Lusterless Medallion keens…” There is one more boss that needs to be defeated though before it turns into the Medallion of Might.
At this stage, it may be advisable to go back out to the Salikawood and save your game before attempting the next boss. Fury, the next boss, is located in the northern section of the Necrohol of Nabudis.
You can either warp to the Nabreus Deadlands and enter the Necrohol from the north or you can run through the Necrohol from where you are if you are choosing not to go back and save your game.
Fury is located in the Cloister of Reason which can be accessed from the Hall of the Ivory Covenant. Once again, take the time to prepare and buff your characters before you enter the Cloister of Reason. You may want to read the description of the boss fight below before initiating the battle. Use the map below to help you find the proper location:

Touch the Door of Loathing and choose to “Examine the Depression.” Secondly, choose to “Use the Medallion of Love” to initiate the battle against Fury.
There is a fairly entertaining scene when you enter the Cloister where Fury, a tiny little rabbit-like creature, defeats a gigantic Catoblepas.

Boss Battle

Level: 46
HP: 69,710
Steal: ![]() Blood Wool (55%),
Blood Wool (55%), ![]() Moondust (10%),
Moondust (10%), ![]() Aries Gem (3%)
Aries Gem (3%)
Once again, make sure that you enter the Cloister of Reason with all of your beneficial status effects cast on your party members. This includes ![]() Protect,
Protect, ![]() Shell,
Shell, ![]() Bubble,
Bubble, ![]() Bravery,
Bravery, ![]() Faith and
Faith and ![]() Haste. You should also set up a
Haste. You should also set up a ![]() Dispel Gambit to remove Fury’s status effects.
Dispel Gambit to remove Fury’s status effects.

The most difficult aspect of the fight against Fury is trying to hit it. It may not have much in the way of HP, but it has very high evasion which will cause many of your attacks to be parried. Some ways around this include using a Quickening Chain or focusing on Magick-based attacks.
Fury’s attacks have a chance of inflicting the Berserk status effect on your party members. You can set up a Gambit to get rid of this; the spell you need to use to get rid of Berserk though is not ![]() Esuna, it is
Esuna, it is ![]() Dispel. Set up the following Gambit:
Dispel. Set up the following Gambit:
Ally: Status = Berserk > ![]() Dispel
Dispel
If you do not have the “Ally: Status = Berserk” Gambit you will have to cast Dispel manually.

At a certain point, Fury will begin using ![]() Bacchus’s Wine on itself to put it into Berserk mode. This will cause its attacks to hit more often and for quite a bit more damage. Keep your
Bacchus’s Wine on itself to put it into Berserk mode. This will cause its attacks to hit more often and for quite a bit more damage. Keep your ![]() Dispel Gambit active and have one party Dispel Berserk from Fury. Each time they do, Fury will use another Bacchus’s Wine to re-enter the Berserk status effect, but casting Dispel each time will take valuable seconds off the clock and basically prevent Fury from attacking you while it is dealing with status effects. Keep up the Dispels until Fury is defeated.
Dispel Gambit active and have one party Dispel Berserk from Fury. Each time they do, Fury will use another Bacchus’s Wine to re-enter the Berserk status effect, but casting Dispel each time will take valuable seconds off the clock and basically prevent Fury from attacking you while it is dealing with status effects. Keep up the Dispels until Fury is defeated.

You can find a video of this battle in the Zodiac Age version below.
You will receive the Medallion of Might once the battle has concluded. With the Medallion of Might, you now have everything that you need to take on the optional Esper, Chaos, Walker of the Wheel.

Information on where to find Chaos and how to defeat him are included in the Espers section below:
Esper

Entering the final room in the Necrohol of Nabudis (the Crucible) to defeat and obtain Chaos.
This is everything that you can do in the Necrohol of Nabudis.