Cie’th Stone Circle
You may have noticed while traveling through the Archylte Steppes that there is a circle of Cie’th Stones that are either active or deactivated depending on what part of the game you’ve reached. The Cie’th Stones will automatically activate once you reach Chapter 11 - Taejin’s Tower and the can be used to initiate:
 Mission 56 - A Toothy Grin (Ugallu)
- Mission 57 - What’s Yours is Brine (Sahagin)
- Mission 58 - The Culler of Many (Humbaba)
- Mission 59 - Two-faced Fiend (Zirnitra)
- Mission 60 - Dégelà Vu (Gelatitan)
- Mission 61 - I, Juggernaut (Juggernaut)
- Mission 62 - Indomitable Will (Raktavija)
These Cie’th Mission Stones function just like any other Mission Stone with one small exception. Once you complete all 7 of the Missions a number of the larger Oretoise enemies wandering around the Archylte Steppe will change forms into a more difficult form.

Namely, Adamantortoise and Adamantoise enemies will be replaced by Shaolong Gui and Long Gui. Shaolong Gui and Long Gui enemies are some of the most difficult in the game, so you’ll need to watch out for them as you’re running around the plains of the Steppe, but more importantly, there will be only one Adamantoise left roaming around and you won’t be able to find any more Adamantortoise in the Archylte Steppe without reinitiating ![]() Mission 63 - Crushed by Doubt (Adamantortoise).
Mission 63 - Crushed by Doubt (Adamantortoise).
Does this matter?
Not really. It can be argued that Adamantortoise is easier to defeat and farm than Adamantoise, but there is a fairly reliable method for farming Adamantoise that this guide recommends and provides a full walkthrough for. You can find it here:
Quickly engaging and defeating Adamantoise enemies out in the Archylte Steppe for a shot at Platinum Ingots or a Trapezohedron.
The only problem is that it becomes much harder to find Adamantortoise (not that you need them) if you’re looking to fight them instead.
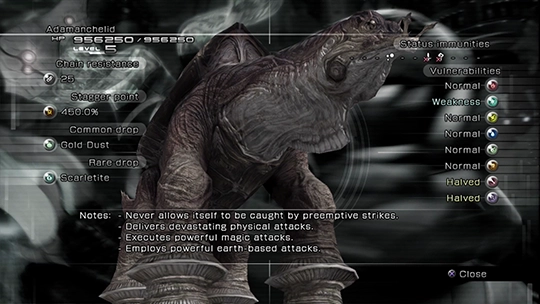
Identifying Oretoise
All the Oretoises look very similar, but the differences are noted in the table below, and you may need to open the images and enlarge them to pick up on the subtle differences. While its not particularly helpful, you’ll immediately know if you’re facing a Shaolong Gui or a Long Gui because they will use “Quake” or “Ultima” to open the battle.
| Oretoise | Description | |
|---|---|---|
| Adamanchelid | Smallest oretoise, brown, missing both tusks and does not have chains.
|
|
| Adamantortoise | Larger oretoise, brown, has two tusks with one of them broken, also has chains. These disappear from the Archylte Steppe after completing 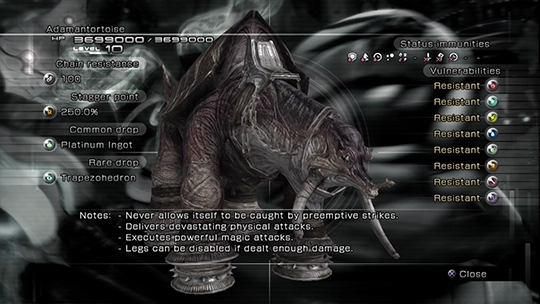
|
|
| Adamantoise | Larger oretoise that looks nearly the same as an Adamantortoise. It is light brown, has chains, but the biggest difference to watch for is its unbroken tusks and larger harness.
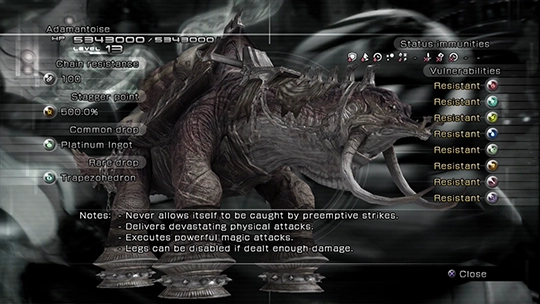
|
|
| Shaolong Gui | Looks similar to an Adamanchelid (the smallest Oretoise) with no tusks, no chains and no harness, but has a light blue tinted color.
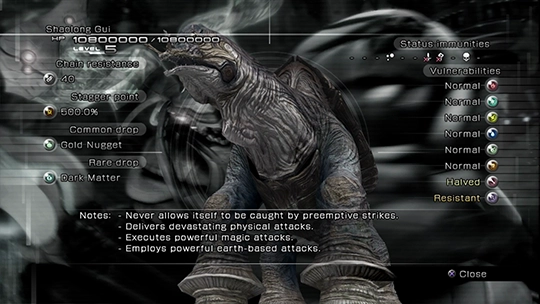
|
|
| Long Gui | Looks similar to an Adamantortoise or Adamantoise (the larger Oretoise) with unbroken tusks, chains and a harness, but has a lightly blue tinted color (barely noticeable in the screenshot).
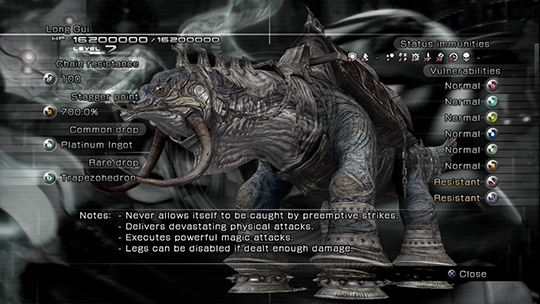
|
Defeating Shaolong Gui and Long Gui
This strategy guide also includes an overview of how to defeat Shaolong Gui and Long Gui who help to form some of the superbosses that you can challenge in Final Fantasy XIII. The guides for defeating these gigantic creatures is included below: