Every layout you can land in, grouped by the Cloisters it can appear on. The same layout shows up in more than one group, because each stretch of the dungeon draws from an overlapping set of maps.
Boss Level Map
Map Notes
Teleporters on these Cloisters allow you to warp between Cloister 20, 40, 60, 80, and ∞.
Random Map 1
Map Notes
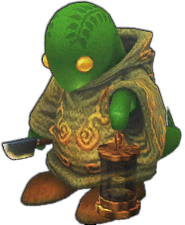
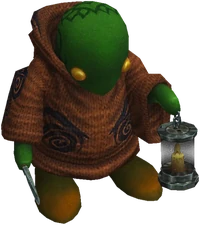
Touching this Tonberry will initiate a battle. Fighting it is optional.
Random Map 2
Map Notes
Touching this Tonberry will initiate a battle. Fighting it is optional.
Random Map 3
Map Notes
Touching this Tonberry will initiate a battle, but defeating it is required to reveal the Teleporter.
Random Map 4
Map Notes
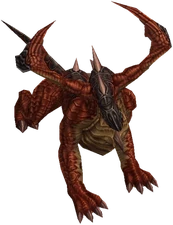
These Elder Drakes may not always appear in lower level Cloisters. When they do appear, they jump out on a timer, so be careful running past.
Random Map 5
Random Map 6
Map Notes
Touching this Tonberry will initiate a battle. You must defeat it to reveal the pathway.
Random Map 1
Map Notes
Touching this Tonberry will initiate a battle. Fighting it is optional.
Random Map 2
Map Notes
Touching this Tonberry will initiate a battle. Fighting it is optional.
Random Map 3
Map Notes
Touching this Tonberry will initiate a battle, but defeating it is required to reveal the Teleporter.
Random Map 4
Map Notes
These Elder Drakes may not always appear in lower level Cloisters. When they do appear, they jump out on a timer, so be careful running past.
Random Map 5
Random Map 6
Map Notes
Touching this Tonberry will initiate a battle. You must defeat it to reveal the pathway.
Random Map 7
Map Notes
Touching this Tonberry will initiate a battle. Fighting it is optional.
One of the three switches will cause the screen to flash, and the center of the map will disappear, allowing you to drop down into the next Cloister.
Random Map 8
Map Notes
Step on the switch to activate a platform you can use to jump over the Elder Drake
Talk to this Tonberry and it gives you an item instead of fighting.
Random Map 9
Map Notes
Touching this Tonberry will initiate a battle. You must defeat it to reveal the pathway.
Random Map 4
Map Notes
These Elder Drakes may not always appear in lower level Cloisters. When they do appear, they jump out on a timer, so be careful running past.
Random Map 5
Random Map 6
Map Notes
Touching this Tonberry will initiate a battle. You must defeat it to reveal the pathway.
Random Map 7
Map Notes
Touching this Tonberry will initiate a battle. Fighting it is optional.
One of the three switches will cause the screen to flash, and the center of the map will disappear, allowing you to drop down into the next Cloister.
Random Map 8
Map Notes
Step on the switch to activate a platform you can use to jump over the Elder Drake
Talk to this Tonberry and it gives you an item instead of fighting.
Random Map 9
Map Notes
Touching this Tonberry will initiate a battle. You must defeat it to reveal the pathway.
Random Map 10
Map Notes
Talk to this Tonberry and it gives you an item instead of fighting.
Random Map 11
Map Notes
Drop off the back/south ledge to the level below and ride the elevator up to the other side.
This switch is located on the south side of the large wall. Climb over it, and drop down carefully, making sure not to accidentally touch the Mega Tonberry. The switch needs to be triggered to reveal the exit.
This Tonberry needs to be defeated because it stands in your way.
Random Map 12
Map Notes
Activating the switch will teleport you to the teleporter and is required to make the teleporter appear
The Mega Tonberry may not appear in lower levels. If it does, you would have to defeat it to activate the switch and reveal the teleporter.
Random Map 7
Map Notes
Touching this Tonberry will initiate a battle. Fighting it is optional.
One of the three switches will cause the screen to flash, and the center of the map will disappear, allowing you to drop down into the next Cloister.
Random Map 8
Map Notes
Step on the switch to activate a platform you can use to jump over the Elder Drake
Talk to this Tonberry and it gives you an item instead of fighting.
Random Map 9
Map Notes
Touching this Tonberry will initiate a battle. You must defeat it to reveal the pathway.
Random Map 10
Map Notes
Talk to this Tonberry and it gives you an item instead of fighting.
Random Map 11
Map Notes
Drop off the back/south ledge to the level below and ride the elevator up to the other side.
This switch is located on the south side of the large wall. Climb over it, and drop down carefully, making sure not to accidentally touch the Mega Tonberry. The switch needs to be triggered to reveal the exit.
This Tonberry needs to be defeated because it stands in your way.
Random Map 12
Map Notes
Activating the switch will teleport you to the teleporter and is required to make the teleporter appear
The Mega Tonberry may not appear in lower levels. If it does, you would have to defeat it to activate the switch and reveal the teleporter.
Random Map 13
Random Map 14
Map Notes
Touching this Tonberry gives you a chest.
Random Map 15
Map Notes
Don’t touch any Tonberries in this room or a Mega Tonberry will walk over and you’ll end up fighting both.
Each spot marked by a switch on the map can be a teleporter. One switch activates the exit in the center of the room that drops down to the next Cloister.
Random Map 10
Map Notes
Talk to this Tonberry and it gives you an item instead of fighting.
Random Map 11
Map Notes
Drop off the back/south ledge to the level below and ride the elevator up to the other side.
This switch is located on the south side of the large wall. Climb over it, and drop down carefully, making sure not to accidentally touch the Mega Tonberry. The switch needs to be triggered to reveal the exit.
This Tonberry needs to be defeated because it stands in your way.
Random Map 12
Map Notes
Activating the switch will teleport you to the teleporter and is required to make the teleporter appear
The Mega Tonberry may not appear in lower levels. If it does, you would have to defeat it to activate the switch and reveal the teleporter.
Random Map 13
Random Map 14
Map Notes
Touching this Tonberry gives you a chest.
Random Map 15
Map Notes
Don’t touch any Tonberries in this room or a Mega Tonberry will walk over and you’ll end up fighting both.
Each spot marked by a switch on the map can be a teleporter. One switch activates the exit in the center of the room that drops down to the next Cloister.